Pages

Thursday, January 28, 2010

Chicken and fluffy dumplings

It was a very cold and snowy day here in Colorado. A hearty stew sounded delicious for dinner. Given what staples I had on hand I decided a chicken based stew would be in order. So I whipped up a batch of chicken stock and laid my plan of attack. A trip to the store was not happening so I had to use what I had on hand, frozen corn and green beans. Both of those veggies should lend good flavor to the stew and I know my daughter will eat them both.

The dumplings are puffy and soft. They are little clouds of deliciousness! The herb blend in the dumplings add a nice, but not overpowering herb flavor. This is a very rich and hearty stew, perfect for cold nights. And its really quick cooking, less than an hour from start to finish, can't ask for much more than that!

Chicken and dumplings
serves 4
8 oz chicken breast (1 whole) sliced thin against the grain
4 cups homemade chicken stock (canned broth will work)
2 T butter
1/4 c flour
2 carrots diced
2 stalks celery sliced
1/2 c frozen corn
1/2 c frozen green beans
handful frozen peas, optional
2 T heavy cream, optional
Kosher salt and pepper

Dumplings:
1 c flour
3/4 t kosher salt
1 t baking soda
1/2 t poultry seasoning
2 T cold butter cut into cubes
1/4 to 1/2 c milk (start w/ 1/4 and add more if need be)

Make a roux out of the butter and flour. Slowly whisk in the chicken stock. Bring to a simmer and add chicken, celery and carrots. Simmer 5 minutes while you make up dumpling batter.

In a food processor pulse the flour, poultry seasoning, salt and baking soda. Add butter cubes, pulse until you have very fine crumbs, like cornmeal. Pour flour mixture into a bowl and slowly stir in the milk. You want a fairly thick batter, similar in consistency of cookie dough.

Add the frozen veggies and cream to the stew. Stir well to incorporate.

Using a cookie scoop (or use a tablespoon) drop dumplings onto the top of the stew. You'll get about 12 dumplings. Cover and simmer for 15 minutes. DO NOT OPEN THE LID WHILE DUMPLINGS COOK! The steam along with the simmering is what cooks and puffs the dumplings.


nutritional information provided by Sparkpeople recipe calculator
Nutrition Facts
Chicken and fluffy dumplings
4 Servings
Amount Per Serving
Calories 399.4
Total Fat 16.5 g
Saturated Fat 9.8 g
Polyunsaturated Fat 1.0 g
Monounsaturated Fat 4.6 g
Cholesterol 82.9 mg
Sodium 2,210.9 mg
Potassium 389.2 mg
Total Carbohydrate 41.0 g
Dietary Fiber 2.8
Sugars 4.4 g
Protein 20.9 g

Monday, January 25, 2010

French Onion Soup


If there's one thing I can always count on its that if French Onion soup is on a menu my husband will be ordering a bowl full. And then he'll always ask if I can make it & why I haven't.

Taking that last part as a not so subtle hint, I decided it was time to make some for the poor man. Needless to say when he came home from work to smell the sweet scent of caramelized onions in the air he had one question for me - "Is that French Onion soup?!?" He was pretty jazzed when the answer was indeed YES!

This is a soup that takes a long time to do right. Not that is complicated, its anything but. However to get the onions deeply caramelized like we need takes a long time. Plan on at least 3 hours for this soup to cook. You simply can not rush the onions caramelization process.

I don't know if its the melted cheese, the toasted bread croûton or the delightfully sweet yet savory soup broth but French Onion soup is pretty magickal. Its the perfect snowy day got no place to go type of soup. Enjoy!

French Onion Soup
serves 4
2 large onions (2 lbs worth)
2 T EVOO
lots of kosher salt
1 t dry or 3 sprigs fresh thyme
1 bay leaves
4 cups chicken stock
1/2 c dry white wine divided
4 oz. swiss cheese or Gruyère cheese
4 slices french or sourdough bread, bias sliced and toasted

-crocks for broiling

Slice onions thin from pole to pole. In a dutch oven or other large heavy bottomed pan heat oil over medium heat. Add onions and about 1 t kosher salt. Stir well to cover onions in salt and oil. Cover and cook over medium low heat for 20 to 30 minutes or until onions have given off a lot of juice.Remove the lid, reduce heat to low and allow onions to brown and caramelize. This will take a long time, about 2 hours. Stir onions every 15 min to avoid burning and hot spots. Do not crank the heat to speed this process up or you'll be stuck with bitter tasting soup. You want deeply caramelized onions, not burnt ones. This can only be done over low heat for a long time.


this is about an hour into the caramelization process

Once onions are mahonany in color add 1/4 c white wine and deglaze pan, scraping up all caramelized bits from bottom. Continue to cook onions, wine will cook out, that's ok. You'll deglaze twice with wine before adding the stock.

After 2nd deglaze, notice the deep caramel color on the wooden spoon, this is the fond from the bottom of the pan AKA FLAVOR
Once the onions have been deglazed twice and are very deeply browned add the stock and herbs. Taste, adjust salt seasoning if need be. Simmer soup for 30 minutes, adding more stock or water if needed. After all this is a soup :-)


Once soup is cooked portion into oven proof crocks. Top with 1-2 bread slices, top that with the cheese. If you have block swiss shred it. If you have swiss slices then dice the cheese to mimic shredded cheese, for ease of melting. Put crocks on a baking sheet and put under broiler. Keep an eye on them this goes faster than you think! Once the cheese is browned and soup is bubbling remove from oven.


Nutrition Facts
4 Servings
Amount Per Serving
Calories 311.1
Total Fat 15.6 g
Saturated Fat 6.2 g
Polyunsaturated Fat 1.1 g
Monounsaturated Fat 7.4 g
Cholesterol 31.1 mg
Sodium 1,232.0 mg
Potassium 190.0 mg
Total Carbohydrate 23.3 g
Dietary Fiber 2.0 g
Sugars 0.5 g
Protein 12.5 g

Sunday, January 24, 2010

Pepper steak sandwiches


While browsing one of my favorite food blogs the Pioneer Woman I found her recipe for 'The Marlboro Man's favorite sandwich'. It looked delicious but not exactly the healthiest thing under the sun. What I liked about Ree's recipe most of all was the idea of using cube steak for a sandwich. Honestly until I saw that recipe I had always seen cube steak as chicken fried steak, that's it! But her idea to slice it thin against the grain and tenderization lines was brilliant!! What you get is nice thin slices of meat that are tender and perfect for sandwiches.

Running with that idea I thought about what we like on steak sandwiches. Peppers came to mind first. Lots of bell peppers, a touch of onions. Maybe a bit of cheese. And what about a sauce? Things could get kinda dry in there without one. Well it IS steak so why not use steak sauce? Add a touch of soy sauce for the umami factor, a bit of balsamic to boost the acidity and subtle sweetness and some horseradish for a spicy background kick. Hmm... sounds like the Witch is on to something here.

This sandwich is pretty big. I had 1/2 a sandwich, the husband had a whole one and the little one had a few strips of meat. And she even tried a bell pepper!! So if you have adequate side dishes I would bet that you could serve 4 people off this recipe. I fed 3 of us and we had a bit left over.


Pepper Steak sandwiches
Makes 2 large sandwiches
2 cube steaks
1/4 onion sliced
1 bell peppers julienned
2 T A-1
1 t Worcestershire sauce
1 t soy sauce
1 t balsamic vinegar
scant 1 t extra spicy horseradish, use more or less depending on taste
seasoned salt
4 slices swiss cheese OPTIONAL
2 French bread sandwich rolls
butter for rolls

Slice steaks thin, against the grain & tenderization lines. This will allow the meat to be very tender. Mix the liquids together to make a sauce.

Heat a cast iron skillet over medium heat. Once its nice & hot add the beef and onions, laying onions on top of beef. Cover and allow to cook about 3 min or until you have a good amount of browning on the beef.

Flip meat and add bell peppers. Cover and cook about 1 minute, then add the sauce and a generous sprinkling of seasoned salt. Stir to mix, reduce heat to medium low and simmer uncovered until liquid is almost cooked out, about 5 minutes.


Butter the rolls and grill until golden. Place cheese slices over the hot beef and peppers. Cover and allow cheese to melt while buns are toasting. Assemble sandwiches and enjoy!


Nutrition Facts
Servings Per Recipe: 2
Serving Size: 1 sandwich

Amount Per Serving
Calories 434.7
Total Fat 18.0 g
Saturated Fat 9.5 g
Polyunsaturated Fat 1.0 g
Monounsaturated Fat 5.7 g
Cholesterol 101.7 mg
Sodium 796.3 mg
Potassium 631.0 mg
Total Carbohydrate 28.2 g
Dietary Fiber 2.1 g
Sugars 4.4 g
Protein 38.0 g

Friday, January 22, 2010

Braised Beef Short Ribs

This was my first time making beef short ribs. They were on sale at the market so I figured I'd give them a shot. They are cut from the chuck primal, meaning they're perfect for a low, slow, moist cooking environment, AKA a braise. The short ribs I got are boneless, an added bonus because the bone in ones tend to take FOREVER to cook.

Braising is simply cooking things, like tough cuts of meat, in a flavorful liquid, at low temperatures, for a long time. This magical way of cooking will transform tough, cheap cut of meat into a succulent moist and delicious cuts your family will go crazy for. You've probably braised before and just don't realize that's what you were doing. Ever made a pot roast? What about a stew? Yup, those are both braises. The long, slow, moist (wow that was pretty sexy!) cooking method breaks down the collegens and fat, producing geletain, which makes the meat delightfully sticky and savory, it has a velvety mouth feel, very unctuous and full of umami. (to those of you who don't speak chef, that means you'll get a yummy tender beefy tasting piece of meat)

In a beef braised dish normally I'd use red wine. However I was out, and getting more wasn't an option. So I used white wine and augmented it with balsamic and red wine vinegars as well as soy sauce. The vinegars I hoped would provide a deeper, rounder flavor, more like a red wine would produce. The soy sauce provided the umami, which is the 5th taste, beefy and meaty. Trust me, the addition of a little soy sauce really amps up the YUM factor. The cooking liquids then get reduced to make a jus (gravy), served over hot buttered egg noodles. Its cold day dinner bliss!


Braised beef short ribs
Makes 6 servings
1 lb boneless beef short ribs
1 can diced tomatoes
1/2 c white wine
1 T soy sauce
2 T red wine vinegar
1 T balsamic vinegar
2 bay leaves
1 t dry Italian seasoning
S&P
1 onion, sliced
4 large cloves garlic chopped roughly
4 carrots, peeled and cut into 3 in chunks
1 rib celery, cut into 1 in cubes
1 T oil for browning beef

Pat meat dry. Sprinkle with S&P. Brown each piece of meat well on all 4 sides. This will take a few installments. As always don't worry about the funky stuff building up on the pan, thats your flavor base.


Once all pieces are browned deglaze pan with water and vinegars. Avoid steam, vinegar fumes are nasty to breath!

Take care to scrape up all the browned bits on the bottom of the pan. Once its fully deglazed add the tomatoes and their juices, herbs and onion. Add beef back to the pan, cover with foil and then with lid. This ensures a tight seal so your beef will be very tender and juicy.

Cook at 250* for 5-6 hours.

3 hours into the braise add carrots and celery. Recover and finish cooking.

Remove from oven, remove ribs and veggies to a serving platter. Strain the cooking veggies in a mesh strainer and return the cooking liquids to the braising pot. Bring liquid to a boil and reduce by half. This will result in a very concentrated jus which is a French term for the cooking juices from meats. What we call it is the best darn gravy ever!

Serve with egg noodles or mashed potatoes.


Nutrition Facts
6 Servings
Amount Per Serving 1 1/2 ribs each with vegetables

Calories 292.0
Total Fat 16.4 g
Saturated Fat 1.6 g
Polyunsaturated Fat 0.5 g
Monounsaturated Fat 1.8 g
Cholesterol 48.0 mg
Sodium 716.1 mg
Potassium 551.2 mg
Total Carbohydrate 9.0 g
Dietary Fiber 1.9 g
Sugars 3.1 g
Protein 23.5 g

Wednesday, January 20, 2010

Chocolate ice cream with chocolate mint chips


Sometimes an ill fated dish ends up turning into a stroke of brilliance! Kitchen mistakes happen to us all, the Kitchen Witch is no exception!! The other night I made a batch of chocolate pudding however I didn't do it right. I realized that I was running low on cornstarch and didn't use as much as I should have.

No problem, the Witch thinks, I'll just add a few egg yolks - that ought to thicken it right up, like a custard. Great idea in theory, however in this practice it just didn't happen. It was still too thin and NOT pudding like in consistency.

No problem, the Witch thinks again, it needs to cool off anyway and it will thicken up as it cools, right? The husband and I each ate a mug full and agreed it was good but not thick enough to be a pudding. It was more like melted ice cream.

Thats when it hit me. Ice cream. That's just milk, egg yolks, sugar, flavors and cream. This thin pudding was pretty much that, minus the cream. What it lacked in cream (richness and thickness) was mostly made up for by the cornstarch and cooking. This failed pudding was really just a chocolate ice cream base waiting to be frozen. It might even be a lower calorie, certainly lower in fat, than traditional store bought ice cream. How can that be bad?


Lucky for this Kitchen Witch I have a fully equipped kitchen including a counter top ice cream maker. I scored this thing off QVC years ago for next to nothing. I keep the frozen cylinder in my deep freeze so its ready to make a batch of ice cream anytime I am. If you don't have a table top ice cream machine you can use an old fashioned ice cream churn, with ice and rock salt. Sorry, I've got nothin' better to offer :-(

The recipe is proving slightly difficult to pin down because when I made this it was supposed to be pudding. And 2 of the 6 cups got consumed as such. So I'll post the recipe based on 6 cups of ice cream base, however most ice cream machines can handle about 4 cups max. The nutritional info is based on the full recipe being frozen and dished out into 1/2 cup portions.

Chocolate mint chocolate chip ice cream
makes 12 1/2 (half) cup servings
6 1/2 c milk
3/4 c sugar
1/2 c cocoa powder
1 t vanilla
3 T corn starch
2 egg yolks
1 c mint and dark chocolate chips, melted (these were a limited time holiday thing, if you don't have them you can use plain chocolate chips & add 1 t peppermint extract to the ice cream base before freezing)

Mix the cocoa powder, sugar and corn starch together in a large heavy bottom pan. Add the milk. Whisk well to incorporate, it will be very foamy but that will subside as it heats up.

Cook over medium heat until it boils, stirring well to avoid scorching. Bring to a full rolling boil and cook for 2 minutes.

Whisk the egg yolks. Add 1/2 c of the hot chocolate mixture, whisk well. Slowly drizzle the egg chocolate mixture into the ice cream base, whisking very well. Cook 2 minutes longer.

Remove from heat and add vanilla. Pour into a large bowl and place plastic wrap over the top to prevent a skin from forming. Allow to cool fully before putting into the ice cream machine.

Once ice cream base is fully chilled pour into an ice cream machine. Melt the chocolate chips in the microwave, using 30 second bursts and stirring very well between heatings.


Once ice cream is thick and frozen remove from frozen cylinder and put into a medium sized bowl. Drizzle 1/2 the melted chocolate over the ice cream, stir it well to break up the chocolate, causing 'chips'. Repeat this until the melted chocolate is fully incorporated into the ice cream.


Freeze ice cream a minimum of 2 hours before serving. Lasts up to 7 days in the freezer well covered, however chances are good it won't last more than 2 nights in the Kitchen Witches household.


Nutrition Facts
12 Servings
Amount Per Serving 1/2 cup

Calories 176.1
Total Fat 6.8 g
Saturated Fat 4.0 g
Polyunsaturated Fat 0.3 g
Monounsaturated Fat 2.3 g
Cholesterol 32.1 mg
Sodium 36.8 mg
Potassium 108.8 mg
Total Carbohydrate 28.2 g
Dietary Fiber 2.0 g
Sugars 24.4 g
Protein 4.3 g

Tuesday, January 19, 2010

Cream cheese salsa chicken


My sister Danielle turned me onto this recipe. She found it in her the Biggest Loser cookbook. I'm a fan of the show, and of healthy eating, so I thought I could do a bit of Kitchen Witchcraft on it and take it from good to great. And get this, this is the best part!

It has 3 ingredients. Three. Ok, 5 if you count kosher salt and pepper. And I'd bet that most of you have these ingredients in your house right now. Just think, a delicious home cooked meal could be yours in 20 minutes, and however long it takes you to read this blog...

Chicken breasts are a staple in most households. You'll need one per person. Cream cheese, low fat or Neufchatel cheese if you've got it is our creamy cheesy portion. Salsa becomes the spicy sauce. 1/2 cup will do fine. Add in the obligitory S&P and that's it.

The original recipe didn't call for the chicken to be browned before putting into the oven. However if you know the Kitchen Witch, I like browned food. It just tastes better!!! The browning of the chicken adds a very deep, slow cooked, slaved over the stove type of flavor, and it takes less than 4 minutes to achieve. That's a serious payoff for my time invested! Remember - your food is only as good as the ingredients you buy and the way you treat it when preparing it. Treat your food well, prepare it carefully and lovingly and you will taste a difference.

Spicy. Creamy. Cheesy. 20 minutes. 226 calories. One pan. 3 ingredients. Have I convinced you to try it yet? Trust the Kitchen Witch, this one is deceptively simple and yet so very complex, you'll be happy you did!

Cream cheese salsa chicken
serves 2, 1 breast per person
2 4 oz chicken breasts pounded slighlty
1/2 c. salsa
2 oz neufchatel cheese, or cream cheese
kosher salt & pepper

Sprinkle chicken with S&P. I allow these to sit for about 2 hrs, the salt acts as a mini brine, ensuring that my chicken is both flavorful as well as moist.

Preheat oven to 400*


Heat a small sautee pan over med hi heat. Add 1 t EVOO. Pat chicken dry. Once pan is hot add chicken. Cook on first side until golden brown.


Flip chicken over. Spread each breast with 1 ounce Neufchatel cheese. Pour salsa around chicken. Put entire pan into the hot oven and cook 10 minutes or until internal temperature reaches 160*.


Plate chicken. Stir the salsa in the pan well being sure to loosen and incorporate any cooked on bits from the bottom. Spoon salsa over top of chicken.


Nutrition Facts
1 Serving
Amount Per Serving
Calories 226.3
Total Fat 11.6 g
Saturated Fat 5.4 g
Polyunsaturated Fat 1.2 g
Monounsaturated Fat 3.3 g
Cholesterol 105.0 mg
Sodium 436.7 mg
Potassium 0.0 mg
Total Carbohydrate 3.3 g
Dietary Fiber 0.0 g
Sugars 3.3 g
Protein 25.5 g

Sunday, January 17, 2010

Creamy broccoli cheese soup


I call this Creamy Broccoli Cheese Soup rather than Cream Of Broccoli soup because it contains NO cream! Yes that's right, no cream! You still get all the flavor and creamy texture that you've come to love in a broccoli soup, with out the added fat and calories.

Most people like the broccoli florettes. They're nice & pretty, tender & easy to eat. My preschooler LOVES the florettes, she calls them dinosaur trees & will chow down on them with a quickness. Which is awesome but it leaves me with a LOT of stem ends.

Now if you've learned anything about the Kitchen Witch its that I abhor waste in the kitchen. Ingredients are too expensive to just throw away parts & pieces because they are less pretty or not needed for a recipe. The broccoli stems are a prime example of this. When the little Witch asks for broccoli she expects to see a neatly trimmed florette, leaving behind the stem. I look at this pale green stem and say hmm...you could be made into soup! Its loaded with lots of broccoli flavor, not to mention fiber, perfect! A little cooking and its tender, a little puree and its a soup base loaded with flavor and lends a delightful green hue to the soup.

Kitchen Witch Tip: If you have broccoli stems but aren't ready to make the soup, no fear! Simply put the stems in a freezer zip top bag & freeze until you have enough to make this soup. You can also use frozen broccoli, however please adjust your cooking times as the frozen florettes tend to cook quicker than their fresh counterpart.

This creamy broccoli soup will keep them coming back for more, and at less than 250 calories a bowl, you can feel good about serving it to your family.

Creamy Broccoli Soup
serves 8 generous bowls
2-3 heads broccoli including stems
4 c chicken stock (you do use homemade, right?)
2 c milk
1 small onion
1 rib celery
S&P
3 T butter
1/2 c flour
8 oz Cheddar or colby jack cheese shredded, optional
drizzle of oil


Cut the broccoli florettes from the stems. Set aside. Roughly chop the stems, onion and celery.


Heat a large soup pot over med hi heat. Drizzle oil in pan, once hot add broccoli stems, onions & celery. Cook until the broccoli starts to brown.

Add chicken broth, S&P and simmer about 15 min, until vegetables are very soft. Remove veggie solids into a food processor, add 1-2 c cooking liquid and puree until very smooth. If you don't have a food processor you can use a blender or an immersion (stick) blender. Transfer the puree and the remaining cooking liquid to a large bowl.


In the same pot melt the butter. Once melted add the flour and whisk well to make a roux. Cook roux about 3-5 min or until it smells nutty and takes on a light golden color. Slowly add milk, whisking well. This will be VERY thick. Add the puree/stock mixture to the thickened milk and stir well. Bring to a simmer. Add broccoli florettes and cook 10-15 min or until broccoli florettes are tender.


Remove soup from heat. Add shredded cheese and stir well until it melts. Adjust seasonings and serve.


Nutrition Facts
8 Servings
Amount Per Serving
Calories 241.3
Total Fat 16.0 g
Saturated Fat 9.9 g
Polyunsaturated Fat 1.1 g
Monounsaturated Fat 5.2 g
Cholesterol 48.8 mg
Sodium 701.7 mg
Potassium 463.0 mg
Total Carbohydrate 13.6 g
Dietary Fiber 2.2 g
Sugars 3.6 g
Protein 12.3 g

Broccoli on Foodista

Friday, January 15, 2010

Salt: Everything you wanted to know but were afraid to ask


Salt. Its one of the most prized and ancient seasonings in the kitchen. Now a days we all take salt for granted. Not many of us stop to think about the very important role that salt plays. Does it add flavor? Yes. Does it act as a preservative? Sure does! Does it provide essential minerals that our bodies need to survive? Absolutely!

The media has really demonized salt lately, something that it may or may not deserve, depending on how you use it. Processed foods are filled with sodium as it acts as a preservative. When you are cooking with processed foods you will NOT need to add additional salt for the most part, as the ingredients have already been salted for you in the factory. But, if you're a from scratch cooker like the Kitchen Witch, you'll be adding salt throughout the cooking process, building layers of flavor as you go.

Think about it. If you're making soup from scratch, you're starting with water, meat & veggies. They all have flavor on their own, but they need salt to bring out their best. You'll salt the water, salt after adding the veggies, salt again while cooking & a final taste before serving to determine the salt level. I promise you if you salt through out the cooking process you'll never, ever need to salt your food at the table.

As a serious cook I take full offense if someone asks for salt at the table. That means to me that I've not done my job properly. If you've ever seen Julie & Julia, you'll remember that Julie was making Bouef Bourgioune and her husband salted the dish. Her expression was priceless. She said "Is it bland?" He said "Not anymore!" She almost died there, and I can appreciate that 100%. Under salting is just as bad, but lots easier to correct, than over salting.

Speaking of over salting, it happens to the best of us. Here's a secret Kitchen Witch tip: If you over salt a dish add a raw potato cut in half to the dish. Let it cook 15 min or so & discard the potato. Potatoes absorb a LOT of salt, so chances are good you can save the dish.

Salt also changes how food cooks. If you add salt too soon to a sautee, you'll have a hard time getting food to brown as the salt draws the water out of whatever its put on . Don't salt your onions prior to cooking them if you want a nice caramelized color & flavor, save that for the end seasoning.

One final word on salting and that is taste! Taste your dish often, through out the cooking process. If its bland, add some more salt. If you're not sure if it needs more salt let it cook another 15 min & taste again.


Here are a few commonly asked questions regarding salt:

1. What the heck is Kosher salt?
Kosher salt (or Koshering salt as its known in the UK) is large flat flakes of salt that has not been iodized. The large flat flakes stick to the surface of meats better, drawing out liquids, thus 'Koshering' the meat, an ancient method of preservation. Despite the name adding Kosher salt to food does not make your food Kosher.

2. Why do chef's use Kosher salt?
Most chefs use Kosher salt for a few reasons. First, the flakes are large & you can handle it with your fingers, adding a pinch here & there. Have you ever tried to sprinkle your salt shaker over a pot of hot soup? The steam condenses on the salt shaker holes, clogging the whole works up. Most people then take the lid off, hoping to add just a dash and then it happens. The salt comes pouring out and ruins the dish. When you're handling the salt with your hands you know how much you're adding, not a guessing game of how much is flowing out of the holes in a shaker.

3. What makes Kosher salt so gosh darn special?
Well, in a word, flavor! Chef's use Kosher salt rather than table salt is for flavor. Table salt has been iodized, meaning iodine has been added, which alters the flavor just slightly. Iodine is added to table salt to help prevent thyroid related iodine deficiencies, such as goiters. FYI, the US standard for iodized salt is 46-77 ppm vs the UK's standard of 10-22 ppm. If you want a true salt flavor, with out any additional tag along flavors, reach for the Kosher salt.


Kosher salt on left, Iodized table salt on right, both Morton brand

4. Can I use regular table salt in place of Kosher salt?
You sure can, with modifications. Kosher salt grains are larger they take up more volume than table salt. This means that if a recipe calls for 1 t salt, and its tested using table salt, you'd have to use 2 t of kosher salt to equal the same saltiness. Conversely if the recipe calls for Kosher salt, say 1 t worth, you'd have to use only 1/2 t of table salt.

PLEASE NOTE THAT ALL KITCHEN WITCH RECIPES USE KOSHER SALT UNLESS OTHERWISE NOTED.

If you have any salt questions please feel free to post them her under COMMENTS. Andrea the Kitchen Witch reads all of your comments & your questions will be answered!

Thursday, January 14, 2010

Chicken stir fry and Asian sauce base


Stir fry is one of our go to easy, low calorie & low fat, filling, healthy and QUICK meals. Asian flavors are simply divine with fresh vegetables. The sauce is light, flavorful, tart and slightly sweet.

Kitchen Witch, why should I spend the whopping 5 minutes it takes to make my own sauce when the supermarket has TONS on prebottled ones for me to buy?

My answer is pretty simple. Flavor and health. If high fructose corn syrup, artificial flavors and preservatives galore is your thing then go for it, buy what the store has to offer. But if you're like the Kitchen Witch and require some REAL food in your food, make your own. It'll have fresh bright flavors, no preservatives or additives, no HFCS or PHO's. And you can customize it to you and your familys specific tastes. Don't like red pepper flakes? Leave it out! Got a nut allergy in the house? Leave it out! Love ginger, add more. You get the idea.

When you make this stir fry you can serve it with lettuce cups to make lettuce wraps or with steamed rice. Or both :-)

Chicken stir fry/Lettuce Wraps
Serves 4
2 chicken breasts
butter lettuce, pull leaves off to make cups (optional)
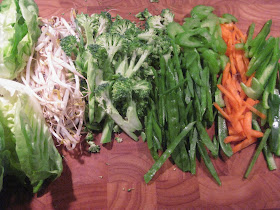
veggies: some suggestions
bell peppers (1/2), snow peas (handful), carrot (1), celery (1 stalk), onion, (1/4 small), broccoli (1 head), mung bean sprouts (hearty handful), water chestnuts (1 can), bamboo shoots (1 can)
Asian sauce (recipe follows)

Marinate chicken in 1 T Asian sauce base. Let marinate for 2 hours.

Heat a large skillet over medium high heat. Cook chicken about 5 min on 1st side, flip when its golden browned and the sides start to turn opaque. Cook an additional 4 min on 2nd side OR until internal temperature is 160*. When chicken is cooled off enough to handle (about 5 minutes) slice into thin strips.

Prep all veggies. This is important in a stir fry because things go QUICK. You won't have time to get your veggies ready to go while other things are cooking so do your prep work first!


In the same skillet add onions, celery and carrots. Cook 1 min or until they start to soften. Add the broccoli and 1/4 c water. Stir well, scraping up any bits off the bottom of the pan. Put a lid on the pot & allow it to steam for 2-3 min.

Add the bell peppers, snow peas, bamboo shoots & water chestnuts. Cover again & cook 1-2 minutes.

Add the bean sprouts, stir well and cover. Cook 1 minute additional.


Slice the chicken and add it to the veggies in the pan, cover & cook 1 minute to warm chicken through.

Serve with lettuce leaf cups and drizzle with Asian sauce.

Asian style sauce/dressing base
1/2 c white wine or rice vinegar
1 T sugar
2 T soy sauce
juice of 1 orange
1 clove garlic smashed
pinch crushed red pepper
2 T tahini (sesame seed paste, can substitute peanut butter or omit if desired)


Make sauce first. In a saucepan add vinegar, orange juice, garlic, sugar & red pepper. Bring to a boil & cook 3 min. Add soy sauce and tahini, stir very well, simmer 2 min longer. Remove from heat and strain through a fine mesh strainer to remove solids.


This base can be used as a marinade for shrimp, chicken or pork. It can be diluted with oil to become a salad dressing (2T base to 1/4 c oil and 2 T white wine if you want more acidity (opt), shake well). Its also fantastic as a dip for fresh veggies or can be used as a sauce on stir fry or lettuce wraps.

Nutrition Facts
Chicken lettuce wraps
4 Servings

Amount Per Serving
Calories 205.8
Total Fat 2.2 g
Saturated Fat 0.5 g
Polyunsaturated Fat 0.7 g
Monounsaturated Fat 0.4 g
Cholesterol 68.4 mg
Sodium 140.4 mg
Potassium 1,020.7 mg
Total Carbohydrate 15.4 g
Dietary Fiber 6.6 g
Sugars 2.3 g
Protein 33.4 g

Nutrition Facts
Asian style sauce,
8 Servings

Amount Per Serving
Calories 53.9
Total Fat 2.0 g
Saturated Fat 0.3 g
Polyunsaturated Fat 0.9 g
Monounsaturated Fat 0.8 g
Cholesterol 0.0 mg
Sodium 469.9 mg
Potassium 39.0 mg
Total Carbohydrate 8.5 g
Dietary Fiber 0.4 g
Sugars 7.3
Protein 1.0

Wednesday, January 13, 2010

Beef Stroganoff


When creating my dinner menus I look to the weekly sales at the grocery. Combine a few fresh ingredients with what I've got in the pantry and freezer and voila! Dinner is served. Case in point: Beef Stroganoff. Being a Kitchen Witch I don't own or use cream of soup. Finding a decent recipe with out a can of soup was harder than I thought to find. Sometimes I feel like I'm the last of the 'from scratch' home cooks out there! So I created this one for you all.

In my freezer I had cube steaks. I figured if I sliced them against the grain I'd have a nice tender piece of meat for the Stroganoff. Most recipes call for thin sliced sirloin or tenderloin, however the cube steaks is what I had on hand. They worked out quite well in the end product I'm happy to report.

Mushrooms were on sale this week - I had stroganoff in mind when I saw the sale. I also had an abundance of sour cream in the fridge that desperately needed to be used up. Most recipes call for either red wine or brandy to deglaze the fond (cooked on crud on the bottom of the pan). I had neither so I used my trusty white wine. We liked the flavor it brought to the dish and didn't add a reddish hue to the creamy sauce. The wee bit of lemon juice added at the end brings a nice tang to the dish that really makes the sour cream sauce sing.

Even the littlest Kitchen Witch liked this meal! She said that the gravy was good, thats high praise from a 3 yr old :-)

Beef Stroganoff
serves 2 very hearty servings with a lunch left over
2 cube steaks
8 oz package mushrooms, cleaned and quartered
2 T flour
S&P
1 small onion, sliced
2 cloves garlic, minced or pressed
1/2 c white wine
1 1/2 c chicken stock
dash lemon juice
1/2 c sour cream
1 T fresh minced parsley
hot buttered egg noodles (3 c dry noodles was enough for 2.5 dinners & a full lunch)
butter and oil or sautee

Clean and quarter mushrooms. Discard any tough stems.


Slice the beef against the grain into 1/4 in wide strips. Season beef with S&P, then toss with the flour.

In a skillet heat a drizzle of oil and cook beef until nicely browned. Remove browned strips from pan. Add 1 T butter and mushrooms. Allow to brown before stirring. Once mushrooms brown, remove from pan & set aside with the beef.

Add a touch more oil if needed and cook onions. Once the onions begin to sweat add the garlic & stir well. You want the onions to just start to brown on the edges. Once they have browned slightly remove from pan & place with beef & mushrooms.


Deglaze the pan with the white wine. Stir well scraping any browned bits off the bottom of the pan. Add chicken stock and bring to a simmer. Return beef, mushrooms and onions to the pot & simmer about 20 min.

Cook and drain egg noodles.

Turn heat off on the stroganoff. Stir in 1/2 c sour cream and 1 T fresh chopped parsley. Serve over the hot egg noodles.


Nutrition Facts
2 Servings **you could very easily make this feed up to 4 people by adding a veggie side dish, it makes 2 VERY hearty servings!
Amount Per Serving
Calories 475.9
Total Fat 18.3 g
Saturated Fat 9.9 g
Polyunsaturated Fat 1.6 g
Monounsaturated Fat 6.5 g
Cholesterol 125.7 mg
Sodium 818.6 mg
Potassium 1,008.8 mg
Total Carbohydrate 33.9 g
Dietary Fiber 1.4 g
Sugars 2.3 g
Protein 33.2 g