Showing posts with label cookies. Show all posts

Wednesday, January 11, 2012

Brookies

A while ago I won the Clinton St. Baking Company Cookbook from a blog.  For the life of me I can NOT remember which blog it was from, and for that I am deeply sorry.  The cookbook however is great!  If you like down home, family friendly food this is the book for you!  The cover has the most delightful pancakes, topped with chocolate chunks.  It's just a taste of the yummy treats you'll find inside!  These Brookies were discovered in this cookbook, and were one of the first things the Kitchen Witch bookmarked when browsing through it.  The Witch has made many chocolate cookies in the past - Death by Chocolate cookies, chocolate crinkles, you get the idea, we love a chocolate cookie here - so when I saw this cookie that was a brownie/cookie hybrid, I knew that I had to make it!

The recipe calls for 'high quality chocolate', the Kitchen Witch used Ghiradelli 62% cacao double chocolate chips.  I had them on hand, and they're our favorites.  Callebaut, Guittard or Valhrona would also be good choices.  Nestles Toll House would NOT be a good choice here.  You really need that depth of deep chocolate flavor in these tasty treats, so do spend a few extra dollars and get the better chips.  You'll be happy you did.

The brookies mix up quick and easily, heck the Witch didn't even use the KitchenAid for this one!   In less than 30 minutes the house smelled amazing and the brookies were done.  The outsides are dry and cracked, just like a brownie is.  The insides are soft, gooey and oh so rich.  If you like chocolate cookies make these. If you like brownies, make these!  I can't say enough good things about these brookies.  They have officially become the chocolate cookie of choice here at the Witches' home.  And that's saying a lot!

Brookies
Source: Clinton Street Baking Company Cookbook
makes about 30 cookies
2 cups high quality 62% cacao chocolate chips
3/4 c brown sugar
2 eggs
1 T oil
1 t butter
1/2 c flour
1/4 t salt
1/4 t baking powder

Preheat oven to 350F

Melt 1 cup chocolate chips with the oil and butter until melted.  Stir well to melt all chips.  Allow to cool slightly.

In a small bowl mix the flour, salt and baking powder together.

In a medium work bowl mix the eggs and brown sugar together.  Add the melted chocolate, stirring well to thoroughly mix.  Scrape down sides before adding the flour mix.  Whisk it in until just in mixed, then add the remaining chocolate chips and stir well.

Transfer batter to a shallow pan, like a pie pan and put in the freezer for about 10 minutes to firm up batter before scooping.

Scoop cookies onto either a parchment or silpat lined sheet pan.  Using a 1T size scoop, form cookies.

Bake  10-11 minutes, until tops are dry looking and cracked like a brownie.  Remove from oven and allow to rest on tray for 5 minutes before removing to a cooling rack.  The centers will be very soft and brownie like in texture.  These cookies are best consumed in the first 12 hours, they begin to dry out after that and lose that brownie like texture.


Nutrition Facts calculated at SparkPeople recipe calculator Amount Per Serving Calories 75.6 Total Fat 3.4 g Saturated Fat 1.8 g Polyunsaturated Fat 0.2 g Monounsaturated Fat 0.4 g Cholesterol 12.7 mg Sodium 30.4 mg Potassium 26.0 mg Total Carbohydrate 13.7 g Dietary Fiber 0.6 g Sugars 11.1 g Protein 1.2 g

Friday, December 23, 2011

Citrus Buttercream Sandwich Cookies

Citrus buttercream sandwich cookies were part of my Christmas goody gift package this year.  When I went soliciting ideas for Christmas cookies one of my friends suggested a citrus cookie.  Honestly it took me by surprise, as I'm a chocolate and caramel cookie kind of Witch.  A citrus cookie would be different and very holiday appropriate, after all the best citrus fruits are ripe in December.  I wasn't sure what kind of citrus cookie to make, however.  I tossed around a few ideas, a thumbprint type of cookie, filled with a citrus curd maybe?  What about a citrus shortbread with a citrus glaze?  Both sounded quite nice but really my mind kept wandering to a sandwich cookie, something that incorporated both of those ideas, filled and crispy all at once.  Now that the type had been hammered down to  a sandwich cookie, it was a matter of figuring out what kind of cookie I wanted to make for the sandwich.  Shortbread tends to really just crumble away for me so I decided it wasn't what I wanted here.  A standard drop cookie isn't structurally strong enough to support filling and a top cookie, not to mention their round shape isn't what I was looking for here.  Back to the drawing board.

That's when I went blog hopping and discovered Culinary Connection's by Peabody's recipe for Citrus sandwich cookies.  Immediately I knew I had my recipe.  The Witch changed a few very minor things; I used the zest of clementines instead of orange and I added lime zest into the mix as well.  The colors of the zest are so pretty in the pale yellow citrus dough, which was a pleasure to work with, not dry or crumbly and rolled out easily.  Baking the cookies released the essential oils of the citrus zests, adding their flavorful perfume to the cookie.  The filling is a reduction of orange and lemon juices whipped into a buttercream, their tangy acidity help balance the sweetness of the filling.  A touch of heavy cream keeps the melt in your mouth soft.

The cookies looked impressive once finished.  The colorful zest peeping through the cookie with the pale buttercream centers were very pretty.  The Kitchen Witch is very sad to say that she never got to taste one in it's finished state.  The recipe made 32 sandwich cookies, the exact number of recipients on my goodie gift list this year.  I was able to snag a broken piece of cookie, it was delicious, slightly chewy and rich, and the buttercream I sampled and enjoyed.  Yet the finished product I didn't get.  Sob!  That's ok, I'll just have to make these beauties again soon.  Enjoy!


Citrus Sandwich Cookies 
Makes 32 sandwich cookies
Source:  Culinary Connections 
2 cups all purpose flour
¼ tsp baking powder
¼ tsp salt
14 TBSP unsalted butter, softened
1 cup granulated sugar
1 large egg yolk
 2 tsp finely grated lemon zest
 1 tsp finely grated orange zest
1 tsp finely grated lime zest

Whisk together the flour, baking powder and salt in a medium bowl; set aside.

In the bowl of an electric mixer fitted with a paddle attachment, beat butter and sugar at medium speed for 3 minutes. Add egg and zest and beat until combined.

Reduce to slow speed and add flour mixture just until well blended. Scrape dough onto a work surface and gather it up into a disk. Wrap the disc in plastic warp and refrigerate for at least 2 hours, until firm(up to 3 days).

350F. Line baking sheets with parchment paper or silpat.

Place the chilled dough on a lightly floured work surface and sprinkle lightly with flour. Using a rolling pin, roll the dough out to a thickness of 1/8 inch.

Using a small cookie cutter, cut out as many cookies possible from the dough. Transfer dough to baking sheets and bake for 9-11 minutes or until lightly browned on the bottom(not the top).

Transfer the cookies to wire racks and cool completely.

Citrus buttercream filling 
¼ cup orange juice
1 TBSP lemon juice
6 TBSP unsalted butter, softened
1 ½ cups powdered sugar
1 TBSP heavy cream
pinch of salt

 In a small nonreactive saucepan, bring the orange and lemon juices to a boil over high heat and boil for 3 to 5 minutes, or until reduced by half (3T).  Let cool completely.

 In a bowl of an electric mixer, using the paddle attachment, beat the butter, powdered sugar, cream, salt and cooled citrus juices at medium speed until smooth and fluffy.

Pipe fiilling onto the bottom of one of the cookies. Top with another cookie. Press the cookies lightly together. Repeat with the remaining cookies and filing.

Store cookies in the fridge.  Allow to warm to room temperature before serving.


Nutrition Facts provided by SparkPeople recipe calculator
  32 Servings
Amount Per Serving
  Calories142.2
 Total Fat7.6 g

 Saturated Fat4.7 g

 Polyunsaturated Fat0.3 g

  Monounsaturated Fat2.2 g
Cholesterol26.5 mg
Sodium23.6 mg
 Potassium16.4 mg
Total Carbohydrate18.1 g

Dietary Fiber0.2 g

Sugars12.0 g
Protein1.0 g

Thursday, December 22, 2011

Molasses Spice Cookies

Molasses cookies are the Witches' husband's favorite cookie ever. His Grandma used to make the BEST molasses cookies!! Last holiday season I was searching for a newer version of the molasses cookie, something to dress up the standard spicy treat. I stumbled across this recipe from a blog, but after over 365 days of NOT posting this post (because I forgot to take photos of the cookies, D'oh!) I have completely forgotten which blog it came from. And for that I apologize. The Kitchen Witch did do a google search to see if I could find it to give proper credit where it's due...alas I was unsuccessful in locating the original source. Sorry about that!

Back to the cookies! These molasses spice cookies start off the same as Grandma's, but they take a turn at Spicy Town with the addition of cardamom and black pepper. Yes, I said black pepper. In a baked good. It's tasty, too! A generous 2 teaspoons of ground ginger helps reinforce that these are indeed spice cookies and they pack a wallop! But behind that spicy bite is a mellow sweetness and a delightful chewiness to the cookie. The molasses really make these a crispy outside, chewy inside cookie, which makes me a very happy Witch indeed!

These cookies are not a favorite of the Little Witch, she thinks they're too spicy. I tend to agree with her, they are spicy, but I like that. They are spicy, not necessarily 'hot' but spicy and not overly sweet, and therefore tend to not be a preferred cookie of the kids. And that's ok in this Witches' opinion. After all the cloying sweet Holiday treats, it's nice to have a bit of spice and subtle sweetness. And best of all, Santa loves these cookies! I hope you enjoy them.

Happy Yule to you and yours!

Molasses Spice Cookies makes 3 dozen, 2 cookies per serving
Source: Unknown; inspired by a blogger with good taste!
1/2 cup butter, softened
1 cup sugar
1/4 cup molasses (not blackstrap)
2 tbsp honey
1 large egg
2 1/3 cups all purpose flour
2 tsp baking soda
2 tsp ground ginger
1 tsp ground cinnamon
1/4 tsp ground cloves
1/2 tsp ground cardamom (7 pods ground)
1/4 tsp ground black pepper
1/2 teaspoon salt
sugar, for rolling

Preheat oven to 350F.

In a work bowl of a stand mixer, cream together butter and sugar until fluffy. Beat in molasses, honey and egg until smooth.

In a medium bowl, whisk together flour, baking soda, spices and salt.

Working by hand, or with a mixer on low speed, stir flour mixture into molasses mixture.

Roll dough into 1-inch balls and roll each ball in extra sugar before placing on baking sheet.

Bake cookies for 10-12 minutes, until the edges are set but not browned.

Cool for 5-10 minutes on baking sheet, then transfer to a wire rack to cool completely. Store in an airtight container.


Nutrition Facts calculated at SparkPeople recipe calculator
Amount Per Serving
Calories 177.8
Total Fat 5.6 g
Saturated Fat 3.3 g
Polyunsaturated Fat 0.3 g
Monounsaturated Fat 1.6 g
Cholesterol 24.1 mg
Sodium 211.1 mg
Potassium 91.0 mg
Total Carbohydrate 30.5 g
Dietary Fiber 0.4 g
Sugars 17.3 g
Protein 2

Tuesday, November 8, 2011

Pumpkin Whoopie Pies

On a chilly fall afternoon nothing smells or feels quite as homey as a batch of pumpkin baked goods in the oven. That's what the Witch was thinking when she went blog surfing to find a new and different pumpkin recipe to make. Pumpkin bread, pumpkin muffins, pumpkin bars: been there, done that. I wanted something different, not seen before in the Kitchen Witches' kitchen. That's when I went to the guru of all things pumpkin, Annie of Annie's Eats!! Annie is a certified pumpkin lover and I knew that if I was looking for baked delicious pumpkin goods Annie's site was the place to be.

I was right! After browsing her pumpkin collection I stumbled upon pumpkin whoopie pies. I'd seen these on her site before. Heck, I had bookmarked them on my old computer, but it died before I could make them. Now was the time!! The Kitchen Witch has never made whoopie pies before so I had no point of reference to go by other than what I knew about the pies; soft, fluffy cake cookies with a creamy filling. Annie's recipe provided both of those things. The pumpkin cake is soft and tender like most pumpkin baked goods are, delicatly flavored with spices and just sweet enough. The filling is the amazing, cream cheese maple icing!! Seriously, this is the best and easiest cream cheese icing I've ever attempted.

The whoopie pies come together quickly; the batter is scooped onto sheet trays with a 1.5T scooper and after a 12 minute bake they're done. After mixing up the delicious icing in the stand mixer I transferred it to a large plastic bag which I cut the end off one corner to make a piping bag. A quick swirl of filling and the pies are finished with a topping cake. Whoopie pies have captured our hearts and taste buds, so much so that the Husband asked for these as his birthday cake. I take that as recipe success anyday! Thanks Annie for the great recipe, we love it!

Pumpkin Whoopie Pies
Source: Annie's Eats
Makes: 32 pies

For the pumpkin cookies:
3 cups all-purpose flour
1 tsp. salt
1 tsp. baking soda
1 tsp. baking powder
2 tbsp. cinnamon
1 tsp. ground ginger
½ tsp. ground nutmeg
1 cup granulated sugar
1 cup dark brown sugar, firmly packed
1 cup canola oil
3 cups chilled pumpkin puree
2 large eggs
1 tsp. vanilla extract

For the maple cream cheese filling:
3 cups powdered sugar
½ cup unsalted butter, at room temperature
8 oz. cream cheese, at room temperature
3 tbsp. maple syrup
1 tsp. vanilla extract

Directions:
To make the pumpkin cookies, preheat the oven to 350° F. Line two baking sheets with parchment paper. In a large bowl, whisk together the flour, salt, baking soda, baking powder and spices. Set aside. In a separate bowl, whisk sugars and oil together. Add the pumpkin puree and whisk to combine thoroughly. Add the eggs and vanilla and whisk until combined. Sprinkle the flour mixture over the pumpkin mixture and whisk until completely combined.

Use a small ice cream scoop with a release mechanism to drop the dough onto the prepared baking sheets (about 1.5-2 tablespoons.), about 1 inch apart. Bake for 10-12 minutes, until the cookies are just starting to crack on top and a toothpick inserted into the center of a cookie comes out clean. Remove from the oven and let the cookies cool on the pan for about 10 minutes. Transfer to a wire rack to cool completely. Repeat with remaining dough.

To make the filling, in the bowl of an electric mixer fitted with the paddle attachment beat the butter until smooth with no visible lumps. Add the cream cheese and beat until combined. Add the powdered sugar, maple syrup and vanilla and beat until smooth. Be careful not to overbeat the filling or it will lose structure.

To assemble, turn half of the cooled cookies upside down. Pipe filling onto the flat side of the overturned cookies. Place another cookie, flat side down, on top of the filling. Press down slightly so that the filling spreads to the edges of the cookie. Repeat until all the cookies are used. Refrigerate for at least 30 minutes to firm before serving.


Nutrition Facts calculated by SparkPeople recipe calculator
Amount Per Serving
Calories 262.2
Total Fat 12.6 g
Saturated Fat 4.0 g
Polyunsaturated Fat 2.3 g
Monounsaturated Fat 5.7 g
Cholesterol 27.1 mg
Sodium 210.8 mg
Potassium 109.0 mg
Total Carbohydrate 38.4 g
Dietary Fiber 0.7 g
Sugars 27.8 g
Protein 2.3 g

Sunday, March 13, 2011

Death by Chocolate cookies

Do you like cookies? What about brownies? Wouldn't it be awesome to have them both, at once, in a delicious dark chocolate cookie concoction of deliciousness? Well guess what readers, YOU CAN!! Yes, the Kitchen Witch has been casting her spell over chocolate cookies and I present to you the fruits of my labors, Death by Chocolate cookies.

Recently the Witch made a trip to Savory Spice, a fun spice store that has everything you could possibly need for spices and herbs. They also carry a lot of different cocoa powders. I found some black onyx cocoa powder and had to buy some. I've used other black cocoas and LOVE the intense dark color that it adds, not to mention the super chocolate kick in the flavor department. Savory Spices' black onyx cocoa delivered, nicely, on both of these requirements. Because the onyx cocoa is more expensive than regular old cocoa powder, I use just a bit to add color & flavor with out breaking the bank. In the 1/2 c cocoa powder that this recipe calls for 2 T of that was the black onyx cocoa. You can make these with out black cocoa but the results won't be as dark and delightful.

The Witch uses a combination of white and brown sugar in these cookies. The brown sugar adds moisture as well as a deeper, more caramelized flavor whereas the white sugar provides necessary sweetness and crispness to the exterior crust. A bit of oil is also added to these cookies, it helps balance the dry crumblies that cocoa powder can cause, due to its dry powdery nature. The extra oil helps hydrate the cocoa and make it act more like melted chocolate would in recipes. In addition, mixing the cocoa powders with the fats help coat the cocoa, keeping the grainy dusty texture that is all too common with cocoa powder recipes at bay.

So there you have it. Rich. Dark. Soft. Moist. Slightly crispy. Death by Chocolate cookies. Enjoy, I know you will!

Death by Chocolate cookies
makes 3 dozen cookies
1/2 c brown sugar
1/2 c white sugar
1 stick (1/2 c) butter, unsalted
3 T oil
1/2 c cocoa powder
1 egg
1 t vanilla
almost 2 cups flour
1 t baking soda
1/2 t salt
1 cup chocolate chips

Preheat oven to 350F

Cream butter and oil in the work bowl of a stand mixer until very smooth. Add cocoa powder and sugars, mix until light and fluffy. Scrap down sides. Add the egg and vanilla, mix until light and fluffy again.

Add flour, salt and baking soda, scrape down sides. Add chocolate chips and mix until evenly distributed.

Scoop cookies onto sheet pan. Bake cookies for 10-11 minutes. You want the bottoms and edges to be set and slightly crispy. Its hard to tell when these are done due to the dark color so use a timer!

Allow to cook for 3-5 minutes on sheet pan before removing to a cooking rack.


Nutrition Facts provided by SparkPeople recipe calculator
Amount Per Serving
Calories 111.5
Total Fat 5.6 g
Saturated Fat 2.7 g
Polyunsaturated Fat 0.5 g
Monounsaturated Fat 1.5 g
Cholesterol 12.0 mg
Sodium 71.2 mg
Potassium 39.0 mg
Total Carbohydrate 16.2 g
Dietary Fiber 0.6 g
Sugars 9.6 g
Protein 1.6 g

Friday, January 7, 2011

Chocolate Crinkles

Are you a chocoholic? Do you like cookies? Do you like your chocolate to be on the darker side, full of complex flavors and not cloyingly sweet? If you answered YES to these questions then I've got the cookie for you! Chocolate Crinkles!

What makes these cookies so special? First of all, they call for melted chocolate, not cocoa powder. Now don't get me wrong, the Kitchen Witch LOVES cocoa powder. But even the Witch will admit, its not 'real chocolate'. Cocoa powder is a large contributor of the dreaded dry crumblies in cookies, and sometimes it just doesn't have that CHOCOLATE punch of flavor that I'm looking for. There's nothing more disappointing than taking a big bite of a deep dark chocolate cookie and have no flavor to back up that beautiful color. These cookies, on the other hand, deliver on the chocolate in a big way. The Witch used a combo of 60% dark (4 oz) and semi sweet chips (6 oz, yeah I know that's more than the recipe called for, but I love chocolate!). Next time I'll use all 60% cacao dark chocolate, as always, use whatever chocolate you like.

Second, there's not a lot of sugar in these babies, a mere 2/3 c plus 2T for the entire batch means these won't be cloying in the slightest. I also really like how the less than sweet cookie base allows the powdered sugar coating to bring a bit more sweetness to each bite.

Lastly, the coffee powder in these cookies really take them from ho hum to WOW! Dark chocolate and coffee are BFF. Just like real BFF's, they bring out the best in each other. Coffee intensifies chocolate's flavor while chocolate makes coffee less bitter. The deep complexities of each of these sing in perfect harmony in this powdered sugar coated chocolate lovers dream come true cookie. Please keep in mind that these are not very popular with the kids. Between the intense dark chocolate, the lack of sugary sweetness and the deep coffee notes keep the kiddo's hands off these, which leaves more for us adults. I like that!

Chocolate Crinkles
source: adapted from King Arthur Flour Recipes
Makes: about 3 dozen cookies (more or less depending on size)
1 1/3 cups (8 ounces) chopped bittersweet chocolate and/or chocolate chips
1/2 cup (4 ounces, 1 stick) unsalted butter
2/3 cup plus 2T (4 3/4 ounces) sugar
3 large eggs
2 teaspoons vanilla
2 teaspoons espresso powder (optional) (I used a packet of Starbucks VIA Italian Roast)
1/2 teaspoon baking powder
1/4 teaspoon salt
1 2/3 cups (7 ounces) All-Purpose Flour
confectioners' sugar* (for coating)

In a microwave safe bowl add the chocolate and butter. Using 30 second bursts of power, heat chocolate until melted, stirring well after each heating cycle. It took 3 rounds in my microwave. Stir chocolate and butter until you have a smooth consistency.

In a separate bowl, beat together the sugar, eggs, vanilla and espresso powder. Stir in the chocolate mixture, baking powder and salt, then the flour. Chill the dough for 2 to 3 hours, or overnight; it'll firm up considerably.

Scoop cookies using a cookie scoop and place into powdered sugar. Roll in sugar to coat all sides and place on a parchment lined baking sheet (these cookies do want to stick so please use parchment, silpat or lightly oil the sheet tray). Bake at 325 for 10-12 minutes. The bottoms will be slightly crispy and the tops will be very soft, almost liquid. Allow to rest on baking sheet for 1 minute before carefully removing to a cooking rack. Let cookies cool for at least 1 hour.

Friday, September 3, 2010

No Roll Sugar Cookies

I was so happy to find this recipe for sugar cookies on Fat Girl Trapped in a Skinny Body. Julia is a fantastic baker so when she claimed that this cookie was sugar cookie perfection, I knew I had to try it!

In this Witches' opinion sugar cookies should be soft, chewy, vanilla flavored, buttery and sweet. Dry and crumbly should not apply. Neither should high maintenance, kitchen destroying or frustrating. The latter is usually what I experience when I make sugar cookies: High maintenance because you have to make the dough and then chill it for at least an HOUR. Kitchen destroying because you then have to spread flour all over the place and roll them out, cut them out then attempt to transfer to a cookie sheet intact. Frustrating because all the above is happening and usually the flavor isn't what you want anyway, or the dreaded dry crumblies hit. These reasons and more are why you've not seen a sugar cookie recipe on this blog. Until now.

These cookies are totally different. First of all, they're drop cookies! That means no chill out time, no rolling, no flour everywhere, no fuss, no muss! Second, the flavor is what I expect out of a sugar cookie: buttery, sweet and vanilla scented. Soft and chewy inside, slightly crunchy outside. Yes folks, these sugar cookies have it all!

Next time I make these I think I'll frost them instead. A fruit flavored or even a chocolate frosting would be pretty good I think. We chose to roll the cookies in sprinkles and colored sugars. It was a lot of fun for both myself and the Little Witch.


Sugar Cookies

makes 3 dozen cookies
1 1/4 c white sugar
2 sticks butter (1 cup)
3 egg yolks
3 t vanilla
2 1/2 c AP flour
1/2 t cream of tartar
1 t baking soda
1/4 t table salt
about 1/2 c sprinkles, colored sugars or granulated sugar to roll in

Cream the butter and sugar together in a stand mixer with the paddle until very light and fluffy, about 5 minutes on medium speed.

Scrape down the sides and add the vanilla extract. Mix until incorporated. Add the egg yolks one at a time, beating well between each addition and scraping sides of bowl and paddle after each addition.

Mix the flour, baking soda, cream of tartar and salt together in a bowl. Slowly add the dry ingredients, scraping down the sides after each addition.

Scoop balls of dough and roll in colored sugar or sprinkles, coating all sides.


Place 12 cookies on a sheet pan and bake in a preheated 350 oven for 11 minutes or until just set. You don't want these to brown, if they do they'll dry out and not be soft and chewy in the middle.


Nutrition Facts provided by SparkPeople Recipe calculator
Amount Per Serving
Calories 117.1
Total Fat 6.0 g
Saturated Fat 3.6 g
Polyunsaturated Fat 0.3 g
Monounsaturated Fat 1.6 g
Cholesterol 30.9 mg
Sodium 40.8 mg
Potassium 19.5 mg
Total Carbohydrate 15.0 g
Dietary Fiber 0.2 g
Sugars 8.3 g
Protein 1.2 g

Friday, May 14, 2010

Key Lime cookies with white chocolate

The little Witch had been asking to make cookies, like usual. Unlike usual I was out of chocolate chips. The horror!! I did however have white chocolate chips. And an excess of key limes and a touch of coconut.

Siri over at Siriously Delicious made and blogged about coconut white chocolate chip cookies a few days ago. She, of course, added the 'put the lime in the coconut and drink it all down' lyrics in her blog, which then promptly got stuck in my head. Thanks, Siri. On the upside, I got the idea to add some key lime zest and juice to something similar to her coconut white chocolate chip cookies.

I think its a successful marriage. Lime and coconut are delicious together. White chocolate helps add a sweet vanilla flavor to the sour lime. Zest adds a punch of lime as well as provide pretty specks of green in these pale beauties.

In the end the cookie is a hit with the adults. The little Witch, well she still wants her favorite chocolate chip cookies. Kids :)

Key Lime coconut white chocolate cookies
makes 24 cookies
1/2 cup butter (1 stick)
1/2 c white sugar
1/4 c brown sugar
zest and juice of 2 key limes
1/2 c coconut
1 egg
3/4 t baking soda
1/2 t salt
1 3/4 c AP flour
1 c white chocolate chips

Cream butter. Add sugars, beat until fluffy. Add zest, juice and egg, beat until light and fluffy again. Add coconut and 1/3 the flour, baking soda and salt. Mix until flour is incorporated. Scrape down the sides, add remaining flour in 2 installments, scraping after each. Add white chocolate chips. Scoop onto a baking sheet and bake for 11 minutes at 350.


Nutrition Facts provided by SparkPeople recipe calculator
24 Servings (1 cookie per serving)
Amount Per Serving
Calories 136.1
Total Fat 6.7 g
Saturated Fat 4.1 g
Polyunsaturated Fat 0.3 g
Monounsaturated Fat 1.9 g
Cholesterol 19.2 mg
Sodium 109.9 mg
Potassium 53.8 mg
Total Carbohydrate 19.5 g
Dietary Fiber 0.7 g
Sugars 11.1 g
Protein 1.6 g

Friday, April 30, 2010

Chocolate chip cookies - for high altitude


Thanks to all my Facebook fans for encouraging me to post this cookie recipe. I hope you all enjoy it. If you're not a fan of Andrea the Kitchen Witch on Facebook, please take a minute to click on the link on the left side to become one. The Kitchen Witch thanks each and every one of you for your support!

Chocolate chip cookies are A#1 most requested cookies here at Kitchen Witch headquarters. The little Witch only likes white cookies with brown chocolate chips (her words, not mine) so chocolate chip gets made often. I have become quite a pro at whipping these babies out, in less than 5 minutes I can have a batch of dough made up and the kitchen is clean again. Yes, I've got these down to a science!

I've modified everyone's favorite cookie recipe from Nestle Tollhouse for my high altitude. Those of you who don't live at 6,000 ft above sea level probably have no idea the trials and tribulations of baking in high altitudes. Suffice to say that its challenging. Cookies spread too much and become thin crispy wafers, not tender soft and chewy cookies. With a few modifications I've come up with a pretty fool proof chocolate chip cookie that will be chewy and crispy all at once. Even at 6,000 ft above sea level!

Chocolate Chip Cookies - for high altitude
makes about 2 dozen cookies
1 stick unsalted butter
1/4 c plus 2T brown sugar
1/4 c plus 2T white sugar
1 egg at room temperature
1 t vanilla
1 3/4 c flour
1 t baking soda
1/2 t salt
1 c (1/2 bag) chocolate chips

Preheat oven to 350.

Cream butter. Add sugars and beat until light & fluffy. Add the vanilla and egg, mix until thick and creamy.

Sift the dry ingredients together. Slowly add them in 3 installments, scraping down the sides as you go. You want a very thick dough, almost the consistence of play dough. Depending on the humidity of the day it may be necessary to add more flour. Add any additional flour in 1T increments. Too little flour yields a flat crispy cookie, too much makes them too dense and dry and they won't spread at all.

Add the chocolate chips, mixing until they are just incorporated into the batter.

At this point you can refrigerate the dough for future use, freeze it for long term storage or bake it. I usually just bake it :)

~*~Kitchen Witch Tip: Invest in a cookie scoop! You'll get even sized and therefore evenly baked cookies. They don't have to be expensive, I got my Chefmate brand scooper (1.5 oz I believe) at Walmart for about $7. Be sure to look for all metal construction. Think about how thick cookie dough is, a plastic scooper would break under those conditions. The scoop should feel solid and not flimsy in your hand. Small cookie scoops can do double duty as a petite ice cream or sorbet scoop and they are ideal for filling mini muffin cups perfectly.~*~

Scoop dough into 1T size balls. Bake at 350 for 11-13 minutes or until browned on the bottoms and slightly on the edges. Remove from oven and allow to cool on tray for 2 minutes before transferring to a cooling rack.


These cookies last about 2 hours before they're gone around here, however, I suppose you could store them for up to 5 days. They will dry out as they age so I recommend eating them as soon as they're cool enough not to burn your mouth.

Nutrition Facts provided by SparkPeople Recipe calculator
24 Servings
Amount Per Serving
Calories 114.4
Total Fat 5.6 g
Saturated Fat 3.4 g
Polyunsaturated Fat 0.2 g
Monounsaturated Fat 1.4 g
Cholesterol 19.5 mg
Sodium 105.7 mg
Potassium 49.1 mg
Total Carbohydrate 16.8 g
Dietary Fiber 0.6 g
Sugars 9.2 g
Protein 1.5 g

Sunday, April 18, 2010

Snickerdoodles

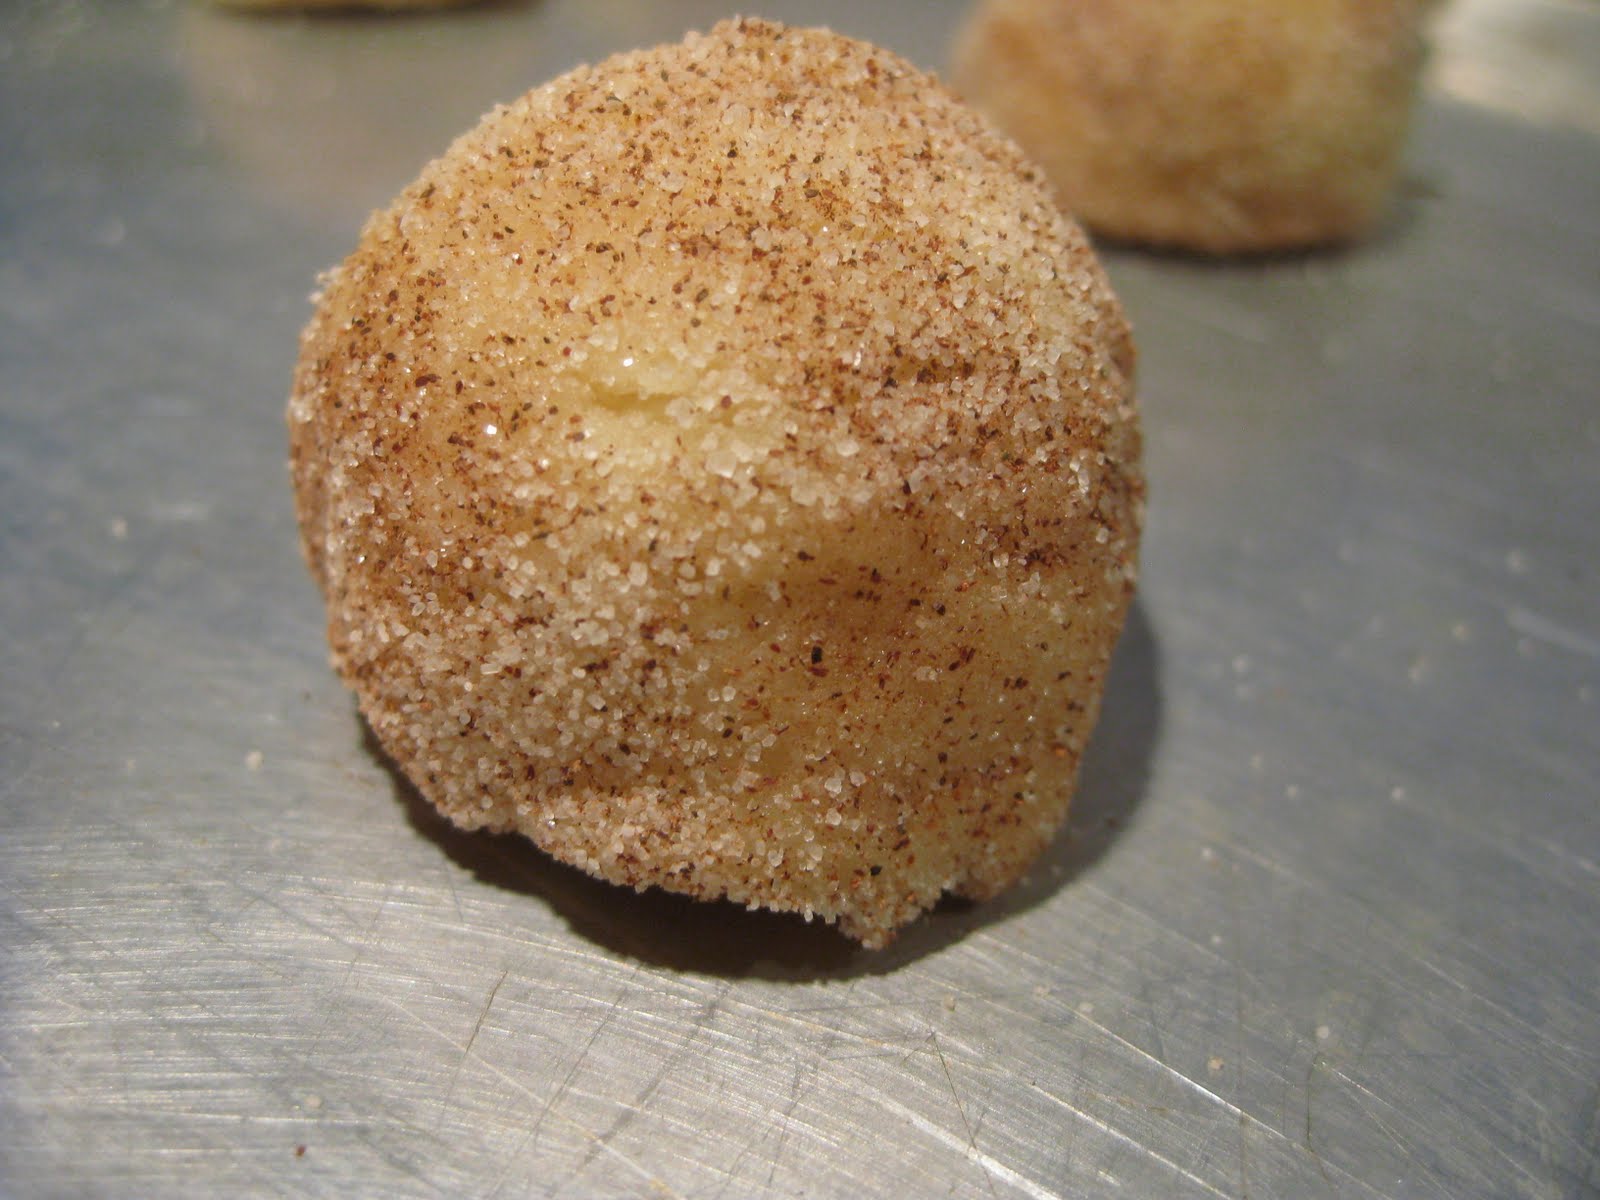
Cinnamon covered buttery cookies with a slight tang. If that intrigues you then please, allow me to introduce you to my friend the snickerdoodle. Maybe you've heard of them before, they are pretty old skool. But, like most good trends from days past, they are becoming popular again. And why not, whats not to love about these spicy delights? The cinnamon provides the perfect foil to the cookie's sweetness, cutting through it yet complimenting it simultaneous. Cream of tartar adds a sour tang and somehow manages to make the cinnamon taste more cinnamon-y.

Treat your family to an old fashioned favorite soon, they'll thank you!

Snickerdoodles
makes approx. 22 cookies
1 stick butter softened
1 egg
3/4 c sugar
1 3/4 c flour
1 t cream of tartar
1/2 t baking soda
1/2 t salt
Topping:
2 T sugar
2-3 t cinnamon

In a bowl mix the flour, salt, cream of tartar and baking soda together.

In a work bowl cream the butter. Add the sugar, beat until light & fluffy. Add the egg, beat until fluffy again. Scrape down sides of the bowl.

Add the flour mix in 3 installments, scraping down sides between each installment. Once dough is mixed cover with plastic wrap and refrigerate for a minimum of 1 hour.

Once dough has chilled scoop into balls (1 T approx). Roll the balls in the cinnamon sugar mix. Place coated balls on a baking sheet.

Bake at 350 for 11-13 minutes. You don't want these cookies to brown at all, you want them to be set yet soft in the middle. Allow to cool on the tray for 2 minutes before removing to cooling racks.

Nutrition Facts provided by SparkPeople recipe calculator
22 Servings (cookies)
Amount Per Serving
Calories 107.6
Total Fat 4.5 g
Saturated Fat 2.7 g
Polyunsaturated Fat 0.2 g
Monounsaturated Fat 1.3 g
Cholesterol 20.9 mg
Sodium 113.9 mg
Potassium 39.0 mg
Total Carbohydrate 15.7 g

Dietary Fiber 0.4 g
Sugars 7.8 g
Protein 1.4 g

Thursday, April 8, 2010

Peanut butter chocolate chip cookies

Peanut butter cookies don't get made very often around here. My niece has a peanut allergy so I tend to avoid peanuts - cross contamination scares me a lot. So when peanut butter cookies started to call my name I immediately thought NO! I can't make them! What if my niece comes over? There'd be potential for allergies everywhere! Reason started to settle in, its the middle of the week, we won't be seeing my niece until this weekend, which gives me plenty of time to clean up any stray cookie crumbs. And lets be honest people, the cookies won't be around that long.

So I gave in to temptation and made peanut butter cookies. And I'm so glad I did! They were everything I was hoping for, creamy, delicate, buttery, rich and delicious. Everyone knows that chocolate is peanut butter's best friend so the chocolate chips were a welcome addition. These cookies turned out better than I hoped for. My husband wants to know when I'll be making them again. I guess that means they are good.

Peanut butter chocolate chip cookies
makes 32 cookies
1 c brown sugar packed
1 stick butter
1 egg
3/4 c creamy all natural peanut butter
1 t vanilla
2 c flour
1 t salt
1 t baking soda
1 c chocolate chips
2 T granulated sugar for tops

Cream butter with a mixer. Add brown sugar, peanut butter, egg and vanilla, mix until very light and fluffy.

Add in the dry ingredients in 3 installments, scraping down after each installment. Add chocolate chips to batter. Scoop using a small cookie scooper (1T approx size).

Press the tines of a fork into the sugar then press into the cookie. Back to the sugar and press the cookie a second time at a 90* angle to the 1st marks, causing small squares in the center. Add a pinch of sugar to the tops of each cookie if they don't have much.

Bake at 350* for 10 minutes. Allow to cool on tray for 1 minute before moving to a cooking rack.


Nutrition Facts provided by SparkPeople Recipe Calculator
32 Servings
Amount Per Serving
Calories 121.4
Total Fat 6.1 g
Saturated Fat 2.3 g
Polyunsaturated Fat 0.2 g
Monounsaturated Fat 0.9 g
Cholesterol 14.4 mg
Sodium 117.3 mg
Potassium 35.0 mg
Total Carbohydrate 16.3 g
Dietary Fiber 0.6 g
Sugars 9.2 g
Protein 2.3 g

Thursday, April 1, 2010

Triple Chocolate Cookies


On Thursdays we go to story time at our local library. The kids get to hear a few stories then make a fun craft. Afterwards they play and have fun. My daughter has befriended a few of the kids there - they've kinda got their own gang going on. Its adorable to watch them play and friendships develop. Since the weather has been warming up we've all taken to hanging out at the playground after story time is over, and with that comes picnic lunches. And cookies. Delicious yummy cookies.

Which brings me to the point of my post. Nicole is one of the moms at story time and it turns out that she's a talented baker. Today she surprised us by bringing cookies for the group. They were amazing. Chocolate cookie nirvana. Nicole was kind enough to bring the recipe as well and I told her that I'd be blogging about it, soon!

These cookies are insanely good. They are rich, dark and chocolate laden. I can not say enough good things about these cookies! I did have to exercise some self control and saved one so I could photograph it for you all. And now that the photo shoot is over, its cookie time!

Triple Chocolate Cookies
By Nicole from my story time group
makes about 30 cookies
1 c AP flour
1/2 c unsweetened cocoa powder
1/2 t baking powder
1/2 t salt
1/2 c unsalted butter, at room temp
1 1/2 c sugar
2 eggs at room temp
1 t vanilla extract
1 T dark roast instant coffee powder (Starbucks VIA Italian roast would be awesome!)
4 oz bittersweet chocolate, melted
4 oz bittersweet chocolate, roughly chopped

Preheat oven to 350

In a medium bowl combine flour, baking powder, salt and cocoa. In another bowl beat butter and sugar until light and fluffy. Add eggs, one at a time, beating well after each addition. Mix in vanilla.

Combine coffee powder and melted chocolate, add this to the butter and egg mixture. Gradually add the flour mixture, mixing until just combined. Fold in chopped chocolate.

Drop dough by heaping tablespoons onto parchment lined baking sheets. Bake until edges are dry, about 15 minutes. Cool completely.


Nutrition Facts provided by SparkPeople Recipe Calculator
30 cookies, 1 cookie per serving
Amount Per Serving
Calories 111.0
Total Fat 5.5 g
Saturated Fat 3.3 g
Polyunsaturated Fat 0.2 g
Monounsaturated Fat 1.1 g
Cholesterol 22.5 mg
Sodium 43.8 mg
Potassium 31.9 mg
Total Carbohydrate 15.1 g
Dietary Fiber 1.1 g
Sugars 10.0 g
Protein 1.7 g

Tuesday, March 9, 2010

Banana Oatmeal Cookies

One day the Kitchen Witch was craving sweets badly. Trying to stick to a healthier lifestyle (and having over ripe bananas on the counter), I found myself creating a new cookie that's a touch easier on the figure. I can't say that I was overly impressed by this cookie. But, then again, they weren't too horrible either.

The texture of these is more cake like than cookie like. And I won't lie, I liked the chocolate drizzled ones a LOT more than the raisin ones. So much for 'diet cookies' LOL :)

I guess the real secret behind 'diet cookies' is that they aren't the best tasting things under the sun, so after 2 (a serving size) you're really OK with that. And maybe that's not a bad thing after all.

Banana Oatmeal honey cookies
makes 36 cookies (18 servings)
3 over ripe bananas
1/2 c honey
1/4 c butter
1/4 c brown sugar
1 egg
1/4 c buttermilk
1 t vanilla
.5 c whole wheat flour
1.5 c AP flour
1.5 c old fashioned oatmeal
1 t baking powder
1 t salt
1 t cinnamon
2 oz chocolate chips melted
OR
1 cup raisins, plumped

Cream butter, sugar and honey together until smooth and fluffy. Add eggs and vanilla, beat well.

Add dry ingredients in 3 stages, scraping down sides of bowl after each addition. The dough will not be very stiff, more like thick pancake batter. Top with raisins, if desired.

Using a small cookie scoop, form cookies on a sheet tray. Bake at 350* for 12 minutes, or until browned on bottoms and set on top.


Drizzle tops with melted chocolate.


Nutrition Facts provided by SparkPeople Recipe Calculator
18 Servings (2 cookies)
Amount Per Serving
Calories 161.6
Total Fat 3.6 g
Saturated Fat 1.9 g
Polyunsaturated Fat 0.4 g
Monounsaturated Fat 1.1 g
Cholesterol 18.8 mg
Sodium 165.7 mg
Potassium 114.9 mg
Total Carbohydrate 30.6 g
Dietary Fiber 1.9 g
Sugars 10.6 g
Protein 3.1 g

Saturday, February 27, 2010

Brownie cheesecake bars


Some of my best creations are based on what I have on hand and what I've been craving. Today is a perfect example: I was bored, its the weekend, so why not bake some tasty treats, right? While my husband and daughter never ever get bored with chocolate chip cookies, I, however do. Brownies sounded good. But I'm out of my beloved black cocoa so I know they won't be as good and dark chocolate as I'd like. Cheesecake sounds delightful, but you really need to let it cool for a good 24 hours, and I didn't have patience for that.

Enter the hybrid of cheesecake and brownie. Not a swirled brownie that only hints of cheesecake, no, I'm looking for a dense brownie bottom with a cheesecake custard layer. Using my old standby brownie recipe was a no brainer, black cocoa or not, it makes awesome brownies. You can find the recipe here. The cheesecake layer was easy to assemble with ingredients that I had in my fridge, with in 20 minutes I had brownie cheesecake bars in my oven.

Creamy, tangy, sweet, chocolaty. Mmm...perfect with a tall glass of ice cold milk.

Brownie Cheesecake Bars
makes a 13x9 pan

brownie layer:
1/2 + 2 T cocoa powder
2 eggs
1 cup + 2 T sugar
1 stick butter
1 1/2 c flour
1 t baking soda
1 t baking powder
1 c chocolate chips

cheesecake layer:
2 packs cream cheese
2 eggs
1 T good vanilla extract
1/2 c sugar

Assemble the brownie layer first while cream cheese sits on counter to come to room temp.

BROWNIES:
in a microwave safe bowl melt the butter. Add sugar to melted butter, stir well and microwave for 60 to 90 seconds. Stir well.

In a small bowl mix cocoa powder and eggs into a very thick paste. Add the butter/sugar mix and stir well until smooth. Add dry ingredients, mix until it forms a thick batter. Add chocolate chips, stir to incorporate.

Press brownie batter into a greased 13x9 pan.


CHEESECAKE:
Using a mixer cream the cheese until light and fluffy. Add sugar, beat about 1 minute. Scrap down sides, add vanilla and 1 egg. Mix very well, about 1 minute. Scrape sides again, add last egg and beat 1 minute until very smooth and thick.

Pour cheesecake over brownie layer. Bake at 350* for 35-40 minutes.


Friday, December 18, 2009

Cavity Finders aka Magic Bars


There is one thing that I make annually that really says CHRISTMAS to us and that's Cavity Finders. They also go by Hello Dolly bars, magic bars or 5 layer bars. But around here they are known as Cavity finders. The name should be pretty self explanatory but for those of you who don't get it let me explain. These bars are sweet, chewy, chocolaty goodness and if you have even the slightest dental imperfection you will know all about it after eating one of these bars. Is it a coincidence that we have our semi annual dentist cleaning appointment in January? I think not.

This recipe is NOT a Kitchen Witch creation. It is, however, simplicity and deliciousness in a 13x9 pan. My mom used to make these when I was a little girl. The recipe has been around forever - and regardless of what you call them, Cavity finders are Christmas baking at its finest, at least in this Kitchen Witches' eyes, and taste buds.

Cavity Finders
adapted from EAGLE brand Magic bars Recipe

1 stick unsalted butter
1 sleeve graham crackers, pulverized
1 can sweetened condensed milk
1 bag chocolate chips
1/2 bag coconut flakes
1 c chopped nuts, optional


Preheat oven to 350*.

In a 13x9 pan place stick of butter and put into hot oven to melt butter.


Crush graham crackers. I use my food processor set up with a grating blade. This produces even crumbs and is turbo fast. If you don't have a food processor put the whole crackers in a large zip top bag and smash away. This method is a great way to relieve holiday stress!

Pour cracker crumbs evenly over melted butter. Tamp down with the flat end of a glass to create an even crust.


Top the crust with sweetened condensed milk.


Top the milk layer with the chocolate chips.


Top the chocolate chips with the coconut flakes.


Top coconut flakes with chopped pecans. Press firmly into pan with palm of hand. This creates a nice tight cookie and makes slicing easier.


Bake for 25 min or until sides are golden brown and the milk is bubbling up in the center. Allow to cool for a full 24 hours before cutting. Yes, I'm serious. The 24 hr rest gives the chocolate time to solidify and the ingredients to meld into a cohesive bar. Your patience will be rewarded!

Related Posts with Thumbnails