Sunday, October 24, 2010

Satay Chicken with Peanut Sauce

Oh look, another recipe from Jenn at Jenn's Food Journey!! Jenn and I have become pretty good blogging friends - and she make some awesome food! I love that her recipes are usually quick for busy weeknights, have ingredients that I keep stocked in my pantry and always deliver on taste. I've told Jenn that if she keeps up these delicious recipes I'll have to rename my blog to "Andrea the Kitchen Witch cooks everything on Jenn's food Journey". She's good, people! If you haven't done so already, please take a look at her awesome blog. You and your taste buds will be happy you did!

When I made this recipe I had to adjust it based on what we had and our personal tastes. (WHAT?? The Witch not follow a recipe? Shocker, right?) And while my almost 4 yr old little Witch might be an adventurous eater, she still does NOT like spicy, so that had to be adjusted as well. I left the spicy stuff out of the dipping sauce knowing that the additional heat would not be welcomed by the little Witch. I decided to leave the Sriracha in the marinade, its heat was gentle and not overpowering and provided the perfect 'oomph' of heat that you need in a peanut sauce. If I had a more heat tolerant preschooler I would have added the Sriracha to the dipping sauce as well. Feel free to adjust to your families taste/spice levels.

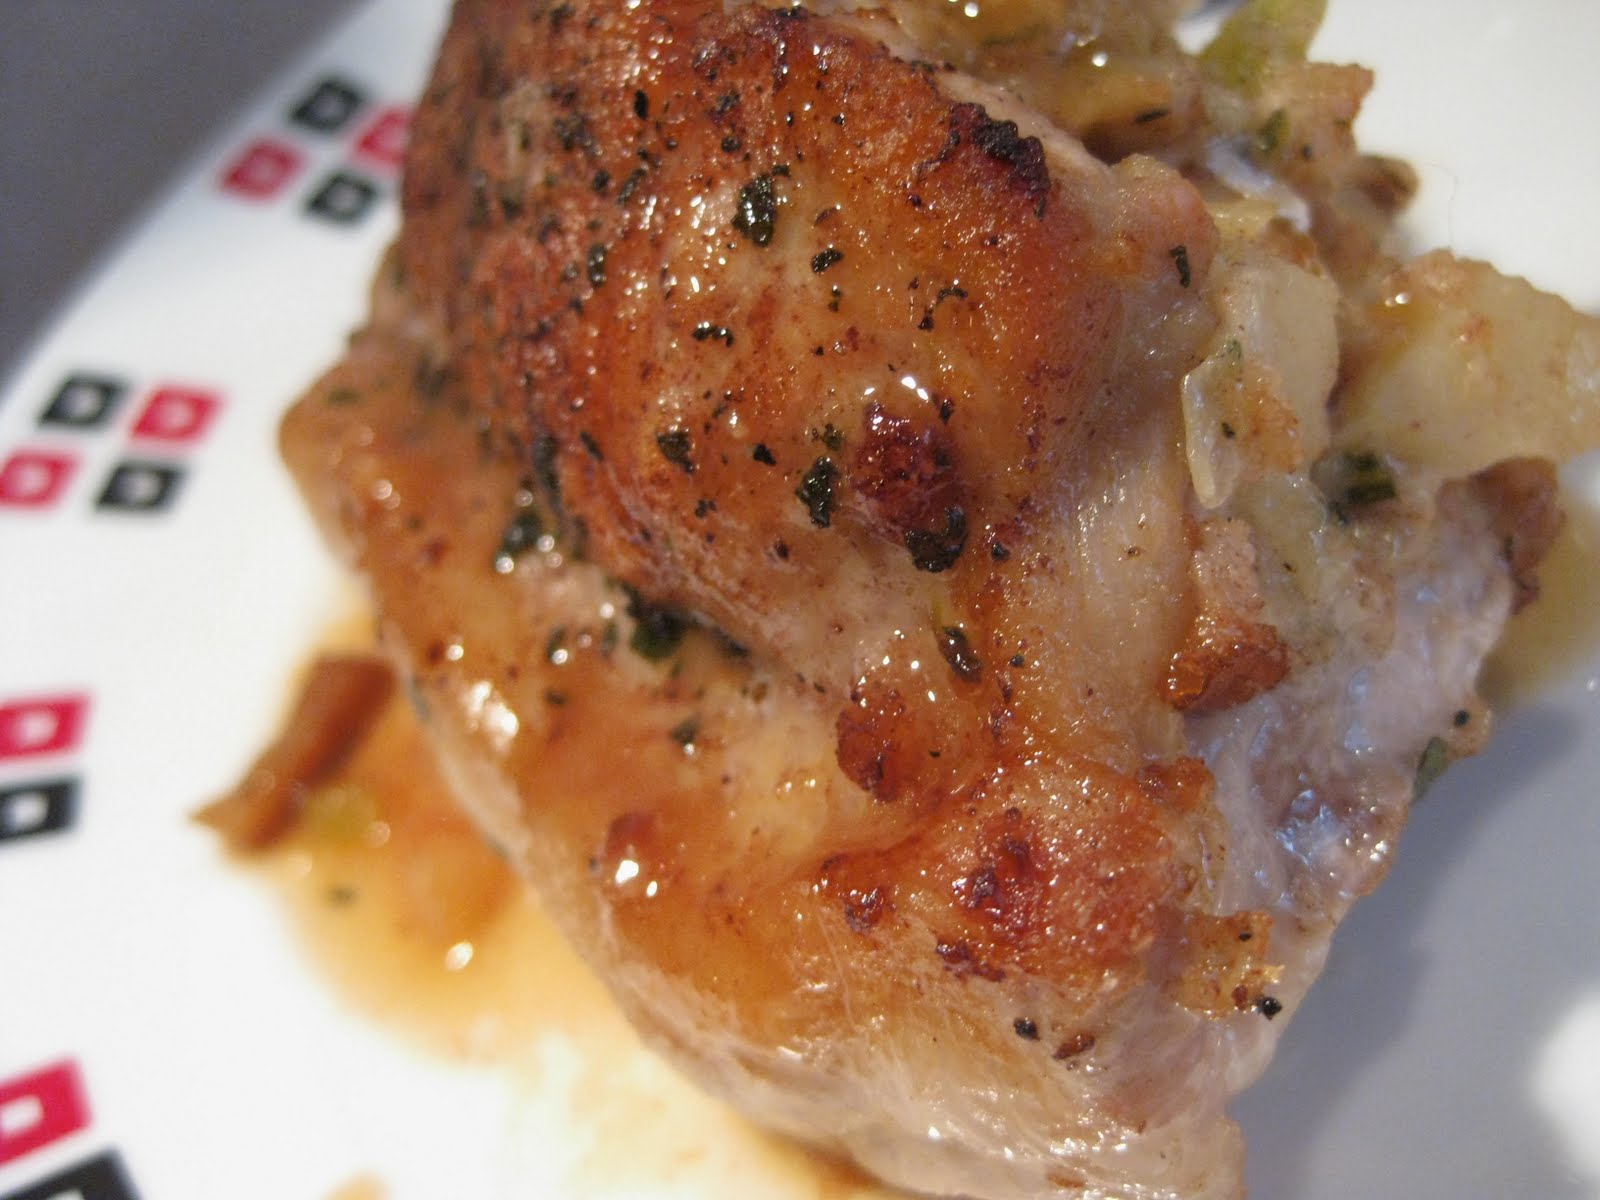
The chicken was moist, flavorful and succulent. The dipping sauce was rich, flavorful and addicting! I cooked the chicken indoors on my George Foreman grill. All in all the entire dish took less than 15 minutes to cook, not including the marinade time. Satay chicken with peanut sauce was a family pleasing, delicious meal that we'll be revisiting often! Thanks again Jenn for such a delicious recipe!!

Satay Chicken with Peanut Sauce
makes 4 serving
recipe adapted from Jenn's Food Journey
For the marinade:
4 chicken breasts, boneless & skinless
2 T peanut butter
juice of 1/2 lime
1 t Sriracha or other hot sauce
3 T soy sauce
1 clove garlic minced (garlic press)

For the sauce:
1/4 c peanut butter (creamy)
3 T soy sauce
juice of 1/2 lime
1/2 t paprika
1/4 c water

Mix the marinade ingredients together and stir until well combined. The peanut butter will make the mixture look grainy, that is OK. Pour over chicken breast in a zip top bag and allow to marinade for at least 30 minutes - The Kitchen Witch let hers marinate for 6 hours, it was delicious!

Cook chicken by which ever method you prefer, I used an indoor grill (George Foreman) however you can also use an outdoor grill. You can pan sautee this however you'll need to add oil to the pan to avoid sticking (the nutritional values do not include any additional cooking oil).

While chicken cooks make the sauce by mixing all the ingredients in a small sauce pan. Heat over medium high heat and bring to a boil. Sauce will thicken after a short boil, stir well to avoid burning. Cook about 1 minute and serve with chicken.


~*~NOTE: Nutritional info assumes that all of the peanut sauce will be consumed. We ended up having a lot of it left over, almost half. So depending on how much sauce you have the numbers provided could be substantially lower~*~

Nutrition Facts provided by SparkPeople recipe calculator
Amount Per Serving
Calories 368.8
Total Fat 10.9 g
Saturated Fat 1.8 g
Polyunsaturated Fat 2.7 g
Monounsaturated Fat 4.7 g
Cholesterol 136.9 mg
Sodium 1,356.0 mg
Potassium 656.3 mg
Total Carbohydrate 5.6 g
Dietary Fiber 1.2 g
Sugars 1.8 g
Protein 59.8 g

Saturday, October 23, 2010

Pumpkin Waffles

Fall is upon us and that means pumpkin time is here! If you read many blogs you'll know that everyone's been on the pumpkin band wagon. The Kitchen Witch is no exception. I can't get enough of those orange globes, they just scream fall and Halloween to me, both of which are amongst my very favorite things ever! Add in the cinnamon, ginger and nutmeg that go so well with winter squash and I'm a very happy Witch indeed.

What do you do when you wake up and its the first day that it feels like fall, finally AND you're a pumpkin fiend? You make pumpkin waffles, of course! A quick trip to Smitten Kitchen yielded a recipe that was indeed drool worthy: Pumpkin waffles, the perfect thing for a cold, cloudy perfectly fall day.

The recipe calls for whipping the egg whites and folding them into the batter. Yes, that's extra work but believe me, it's worth it. It really helps keep the waffles light, fluffy and crispy. Pumpkin is notorious for making a dense, moist product and you really do need this extra step to avoid those pitfalls. If you have a stand mixer simply start your egg whites whipping while you mix the other wet ingredients with the dry. By the time you're done with that the egg whites are done, too. So really, it doesn't take any extra time at all, I'm magickal like that!

This recipe makes a LOT of waffles. We ate about half a batch and I froze the rest. They reheated beautifully in the toaster from a frozen state. The little Witch really loved these and has been bugging me to make her more of them. Who am I to say no!

Pumpkin Waffles
makes 24 single 4 in waffles
recipe from Smitten Kitchen
2 1/2 c flour
1 1/4 t baking powder
1 t baking soda
1/2 t salt
2 t cinnamon, ground
1 t ginger, ground
1/8 t cloves, ground
2 c milk +juice of 1 lemon
OR 2 c buttermilk (in lieu of the milk and lemon)
6 T butter, melted (3/4 stick)
1 15 oz can pumpkin
1/3 c brown sugar
4 eggs, separated

Preheat oven to 250°F and preheat waffle iron. Sift together flour, brown sugar, baking powder and soda, salt, and spices. Whisk egg yolks in a large bowl with buttermilk, pumpkin, and butter until smooth. Whisk in dry ingredients just until combined.

See how lumpy it is? That's OK. The lumps will work themselves out, don't worry!

In a mixing bowl with a whisk attachment, whisk the egg whites until they hold soft peaks. Folk them gently into the waffle batter, until just combined.

Notice the streaks of egg whites? Again that's OK, it will all work out in the end. Please don't be tempted to over mix the batter, the lumps and streaks are what gives you the lightness you're looking for. Its Magick, folks!

Brush waffle iron lightly with oil and spoon batter (about 1/2 cups for each 4-inch Belgian waffles) into waffle iron, spreading quickly. Cook according to manufacturer’s instructions.


Transfer waffles to rack in oven to keep warm and crisp. Make more waffles in same manner.

Nutrition Facts

Pumpkin Waffles provided by SparkPeople recipe calculator
Amount Per Serving (1 waffle each)
Calories 109.9
Total Fat 4.1 g
Saturated Fat 2.2 g
Polyunsaturated Fat 0.3 g
Monounsaturated Fat 1.2 g
Cholesterol 44.0 mg
Sodium 138.0 mg
Potassium 101.8 mg
Total Carbohydrate 16.4 g
Dietary Fiber 0.8 g
Sugars 5.2 g
Protein 3.2 g

Thursday, October 21, 2010

Apple stuffed pork chops with pan sauce


Pork chops and apple sauce. Say it with me like Peter Brady, come on, you know you want to. Pork chops and apple sauce! Its a favorite flavor combination, and for good reason!

This recipe was a collaboration between myself and Jenn from Jenn's Food Journey. We were chatting the other day, discussing what was for dinner and between the 2 of use we came up with this modern interpretation on a stuffed pork chop and apples. I have to say this was a very successful endeavor, the pork was delicious, the stuffing was light and fruity and the sauce...oh my goodness the sauce! When you're working with a sauce Queen like Jenn, well you know you're gonna get a good sauce!

The sauce is a simple pan sauce, or reduction. By concentrating the pan juices you get all the delicious flavor from the pork, herbs and stuffing, then adding the wine, vinegar and stock, well it makes for an incredibly flavorful sauce. Sour from the vinegar which plays nicely off the sweet fruit stuffing and gently flavored pork. Spices like clove and cinnamon are absolutely perfect with pork. The sauce is highly concentrated and slightly salty, but don't let that scare you. The sauce is intended to be drizzled over the meat, allowing a small bit of its golden goodness to flavor each bite. It is not a gravy - not intended to be poured over everything on the plate. The sauce is the perfect compliment to the apple stuffed chops. I can't wait to make this one again!

Apple stuffed pork chops with pan sauce
makes 4 chops
1 apple, peeled and diced fine
1 shallot, diced fine
1 clove garlic minced
6 leaves of sage minced fine, divided
1 rib celery, finely diced
2 T golden raisins soaked in hot water
1/2 c bread crumbs (I used fresh from stale bread but the canned kind should work)
4 center cut 1.5 inch thick pork chops
2 T white wine
1/2 c chicken stock
1 T cider vinegar
1 t apple quintessence (optional, can use cider or apple juice/cider concentrate )
1/2 t cinnamon, divided
pinch cloves
kosher salt & pepper
2 T olive oil

Preheat oven to 350F

Heat a small sautee pan over medium high heat. Add 1 T of olive oil, the diced shallot, celery and garlic. Cook until the edges start to brown (about 5-10 minutes).


In a smallish bowl add the bread crumbs, apples, drained raisins and cooked shallot mixture. Add 1/3 of the chopped sage and a pinch of salt and dash of pepper. Mix well and allow to cool while you prepare the pork chops.

In a small bowl mix 1/3 of the chopped sage about 1 t kosher salt and some black pepper along with 1/4 t cinnamon and a pinch of cloves. Mix well so you have an herbed salt mixture.

Cut the pork chops down the center leaving the fat side attached. This is referred to as butterflying the chops. Once all chops are cut open take a handful of the stuffing and press it into the chop making as equally thick of a layer as possible.


Heat a large oven safe non reactive (stainless steel for example, don't use cast iron here unless its enamel coated) over medium high heat and add the remaining oil to the pan.


Equally distribute the herbed salt over the chops and rub it in on both sides. Once the oil is hot add the chops and cook until deeply browned on one side. Flip chops and transfer pan to the hot oven and allow to finish cooking in the oven. Cook until an internal temperature of 160F is reached (about 10-15 minutes).


Once chops are cooked remove from the pan and allow to rest while the pan sauce is prepared. Add all the liquids (stock, wine, apple quintessence or cider concentrate (OPTIONAL) and vinegar) and the remaining herbs and cinnamon to the pan. Heat the pan over high heat, scraping bottom of pan to remove any cooked on bits. Reduce sauce by half and serve with pork.


Nutrition Facts provided by SparkPeople recipe calculator
Amount Per Serving including sauce
Calories 550.1
Total Fat 21.5 g
Saturated Fat 7.9 g
Polyunsaturated Fat 1.9 g
Monounsaturated Fat 9.3 g
Cholesterol 182.5 mg
Sodium 882.6 mg
Potassium 1,033.1 mg
Total Carbohydrate 20.7 g
Dietary Fiber 1.8 g
Sugars 6.1 g
Protein 65.7 g

Saturday, October 2, 2010

Dilly Beans

I first read about dilly beans in an old Blue Ball canning cookbook. Immediately I thought it was something that both my husband and sister would adore: crispy, salty, vinegary beans spiced with cayenne, garlic and dill. These are actually the very first thing that I ever canned! The beans came from the farmers market, along with the dill. Nervously I boiled my cans, packed the jars, filled with brine, carefully placed the lids on top & set them into the water bath. After 15 minutes of boiling I removed them. The sweet sounds of POPing can lids soon filled the air and the Witch was happy. I did it!! I canned something! But how are they? We'd have to wait 2 long weeks to find out.

When we finally cracked open a jar of dilly beans, the tight seal reassured us that I had done it right. Now as I've said before, I'm not a pickled things fan so I didn't try one, but the husband did. And he loved them, just as I had thought he would. Hooray, canning success!

This year I decided to use cider vinegar instead of traditional white distilled. I got the idea from the pickle recipe I used, a generations old recipe that used cider vinegar. The milder flavor of the cider helped tone down the sharp edge of the bean. I also increased the cayenne pepper this year based on feedback from the family - they like them spicy. And they really like the cider vinegar, as well.


Dilly Beans

makes 1 quart size jar, easily increased based upon number of beans you have
1 quart size mason jar, cleaned and sanitized
enough green and or wax beans to fill the jar, about 1/2 lb
1 T pickling/canning salt
2-4 heads dill
2 cloves garlic
1/4 t cayenne pepper
Brine (makes about 1.5 jars worth):
1 c cider vinegar
4 c water

Clean and sterilize the jar. Pack trimmed beans into the jar with garlic and dill. Pour salt over top.

Bring the vinegar and water to a boil. Once boiling pour into jar, leaving 1/4 inch headroom. Cap with a new sealing lid and a tighten the screw top. Process in a water bath for 10 min (adjusted for altitude 15 min at 6,000 ft). Remove from water bath and allow to cool for 24 hours. Test lid for seal, it shouldn't pop, it should be indented and tight. If its not sealed refrigerate and use with in 2 months.

Allow to cure for a minimum of 2 weeks before enjoying.


Nutrition Facts provided by SparkPeople recipe calculator
16 servings per jar, amount Per Serving
Calories 7.5
Total Fat 0.0 g
Saturated Fat 0.0 g
Polyunsaturated Fat 0.0 g
Monounsaturated Fat 0.0 g
Cholesterol 0.0 mg
Sodium 437.2 mg
Potassium 48.0 mg
Total Carbohydrate 2.1 g
Dietary Fiber 0.5 g
Sugars 0.9 g
Protein 0.3 g


~*~Don't forget to enter my drawing for a FREE $45 gift certificate to any CSN store!~*~

Friday, October 1, 2010

Apple galette with cinnamon cream cheese

Apple season is finally here, hooray!! Apples are my all time favorite fruit. So when it came time to utilize them I of course went for a galette. The flaky pastry dough is easy to work with and produces reliable, delicious results. I also appreciate the freedom a galette offers you, it doesn't have to be perfectly round, just roll it out, fill it and bring the edges up. The less perfect it is, the better.

Adding the cream cheese layer adds a rich, cheesecake like flavor. I added cinnamon to the cream cheese as well as the apple slices themselves, which really provided a deep cinnamon flavor. Using apple quintessence, which I won from Sarah at All our Fingers in the Pie, and a bit of powdered sugar made a perfect glaze for the top, preventing the apples from drying out as well as making it glossy and pretty.

~*~Apple quintessence is a highly concentrated apple syrup. King Arthur Flour has a similar ingredient called boiled cider. If you don't have either I'd suggest using apple juice (100% juice) concentrate. Honey would work also, you won't get the apple flavor but it'll make the top shiny which is the goal of the glaze. It is mixed and heated in a cereal size bowl. Hope that helps!~*~

Apple galette with cinnamon cream cheese
makes 8 slices
Galette dough:
1 stick butter cut into cubes
1.5 c flour
1 t kosher salt
1/4 c sour cream
2 T lemon juice
1/4 c ice cold water

Filling:
8 oz cream cheese at room temp
1 t cinnamon divided
1/4 c sugar, divided
1 T vanilla
1 t corn starch
4 granny smith or pink lady apples, peeled and sliced thin

Glaze:
1/2 c powdered sugar
1 t apple quintessence
1T + 1t water
1 egg yolk and a splash of water for a wash
dusting of granulated sugar for the crust

Make pastry dough by putting the flour and diced butter in a bowl and freezing for 30 minutes. Remove from freezer and place in the work bowl of a food processor.

Pulse 10 times in 1 second bursts.

Mix the wet ingredients together and add to the dry. Pulse 7 to 10 more times, 1 second bursts.

Pour the dough out onto plastic wrap and form into a disc. Cover with plastic and refrigerate for 1 hour minimum.

Roll dough out to a large circle, transfer to a parchment paper lined baking sheet.

Mix cream cheese, 2 T sugar, 1/2 t cinnamon and vanilla together until very smooth.
Spread on top of dough leaving 2-3 inches on the edges to form the crust

Toss apples in remaining sugar, cinnamon and corn starch. Top with apples in a decorative spiral pattern. Fold galette edges up around apples.


Paint edges of dough with egg yolk and water wash and sprinkle with sugar.
Bake at 350F for 30 min or until golden brown & bubbly.

Make glaze, mix glaze ingredients together in a microwave safe bowl and cook for 30 seconds, stir well. Cook in 5 second pulses, stirring after each heat cycle, until the glaze turns transparent and its difficult to cook a full 5 seconds with out it overflowing the bowl.


Nutrition Facts provided by SparkPeople recipe calculator
Amount Per Serving
Calories 394.8
Total Fat 23.9 g
Saturated Fat 14.6 g
Polyunsaturated Fat 1.1 g
Monounsaturated Fat 6.8 g
Cholesterol 91.0 mg
Sodium 91.7 mg
Potassium 158.6 mg
Total Carbohydrate 43.0 g
Dietary Fiber 2.6 g
Sugars 14.8 g
Protein 5.0 g

~*~Don't forget to enter my drawing for a FREE $45 gift certificate to any CSN store!~*~
Related Posts with Thumbnails