Showing posts with label cheese. Show all posts

Thursday, August 28, 2014

Breakfast Casserole

Breakfast Casserole 
1 lb meat your choice - bulk sausage, browned and crumbled, bacon cooked crispy and crumbled or ham cut into bit size pieces
10 eggs
3 c milk
8 oz shredded cheese (swiss, cheddar, casserole blend, pepper jack, etc)
veggies of choice (green onion, asparagus, sun dried tomatoes, chiles, etc)
8 slices of sandwich bread cut into cubes
1/2 t kosher salt
1/4 t dry mustard

spray a 13x9 pan with pam first.
Mix eggs, salt, mustard and milk together until smooth
cube bread, mix with the veggies, meat and cheese and pour into the greased pan
add the milk egg mixture
cover and allow to sit in fridge for at least 8 hours, overnight is better.
bake at 350F about 45 minutes until top is golden browned and the center is set.  Casserole will be very puffed like a souffle when it comes out of the oven, it will deflate as it cools.

Monday, April 9, 2012

Tamales: Pepper Jack and roasted green chiles

For Spring Break the Witch and family went on a little trip to Santa Fe, NM.  The weather was beautiful.  The scenery was stunning.  The food, oh my the food!!  It was amazing, delicious, and abundant.  I would love to have taken home a 55 gallon drum of green chili alas it wouldn't fit in my car.   Before embarking upon our voyage I asked the assistance of a friend who grew up in the Santa Fe area for her list of hot spots not to be missed while in the Land of Enchantment.  Arielle suggested that I stop by Alicia's tortilleria and get myself  'some of the best tortillas in all of New Mexico'.  Not one to pass by the 'best of' anything, I quickly obliged.  The Kitchen Witch left the great state of New Mexico with 3 lbs of corn tortillas, a dozen flour tortillas and 2 lbs of prepared masa harina -  all for $8.75!!  

Today the Kitchen Witch is going to do a photo tutorial on tamale assembly.  I forgot to get a photo of the finished tamales, we were too hungry and excited to try them to remember photography, so please forgive me.  You can find prepared masa harina in most Mexican grocers for a very affordable price, or you can make your own.  Masa Harina is available in the flour section of your grocery store.  Just make sure you get masa "For TAMALES" (there is a masa for tortillas and the grind/texture is different).   These tamales were meat free but feel free to fill your tamales with what ever you like.  The cheese/green chile mix was delicious and light.  I can't wait to make these again.  

Oh and Arielle, you were SO right!  Alicia's tortilleria is amazing, their tortillas are like nothing I've ever had and I wish I had quadrupled my order.  Looks like I need to go back to Santa Fe soon to replenish my supply!

Tamales
makes about 16 tamales
2 lbs prepared masa harina 
corn husks, rehydrated (soak husks in hot water for 1 hour minimum before making tamales.  The longer they soak the easier they are to work with.  Rip one or 2 small husks into strips for tying the tamales) 
3/4 lb pepper jack cheese shredded
4 green chiles roasted, peeled and diced

Begin by gathering all your ingredients and prepping your workstation.  I like to lay a few paper towels down for the wet corn husks to rest on while spreading the masa.

Take a large corn husk and unfold any edges.  Place it with the long side facing you and spread about 3T masa on the husk, making a layer about 1/8 thick, thick enough so the ridges of the corn husk don't show through the masa.  Spread masa to the end of the large end, leaving about 1 inch on the sides of the husk. (the husk shown was a HUGE one, I didn't spread the masa to the ends here cause it would have been a big tamale otherwise!)

Place a small amount of cheese then green chiles in the middle of the masa.

Fold the husk over itself, so the masa ends touch each other, sealing the filling.  Gently press down to release air trapped in the tamale.  

  Fold the end up towards the open end of the tamale and wrap the sides of the husk around the tamale, tucking the end into the husk fold.  If your husk is small or rips while folding, take another husk and wrap it around your torn one and continue.  No one will ever know!

Using a small piece of husk that's been torn into strips, tie the tamale to hold it shut.


Stack tamales in a steamer for cooking.  Repeat until you're out of ingredients.

Steam tamales in a steamer for 45-60 minutes.  The masa will firm up as it steams.  Allow tamales to cool a little before removing the corn husk and enjoying!  Tamales also freeze wonderfully.  Simply freeze tamales after wrapping, before steaming them.  They will last up to 3 mo in the freezer if kept air tight.  Steam from frozen, allowing 60-75 min for cooking.

Saturday, April 7, 2012

Strawberry Deliciousness

Strawberry deliciousness is the new dessert of Spring 2012.  Don't believe me?  Well it's got fresh berries, whipped cream, cream cheese and angel food cake.  Believe me now??   You should cause it's good people.  Really good.  Like push your Mom down to get the last slice good.  I know this because last weekend the Witch and family were at a dinner party at a good friends home and dessert was this:  Strawberry Deliciousness, and instantly, as soon as the 13x9 pan entered the house 6 adults and 3 children, all swarmed in on the bearer of said dessert, oohing and aahing and asking when dinner was done so we could eat the deliciousness.  After dining on our delicious meal everyone was ready for dessert.

As the Deliciousness was being doled out I got the recipe from my friend who brought it.  The original recipe used Cool Whip in lieu of whipping cream.  The Witch doesn't use Cool Whip normally and ok, I'll be honest, I forgot to get a tub while at the store.  Imagine my delight when I remembered that I had heavy whipping cream in the fridge.  Problem solved with out a return trip to the store.  Yay!  The original also calls for strawberry syrup or ice cream topping to be poured over the berries.  Well, again my brain forgot that at the store, so I decided to macerate my berries in sugar and allow them to make their own syrup.  Easy and no HFCS!  I did go with a store bought angel food cake, however if you have a favorite recipe feel free to use it.  Pound cake would be a great alternative to angel food cake, too.

The rest of the dessert is simple assembly, cake, cream cheese whipped cream and berries.  The flavor is that of a cheesecake topped with berries, but not as heavy.  This dessert is rich and yet light all at once.  It is dangerous, too, cause you really could eat the whole pan yourself, it's that good!!  Strawberry Deliciousness really IS the dessert of Spring 2012!  I hope you enjoy it!

Strawberry Deliciousness
makes 12 servings 
Source: Inspired by Gail
1 lb strawberries, cleaned, hulled and diced
1 1/4 c sugar, divided
2 (8 oz ea) packs cream cheese
1 cup heavy whipping cream
1 angel food cake

Begin by washing, hulling and slicing berries.  Put into a medium bowl and sprinkle 1/4 c sugar over berries.  Stir well and cover with plastic.  Allow berries to macerate (sit in the sugar) at room temperature for 1 hour.  This will draw out the berries juices and make it's own syrup.

Once the berries have sat for 1 hr you'll notice there's a lot more liquid in the bowl than you started with.  Using a potato masher smash berries.  You'll want to squish about half of the berries, releasing more of the juices, leaving some in larger chunks for texture as well as visual interest.

Using a mixer cream the cream cheese and remaining 1 cup of sugar.  Scrape down sides often and mix until cream cheese is lighter and fluffy.  Remove from mixer and reserve.

Whip the whipping cream with your mixer.  Once you have stiff peaks change to the blade beater (if using a stand mixer) and add the cream cheese mix to the whipped cream in thirds.

Get a 13x9 pan.  Cut the angel food cake into chunks about (1 inch) and put in the bottom of the 13x9 pan.  Using your hand press the cake into the bottom, compressing it somewhat.  Spread the cream cheese/whipped cream mix on top of the cake.  Pour berries and syrup over top of the cheese mix.  Cover and refrigerate until serving.


Nutrition Facts calculated at SparkPeople Recipe Calculator Amount Per Serving Calories 385.9 Total Fat 17.2 g Saturated Fat 10.6 g Polyunsaturated Fat 0.8 g Monounsaturated Fat 4.8 g Cholesterol 55.2 mg Sodium 368.8 mg Potassium 182.7 mg Total Carbohydrate 53.9 g Dietary Fiber 1.0 g Sugars 38.0 g Protein 6.3 g

Thursday, January 26, 2012

Ricotta cheese


Cheese making has been a goal of the Kitchen Witch for as long as she cares to remember.  Maybe it was reading Little House books, or just the foodie that's always been there, but even as a young teen the Witch has wanted to make her own cheese.  That's normal, right?  Don't you all dream about making your own cheese?  No?  Well...pretend like you do, 'k?  Do you need to make your own ricotta?  No, you don't.  Should you make your own ricotta?  Yes!  Yes you should indeed !   It's easy, quick and really doesn't require any specialty equipment or ingredients.   4 ingredients is all it takes to make the smoothest, richest, silkiest ricotta cheese you've ever been lucky enough to try.

If you aren't a ricotta fan, don't despair.  This ricotta isn't at all like the grainy rubbery ricotta in the tubs at the grocery store.  There is some grain to it, but it's not at all rubbery and if you aren't a fan of the grain, simply drain off more of the whey until you get a cheese that you're happy with.   Other than the noticeable difference in texture there's a taste difference.  Store bought ricotta is bland and rather flavorless to me.  Between the lack of flavor and the nasty texture it's defiantly not high on my like list.  Homemade ricotta, on the other hand, is sweet from the cream and milk, salty and slightly tangy.  It's delicious in lasagna as well as dessert.

Ricotta Cheese
Source:  Ina Garten
Makes about 1 cup of cheese (approx. 8 servings) ~*~easily doubled or tripled~*~

2 cups whole milk (2% works fine too)
1 cup heavy whipping cream
heavy 1/2 t kosher salt
1 1/2 T white wine vinegar

In a stainless steel pan add the milk, cream and salt.  Bring to a full boil over medium high heat, stirring to avoid scortch spots.  Once liquid is boiling turn the heat off and add the vinegar.  Give it one good stir to incorporate the vinegar and allow to sit for at least 1 minute to form the curd.

While the curd is forming dampen some cheesecloth.   Lay a double layer of cheesecloth in a fine mesh sieve placed over a bowl to catch the whey.  Pour the cheese curds and whey into the cheesecloth and allow to drain undisturbed for about 20-30 minutes.  The longer the cheese sits the finer and less distinct the grain becomes.  Transfer the ricotta to a air tight bowl and use anywhere you'd normally use ricotta like lasagna or stuffed pasta recipes.   Stores in the refrigerator for up to 7 days.


Cheese curds set and ready to be seperated

Whey draining from curds
Curds after draining for 10 minutes
 ~*~Kitchen Witch Tip:  No cheesecloth?  No problem!  Simply drain your curds through a clean wash cloth or kitchen towel.  Paper towels absorb too much and don't allow the whey to drain, save those for something else and use cloth to strain cheese.~*~


Nutrition Facts calculated at SparkPeople recipe calculator Amount Per Serving Calories 133.5 Total Fat 12.2 g Saturated Fat 7.6 g Polyunsaturated Fat 0.5 g Monounsaturated Fat 3.5 g Cholesterol 45.6 mg Sodium 156.3 mg Potassium 125.1 mg Total Carbohydrate 3.8 g Dietary Fiber 0.0 g Sugars 3.0 g Protein 2.6 g

Thursday, November 10, 2011

Stuffed Pumpkin with Cheese, Bacon and Chipotles

Don't forget to enter my giveaway for a FREE copy of A Cook's book for Cooks! Click HERE to enter!

Halloween may be over but that's no reason to say good bye to the beloved pumpkin. The orange squash is king of Autumn and until December 21, it's still Autumn, so bring on the pumpkin recipes! Today I happily share with you a pumpkin stuffed with cheese, bacon and chipotle chilies. Holy cow, this thing is good! And rich! And delicious!! This gorgeous dish was found at the Homesick Texan's site. I'm not from Texas (I'm from Michigan!) but this dish makes me homesick for Texas as well!!

The stuffing in this pumpkin is filled with all sorts of deliciousness: French bread cubes, Gruyere and white cheddar cheeses, thick cut bacon and spicy smoky chipotles. A touch of garlic, cumin and cream crown the already rich and flavorful filling. After a long 2 hour baking time the pumpkin is tender and easily scrapes out of it's shell. The sweet and yet bland squash play perfectly with the spicy and rich filling.

Stuffed pumpkin makes a great lunch on its own or would be perfect as a side dish. It'd also be very welcome on the Thanksgiving table. Imagine if you will, the beautiful turkey, golden brown and fragrant, the bowl of red glistening cranberry sauce, fluffy white mashed potatoes, rich brown gravy and this, amazing orange whole baked pumpkin stuffed with cheesy spicy goodness. It's truly a vision of delicious loveliness!


Stuffed Pumpkin with Cheese, Bacon and Chipotles
Source: Homesick Texan
Makes: 4 servings

One 3-to-4 pound pie pumpkin
Salt and black pepper to taste
4 ounces French bread, cut into 1/2-inch cubes
1/4 pound Gruyere, shredded (1 cup)
1/4 pound white cheddar, shredded (1 cup)
4 cloves garlic, minced
1 or 2 chipotle chiles en adobo, diced (depending on how fiery you want it)
1/4 pound cooked bacon, crumbled
1/4 teaspoon ground cumin
Small pinch of nutmeg
1/2 cup heavy cream or half-and-half

Arrange a rack in the center of the oven and preheat the oven to 350 degrees. Line a 8x8 pan or baking sheet with foil or parchment paper.

With a sharp knife, cut a circle around the pumpkin stem about 1 inch away from the stem. Remove the top and clean out the seeds and stringy bits from inside the pumpkin. (You can save the seeds for roasting, if you like.) Lightly salt and pepper the inside of the pumpkin.

Toss together the bread cubes, shredded Gruyere, shredded cheddar, garlic, diced chipotle chiles and cooked bacon, and stuff into the pumpkin. Stir the cumin and nutmeg into the cream, adding a bit of salt and black pepper to taste. Pour cream mixture into pumpkin over bread and cheese.

Place the top back on the pumpkin, and place the pumpkin into the baking pan. Bake for 2 hours or until filling is brown and bubbling.

To serve, remove the top and spoon out portions of the filling along with bits of the cooked pumpkin. You can either leave it in the pan, or by using the foil or parchment paper, you can carefully lift it out of the pan and place it on a platter. Serve warm.


Nutrition Facts calculated at SparkPeople recipe calculator
Amount Per Serving
Calories 497.3
Total Fat 30.4 g
Saturated Fat 18.7 g
Polyunsaturated Fat 0.8 g
Monounsaturated Fat 5.4 g
Cholesterol 101.9 mg
Sodium 1,691.2 mg
Potassium 1,004.7 mg
Total Carbohydrate 37.5 g
Dietary Fiber 4.9 g
Sugars 4.2 g
Protein 21.9 g

Tuesday, November 8, 2011

Pumpkin Whoopie Pies

On a chilly fall afternoon nothing smells or feels quite as homey as a batch of pumpkin baked goods in the oven. That's what the Witch was thinking when she went blog surfing to find a new and different pumpkin recipe to make. Pumpkin bread, pumpkin muffins, pumpkin bars: been there, done that. I wanted something different, not seen before in the Kitchen Witches' kitchen. That's when I went to the guru of all things pumpkin, Annie of Annie's Eats!! Annie is a certified pumpkin lover and I knew that if I was looking for baked delicious pumpkin goods Annie's site was the place to be.

I was right! After browsing her pumpkin collection I stumbled upon pumpkin whoopie pies. I'd seen these on her site before. Heck, I had bookmarked them on my old computer, but it died before I could make them. Now was the time!! The Kitchen Witch has never made whoopie pies before so I had no point of reference to go by other than what I knew about the pies; soft, fluffy cake cookies with a creamy filling. Annie's recipe provided both of those things. The pumpkin cake is soft and tender like most pumpkin baked goods are, delicatly flavored with spices and just sweet enough. The filling is the amazing, cream cheese maple icing!! Seriously, this is the best and easiest cream cheese icing I've ever attempted.

The whoopie pies come together quickly; the batter is scooped onto sheet trays with a 1.5T scooper and after a 12 minute bake they're done. After mixing up the delicious icing in the stand mixer I transferred it to a large plastic bag which I cut the end off one corner to make a piping bag. A quick swirl of filling and the pies are finished with a topping cake. Whoopie pies have captured our hearts and taste buds, so much so that the Husband asked for these as his birthday cake. I take that as recipe success anyday! Thanks Annie for the great recipe, we love it!

Pumpkin Whoopie Pies
Source: Annie's Eats
Makes: 32 pies

For the pumpkin cookies:
3 cups all-purpose flour
1 tsp. salt
1 tsp. baking soda
1 tsp. baking powder
2 tbsp. cinnamon
1 tsp. ground ginger
½ tsp. ground nutmeg
1 cup granulated sugar
1 cup dark brown sugar, firmly packed
1 cup canola oil
3 cups chilled pumpkin puree
2 large eggs
1 tsp. vanilla extract

For the maple cream cheese filling:
3 cups powdered sugar
½ cup unsalted butter, at room temperature
8 oz. cream cheese, at room temperature
3 tbsp. maple syrup
1 tsp. vanilla extract

Directions:
To make the pumpkin cookies, preheat the oven to 350° F. Line two baking sheets with parchment paper. In a large bowl, whisk together the flour, salt, baking soda, baking powder and spices. Set aside. In a separate bowl, whisk sugars and oil together. Add the pumpkin puree and whisk to combine thoroughly. Add the eggs and vanilla and whisk until combined. Sprinkle the flour mixture over the pumpkin mixture and whisk until completely combined.

Use a small ice cream scoop with a release mechanism to drop the dough onto the prepared baking sheets (about 1.5-2 tablespoons.), about 1 inch apart. Bake for 10-12 minutes, until the cookies are just starting to crack on top and a toothpick inserted into the center of a cookie comes out clean. Remove from the oven and let the cookies cool on the pan for about 10 minutes. Transfer to a wire rack to cool completely. Repeat with remaining dough.

To make the filling, in the bowl of an electric mixer fitted with the paddle attachment beat the butter until smooth with no visible lumps. Add the cream cheese and beat until combined. Add the powdered sugar, maple syrup and vanilla and beat until smooth. Be careful not to overbeat the filling or it will lose structure.

To assemble, turn half of the cooled cookies upside down. Pipe filling onto the flat side of the overturned cookies. Place another cookie, flat side down, on top of the filling. Press down slightly so that the filling spreads to the edges of the cookie. Repeat until all the cookies are used. Refrigerate for at least 30 minutes to firm before serving.


Nutrition Facts calculated by SparkPeople recipe calculator
Amount Per Serving
Calories 262.2
Total Fat 12.6 g
Saturated Fat 4.0 g
Polyunsaturated Fat 2.3 g
Monounsaturated Fat 5.7 g
Cholesterol 27.1 mg
Sodium 210.8 mg
Potassium 109.0 mg
Total Carbohydrate 38.4 g
Dietary Fiber 0.7 g
Sugars 27.8 g
Protein 2.3 g

Tuesday, August 23, 2011

Roasted corn and jalapeno cheddar polenta

Polenta is like the red head step child of the side dish world. Most people don't even know what polenta is here in the US. Its only when its referred to as grits, as most southerns know it as, that it gets any recognition. And, unfortunately, the recognition isn't that warm or welcome. Why, I wondered, are people so frightened of polenta. Is it the name? Do people just not know what it is? Could it be the texture? Could it be that maybe they've just never had good polenta? My best guess is a combination of all the above. I hope today that I can demystify polenta and introduce some of you to a new and tasty side dish.

Polenta is corn meal that's been slow cooked to rehydrate it. As mentioned it is known as grits in the south. But please, don't let the name grits turn you off. Yes there is a texture to polenta. However if it's cooked properly it won't be gritty or rough, rather the corn meal softens and becomes al dente and delicious. It has a great corn flavor and stands up well to rich and hearty dishes. There are different grinds to polenta, from instant (not recommended) to coarse grind super slow cooking ones, the choice is yours. Most supermarkets will have 'quick cooking' polenta available and the Kitchen Witch feels that this is a great place to start. After you've made it and decide you love its wholesome corny goodness then please try the coarser grinds, I hear they're loads tastier. I have a bag of Bob's Red Mill coarse grind polenta in the pantry and can't wait to try it! The quick cooking variety will take about 20 minutes to cook up into a creamy corny pudding. What you add to it to flavor it is pretty much endless!

When I created this side dish it was to accompny green chili pork stew. I was looking for something that would go well with the stews liquidy part and what pairs better than corn? I had an ear of corn in the fridge which I roasted under the broiler - you could of course do this over your grill - knowing that the sweet corn would add bursts of flavor as well as a roasted smokiness. Jalapenos seemed natural, they go well with corn as well as the green chili. Onions & garlic add the background flavors to make it more dimensional and the cheese adds the final layer of deliciousness. I left most of the seeds and veins in the jalapeno and honestly it was NOT hot at all. I could have used another 2 peppers before any heat was felt. Use your discression on how hot you want it for your family. I served this polenta in its creamy puddling like form but polenta is the master of make overs! If creamy pudding isn't your thing, no worries, simply pour your polenta into a sheet pan lined with plastic wrap and allow to cool. Once cooled you can slice your now firmed up polenta into any shape you desire and pan fry it in a bit of oil until its golden browned, flip and brown on second side. The exterior has a crispy brown exterior and the inside is a smooth creamy treat. This is a great way to use up left over polenta and its awesome with eggs.

I hope you try polenta in the future and embrace it as a quality side dish that the whole family can enjoy! Play around with the ingredients and add ins, making each batch as individual as you are. Happy cooking!


Roasted corn and jalapeno cheddar polenta
makes 4 servings
1 cup polenta (coarse corn grits)
3 cups chicken broth
1 ear of corn roasted and kernals cut from cob
1/2 onion diced
1 jalapeno diced
2 cloves garlic minced
1/2 c cheddar cheese
2 T butter
1 t kosher salt
black pepper to taste

Begin by roasting the corn in the oven. Set your oven rack on the highest setting and put it on broil. Place the shucked corn cob on the rack under the broiler. Roast until you have a few blackened kernels, rotate and roast evenly all over cob. Don't be alarmed if you hear popping, this is normal if your corn is very fresh. Its the liquid in the kernel expanding as it heats and essentially 'popping'. The popping is usually my indicator that I need to check the corn. Once roasted remove from oven and allow to cool, then cut the kernels off the cob once cool enough to handle.

In a sauce pan heat the butter over medium high heat. Add onions and sautee for 2 minutes. Add the garlic and diced jalapeno, sautee for 5 min longer until the garlic starts to toast slightly and the onions have softened. Add the roasted corn kernels and stir well to coat in the fat.

Add the chicken stock to the veggies in the pan. Using a whisk slowly whisk in the polenta. Whisk until all polenta is incorporated then switch to a wooden spoon. Bring the polenta up to a boil then reduce the heat to low. Cover polenta and cook for 15-20 minutes (or to instructions on package) stirring often to avoid scorch spots and lumps. Once polenta has cooled remove from heat and stir in the cheddar cheese, serve and enjoy.


Nutrition Facts provided by SparkPeople recipe calculator
Amount Per Serving
Calories 296.9
Total Fat 12.0 g
Saturated Fat 6.9 g
Polyunsaturated Fat 1.0 g
Monounsaturated Fat 3.5 g
Cholesterol 30.4 mg
Sodium 1,685.6 mg
Potassium 183.3 mg
Total Carbohydrate 38.5 g
Dietary Fiber 1.6 g
Sugars 1.7 g
Protein 9.0

Saturday, August 20, 2011

Summer Squash Gratin

The Witch has some SERIOUS over achievers in her garden right now. Yes folks, its that time of year again, ZUCCHINI and CROOKED NECK SQUASH is here!! Yay says the Witch as she pulls her first veggies out of the garden. Hooray for my beloved green zucchini and tasty yellow crooked necks! My mind swims with ideas on how to prepare these treats from the garden. But after a few weeks the song changes from YAY zucchini! to UGH! more freaking zucchini?? What the hell am I supposed to do with all of these???? After your friends and family have taken on their fair share you're still left with TONS of green and yellow fruits and the usual prep method of planks sauteed in olive oil until golden brown just isn't seeming as delicious as it did 2 weeks ago.

So after some serious squash overload I went to my favorite go to place for recipes, blogs! While browsing I saw that Siri over at Siriously Delicious had posted one for Summer Squash and potato gratin. Gratin you say? Hmmm...I like cheese. Yes, gratin it is! Cheese is a key component to gratin. A quick trip through the fridge shows Emmental Swiss cheese, something the Little Witch picked out (she has great taste! What can I say?), a small chunk of mozzarella and as always Asiago. Those 3 cheeses sound pretty darn good together, the swiss for a robust cheese flavor, the mozz for the melting factor and Asiago has a pungent flavor that's just delicious.

When seasoning the dish I kept it simple, salt, pepper, garlic and onion powder. Powder?? Yes, powder. I used garlic and onion powder fairly often, in specific dishes, mostly because I like the way they perform in some ways. In dips, sauces and dressings the powders are great because you don't get a sharp bite that you can get from fresh garlic and onions. I like it in marinades too, as the garlic powder won't burn like fresh garlic will. The main reason you'll see me use onion powder or dehydrated onions in place of fresh is because my Witchy Sissy has an onion allergy, poor thing, and can't have fresh onions. Powdered or dehydrated is fine, however. So when I know she'll be eating a dish I'll use the powdered stuff. In the case of this gratin I used it for 2 reasons: I wanted a light flavor of onion, this is a squash gratin, not an onion one and I feared a fresh onion would overpower the squashs' delicate flavor. And 2, my Sissy was going to be eating it. 'Nuff said! The simple seasonings really highlighted the flavors of the squash and cheese resulting in a delicious side dish that makes me excited to pull more zucchini and crooked neck squash out of the garden. Thank you, gratin!

Summer Squash Gratin
makes 8 side dish servings or 4 main dish servings
1 zucchini
1 yellow crooked neck squash
3 oz good quality Emmental Swiss cheese
2 oz mozzerella cheese
1 oz Asiago or Parmesean cheese
1 t Kosher salt
1/4 to 1/2 t ground black pepper
1/2 t garlic powder
1/2 t onion powder
4 sprigs thyme OR 1t dried thyme
about 1/2 c heavy cream (a little less is just fine)
1/2 c fresh bread crumbs

Preheat oven to 350F

Slice crooked neck squash in half and remove the seeds if desired. The larger the squash get the more pronounced the seeds are. Its a personal preference, if you dislike the seeds, remove them, if not leave them in.

Using a food processor with a slicing disc OR a mandolin slice the zucchini and yellow squash into thin rounds. Place slices on paper towel to absorb moisture. You will want a single layer of squash on each towel, yes you'll go through quite a bit. Don't skimp on this step or you will have a watery gratin.

Shred cheeses and reserve cheese.

Spray a casserole dish with non stick spray.

Begin assembling the gratin

First layer: yellow squash first. Use about 1/2 of the yellow slices in the first layer. Sprinkle squash with about 1/4 t kosher salt, some black pepper and a light dusting of garlic and onion powder. Next layer 1/4 of the shredded cheeses on top of the seasoned squash slices.

2nd layer: zucchini rounds. Use 1/2. Season as above (salt, pepper, onion & garlic powder) then top with 1/4 of the cheese. Pour 1/2 the cream over the squash on this layer.

3rd layer: Yellow squash, seasoned as above and add the thyme, then cheese.

4th layer: Remaining zucchini slices, seasoned and the remainder of the cheese. Pour remaining cream over top of the cheese. Top the cheese with the bread crumb.

Bake at 350F for 45 minutes or until browned on top and bubbly. Allow to cool for about 10 minutes before serving so the cheese has time to solidify before slicing. Enjoy!


Nutrition Facts provided by SparkPeople recipe calculator
Amount Per Serving
Calories 127.3
Total Fat 9.6 g
Saturated Fat 5.9 g
Polyunsaturated Fat 0.2 g
Monounsaturated Fat 1.2 g
Cholesterol 30.2 mg
Sodium 372.7 mg
Potassium 169.7 mg
Total Carbohydrate 4.2 g
Dietary Fiber 0.8 g
Sugars 1.3 g
Protein 7.9 g

Monday, August 8, 2011

Chili style stuffed bell peppers

Growing up the Kitchen Witch was NOT a pepper fan. From bells to spicy jalapenos, she hated them all. Green bell peppers might not have been spicy but they sure were bitter. And bitter is a flavor that I struggle with to this day. As the years have progressed the Witch has learned to embrace the bell pepper as an ingredient, its bitter green flavor is awesome in so many places - I can't imagine a fajita with out one! But to eat the whole bell pepper is still a bit outside of my comfort zone. Now the Witchs' husband LOVES bitter. And he loves bell peppers. And he's been clamoring for stuffed bell peppers for a while now. So when green peppers went on sale for .50 each I planned my stuffed bell pepper attack. One that hopefully even the Witch would enjoy.

It was a gloomy rainy day the day these were made so a chili style filling seemed in order. The chili style filling also gave me the perfect opourunity to use my Black Canyon chili powder blend from Savory Spice. This stuff is amazing!!! Its a blend of chile peppers, cocoa powder, garlic, toasted onion, Saigon cinnamon and Mexican oregano. The cinnamon and cocoa powder sound strange I'm sure but really they're used often in Mexican cooking, Mole is loaded with cinnamon and cocoa and its delicious!! Don't worry, your chili won't taste like a dessert, rather, it has a spicy flavor that makes you wonder exactly WHAT that delicious component is. The rich flavors blended perfectly with the ground beef, spicy tomatoes, kidney beans and rice in the peppers.


And about those peppers. The Witch decided to blanch them first, to par cook the pepper in an attempt to cook some of the bitterness out of them. It worked pretty well, the peppers were tender yet not mushy, flavorful and not too bitter. The tops of the peppers are diced up and added to the chili mix. And simply because I had it and needed to use it up, I capped each bell pepper with a crown of shredded Monterey Jack and cheddar cheese. All in all I have to say I enjoyed the chili filling a lot more than I enjoyed the entire stuffed pepper, but that's my own strange palette at work. The Witches' husband loved the peppers and really liked the chili style filling. If you're looking for a fun retro type dish with great flavors, give this one a try!

Chili Style Stuffed Bell Peppers
makes 4 servings
4 bell peppers
1/2 lb ground beef
1 can tomatoes with jalapenos
1 can kidney beans, drained and rinsed
1 T black canyon chili powder blend
OR 2t chili powder, 1/4 t ground cinnamon, 1/2 t ground cumin 1/4 t cocoa powder
1/2 onion diced
3 cloves garlic minced
1 1/2 c cooked rice
1/2 c water
1 t kosher salt
1/8 t black pepper
4 oz shredded Monterey jack cheese or colby jack

Bring a large pot of water to boil for blanching the peppers
Preheat oven to 350F

Slice the tops off the peppers and remove the seeds and pithy membranes. Chop up the tops for use in the stuffing. Dice the onions and mince the garlic.

Salt the water generously and blanch the bell peppers for 5 minutes.


Brown the beef in a skillet over medium high heat. Add the onions and garlic when been if 1/2 browned. Add the chili powder, salt & pepper, stir well to coat. Cook about 3 minutes until it smells fragrant.

Add the tomatoes, chopped bell peppers, beans and water. Simmer for 5 minutes. Stir in the cooked rice and set aside.

In an 8x8 square pan place about 1 cup of the chili filling at the bottom. Place each of the blanched and drained peppers in the pan and fill with the chili mixture. Any remaining filling can be stuffed into the bottom of the pan to help support the peppers. Top each stuffed pepper with shredded cheese. Bake for 30 minutes or until the cheese is melted and bubbly.

Allow to cool for at least 5-10 minutes before serving.


Nutrition Facts provided by SparkPeople recipe calculator
Amount Per Serving
Calories 471.4
Total Fat 21.6 g
Saturated Fat 9.8 g
Polyunsaturated Fat 0.9 g
Monounsaturated Fat 7.7 g
Cholesterol 72.5 mg
Sodium 1,185.2 mg
Potassium 698.4 mg
Total Carbohydrate 46.2 g
Dietary Fiber 8.8 g
Sugars 2.3 g
Protein 24.4 g

Tuesday, July 19, 2011

Roasted tri color potatoes with herbs and cheese

Roasted potatoes are a staple in the Witch household. The browned bottoms, crispy and chip like compliment the soft and creamy insides while the skin is crispy and salty. If you're a potato lover you have got to try these!

The potatoes take about 30 minutes to roast, making them an ideal side dish. While you're working on the main dish these little gems mind their own business, getting all delicious in the oven with very little interaction from you. Adding an herb oil to the finished potatoes brings out all the bright flavors in the herbs and compliments the earthy potato nicely.

If you've never tried a Peruvian blue potato this is a great place to experiment. They taste like a regular potato but have a great blue color. Their flavor is slightly more earthy and really good. The blues are my favorite roasting potatoes, not just for their flavor, but its fun to eat blue food! Baby Yukon golds, Red Bliss or any fingerling potato will work fine here too. I hope you enjoy this easy and tasty dish!


Roasted potatoes with herbs and cheese
makes 4 servings
8 small potatoes, red bliss, yukon gold and Peruvian blue are all fantastic
3 T olive oil
3/4 t kosher salt, divided
ground pepper to taste
fresh herbs including chives, parsley, rosemary and thyme, minced
fresh grated Asiago cheese, or cheese of your choice, about 1/3 c grated

Preheat oven to 425F.

Wash and scrub potatoes. Cut potatoes in half. Pat potatoes dry with paper towels.

Place potatoes on a sheet pan and drizzle with 1.5 T of oil, 1/2 t kosher salt and pepper. Toss potatoes to evenly coat in oil and salt. Place potatoes cut side down and put into the hot oven.

Roast for 30 minutes until the bottoms are browned and the potatoes are soft.

While potatoes roast make the herb oil by mincing your herbs very fine and stirring into the remaining oil with the last 1/2 t of salt & pepper. Stir well.

Once potatoes are roasted remove from sheet pan and put into a bowl. Pour the herb oil over top and toss. Add your grated Asiago cheese, toss. Top potatoes with any extra cheese, if desired, and enjoy.


Nutrition Facts provided by SparkPeople recipe calculator
Amount Per Serving
Calories 382.3
Total Fat 13.1 g
Saturated Fat 2.8 g
Polyunsaturated Fat 1.1 g
Monounsaturated Fat 8.0 g
Cholesterol 6.3 mg
Sodium 465.4 mg
Potassium 1,431.4 mg
Total Carbohydrate 59.4 g
Dietary Fiber 7.5 g
Sugars 2.7 g
Protein 8.6 g

Friday, July 15, 2011

Cheesy veggies with bacon

It was a typical week night: The Witch has been busy (probably playing on facebook or blogging, but busy nonetheless) and suddenly, the Husband is home! Oh joy, its so good to see you Husband but holy crap! When did it get so late? What's for dinner??? I should have thought about this hours ago! A quick inventory yields pork chops, I decide to simply bread and pan fry them. We'll need vegetables, of course. What can I get the girl to actually eat? More importantly, what do I have on hand?

A can of corn. Zucchini. Cherry tomatoes. Onions, garlic, of course. And bacon. Bacon, why yes! The little Witch loves bacon, I can get her to eat the veggies if there's bacon in them. Hmm...there's extra cheese in the fridge too. She likes cheese. The combo of cheese and bacon would be the double whammy to veggie consumption I was sure of it!

And I was right! She passed up everything else on the plate and demolished the veggies. She even had seconds!! And much to everyone's surprise, she ate it ALL, zucchini and cherry tomatoes included. She claims to hate zucchini, and I saw her start to tell me that she wasn't going to eat that part, but after she put it in her mouth all doubt was gone. This side dish was a hit to say the least - I hope you enjoy it as well!

Cheesy veggies with bacon
makes 4 servings
4 strips bacon, sliced into bits
1/4 onion diced fine
1 clove garlic minced
2-3 ears corn, taken off cob OR 1 drained can of corn
1 zucchini diced
about 15-20 cherry tomatoes OR 3 roma tomatoes diced
4 oz cheddar cheese shredded
1/4 c white wine or water

Cook the bacon in a large sautee pan until crispy. Remove and drain bacon, reserve for later use.

In the same skillet use 4 T of the rendered bacon fat, discarding the rest, and cook the onions and garlic until they start to brown, about 5-7 minutes. Add the diced zucchini and cook until golden, another 10 minutes or so. Stir frequently to avoid hot spots & burning. If using fresh off the cob corn add it now too.

Once the zucchini has started to turn golden add the corn (if using canned) and cherry tomatoes. Stir well to coat everything in the bacon fat. Cover and allow to cook another 5-10 minutes, stirring ever few minutes.

Deglaze the pan with the wine or water. Stir well scraping the bottom to dissolve the cooked on browned bits. Simmer for 4-5 minutes to reduce liquid.

Once the tomatoes burst add the cheese in an even layer over the top and cover with bacon pieces. Cover and remove from heat. Allow cheese to melt, about 2-3 minutes and serve.


Nutrition Facts provided by SparkPeople recipe calculator
4 Servings
Amount Per Serving
Calories 217.8
Total Fat 14.0 g
Saturated Fat 7.3 g
Polyunsaturated Fat 0.6 g
Monounsaturated Fat 2.8 g
Cholesterol 39.8 mg
Sodium 417.4 mg
Potassium 303.8 mg
Total Carbohydrate 13.9 g
Dietary Fiber 4.6 g
Sugars 0.8 g
Protein 9.0 g

Tuesday, June 28, 2011

Pasta with Garlic scapes, peas and Asiago cream sauce

Ever heard of a garlic scape? Wondering what the heck it is? Well, garlic and its relatives in the allium family, (leeks, chives, onions) grow underground, where the bulb begins its journey, soft and onion-like. As the bulb gets harder (and more like the garlic we know), a shoot pokes its way through the ground, its long and thin and very pliable and spins itself into a curled tendril. This stage of growth is the garlic scape. If the shoot is left attached to the bulb it will fade in color, becoming papery and whitish like we know garlic to be and it will stop the growth of the bulb below the surface. Farmers who want to keep the garlic growing snip off these scapes and sell them, a double whammy for the garlic farmer, sell the scapes and the bigger bulbs, win/win!

Yesterday the Husband suggested we take a trip to Whole Foods to see 'what looked good'. He's a smart man, that Husband! The Witch of course never turns down a trip to Whole Foods and was pretty darn jazzed about the whole idea.

Kitchen Witch: "Holy cow, garlic scapes! I thought I'd never see those here in Colorado!"
Husband: "What the hell are those?"
Kitchen Witch: "Garlic scapes, the shoot of the garlic plant. Its supposed to be lightly garlic flavored and delicious"
Husband: "So, you're getting them, right?"
Kitchen Witch: "Yes. However what I'll do with them is up for debate as I've never laid hands to them before, muchless cooked with them! Research is in order!!"

And it was then that I remembered that Yenta Mary, the Food Floozie, had just posted a delightful sounding recipe for Garlic Scapes, peas and pasta. It sounded amazing at the time and now that I had my own curled tendrils of garlic goodness in hand it was time to make it! Before I get on with the recipe let me take a moment to say that if you haven't checked out Yenta Mary's site yet, please do! She's a fabulous writer, awesome cook and filled with all sorts of interesting facts - as well as pronunciations of hard to say Yiddish words which will make us gentiles feel like we're kosher. Its a fun and informative site!

Back to the scapes! When I got home I realized I was out of peas. But I did have snow pea pods, so that's what I used. I also didn't have heavy cream and used half and half. The half & half did kinda curdle when it hit the white wine reduction, it wasn't pretty, but once the cheese was added it all came together in a cohesive sauce. However when making this again, and I will be making this again, I'll use heavy cream. Normally when making a cream sauce I'd use a fettuccine pasta but I was out, so fusilli filled in nicely. The spirals of the pasta helped trap some of the yummy garlic sauce in each bite.


Ok Witch, you've told us about how these scapes grow, how you got them and how you didn't have the correct ingredients but made due. Get on with the good part already: How did it taste?? Well my dear readers the taste was amazing! Garlic scapes are defiantly garlic flavored but its more mellow, not as sharp or hot as the garlic bulbs. The flavor of this dish was very reminiscent of chicken with 40 cloves, rich, mellow, carmalized and almost smoky. All that in 10 minutes. If you're lucky enough to run across garlic scapes GET THEM! Try this dish. I promise the garlic lover in your family will thank you!

Pasta with Garlic Scapes, Peas and Asiago cream sauce
Makes 2 servings
8 oz long pasta of your choice (fettuchini)
4 garlic scapes
about 20 snow pea pods OR 1/2 c fresh peas
1 T butter
1 T olive oil
1/4 c white wine
1/4 c cream
1 sprig fresh oregano
1/2 c fresh grated Asiago cheese (parmesen would be fine, too)
kosher salt
pepper

Slice garlic scapes into 1/2 inch pieces, trimming off any tough or woody ends. Slice snow pea pods into 1/4 inch slices. Rough chop the herbs.

Bring a pot of water to boil for pasta. Cook pasta according to instructions on box in well salted water. While pasta cooks prepare sauce.

Heat a skillet over medium high heat. Add butter and oil, once butter has melted add the garlic scapes. Toss to coat in fat and cook about 1 minute, until the scapes smell fragrent and are barely brown. Add the pea pods and cook 1 minute longer, garlic scapes will start to brown.

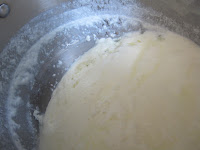
Add the wine and oregano and deglaze pan. Reduce wine by half. Add the cream, salt & pepper and Asiago cheese. Stir to melt and incorporate cheese into sauce. Add cooked and drained pasta, toss with sauce and serve.


Nutrition Factsprovided by SparkPeople recipe calculator
Amount Per Serving
Calories 703.7
Total Fat 43.0 g
Saturated Fat 23.8 g
Polyunsaturated Fat 1.0 g
Monounsaturated Fat 8.6 g
Cholesterol 87.9 mg
Sodium 1,043.0 mg
Potassium 124.0 mg
Total Carbohydrate 47.8 g
Dietary Fiber 2.6 g
Sugars 2.1 g
Protein 29.5 g

Tuesday, June 14, 2011

Spanakopita

My first experience with spanakopita was with my Aunt Katina. She's from Greece and these were always one of her specialties. I remember small triangles of some awesome flaky pastry with cheese and something green in them and that they were amazingly good. My mom always heated them up in our toaster oven - they were a perfect little snack! Little did I know that 'those triangle things that Aunt Katina makes' had a real name and that you could actually get them from other places than Aunt Katina! Who knew?

This recipe might not be an authentic Greek version, I don't know if they use cream cheese or Asiago cheese, my guess would be not. The Kitchen Witch uses these cheeses because, well, they're delicious and work well with the spinach. Something both versions do have in common is the use of feta cheese, its salty sharp tang is what makes this spinach pie delicious. Well, that and the filo dough, and the butter. Mmm...butter...

If you've never worked with filo don't fear it! It's not as hard as it looks. You'll find filo (or phyllo) dough in the frozen section of your grocery, where pie shells are. One box has 2 sleeves of dough in it, and you'll use less than 1/2 of one sleeve for this recipe. Allow the dough to thaw completely before using it, if its even a little frozen it will rip and tear. Been there, done that. Unroll the filo dough and cover it with a damp towel. Have your butter melted and the pan that the dough is going into ready to go. Work quickly as the thin sheets of pastry like to dry out but do not be alarmed if the dough tears. Its very thin and this is to be expected. Honestly, after its all baked no one will ever know if your pastry is pieced together because it kept ripping or if it stayed in one nice sheet. Again, I've had both happen, they both ended up fine.

Spanakopita can be made in a large pie form as I've done here, or you can make smaller appetizer sized ones by folding a bit of filling into strips of buttered filo dough and folding into triangles. Both versions can be frozen with great success. Enjoy this Greek delight!

Spanakopita
makes 8 wedges
12 oz bag frozen cut leaf spinach, thawed and squeezed dry
4 green onions sliced very thin
4 oz cream cheese
1 cup feta cheese
1/4 c asiago cheese, grated
2 cloves garlic, minced
1 t dill weed, dried (if using fresh double the amount)
a few gratings of fresh nutmeg or a pinch ground nutmeg
1 t kosher salt
1/8 t white pepper
1/2 stick (1/4 cup) butter, melted
7 sheets filo dough

Combine everything BUT the butter and the filo dough sheets. Mix well.

Preheat oven to 400F

Using an 8x8 pan butter the bottom and sides liberaly with melted butter. Lay 1 sheet of filo dough over the pan, making one edge flush to the sheet of dough and the other overhanging. Press into place and up the side. Brush that sheet of dough with melted butter. Place another sheet of filo over the 1st one, leaving another edge hanging off. Repeat 2 more times so each side of the pan has a piece of overlapping filo dough.


Spread the spinach and cheese mixture evenly into the pan.


Bring the overhanging sides up and over the cheese mixture, buttering each layer before folding the next over top.

Butter 2 full sheets of filo dough, fold in half and lay on top. Press into place. Butter top layer.

Using a sharp knife cut the pie into wedges or squares before baking.


Bake for 30 minutes or until golden brown.


Nutrition Facts provided by SparkPeople recipe calculator
Amount Per Serving
Calories 212.9
Total Fat 16.1 g
Saturated Fat 10.2 g
Polyunsaturated Fat 0.6 g
Monounsaturated Fat 3.9 g
Cholesterol 50.3 mg
Sodium 600.9 mg
Potassium 174.3 mg
Total Carbohydrate 11.1 g
Dietary Fiber 1.6 g
Sugars 0.5 g
Protein 7.2 g

Saturday, March 5, 2011

Cheddar and broccoli soup

Some broccoli cheese soups are more broccoli than cheese. I don't like that. If it claims to be broccoli CHEESE soup, I expect to see and taste more than just a garnish of shredded cheese. This soup delivers in the cheese department, rich, deep and flavorful.

I used a bit of dry mustard in this recipe. Dry mustard is spicier than regular mustard, its the ground mustard seed with out any vinegar or water added. Don't try to use regular mustard for the dry. Theres something about the way the dry mustard makes the cheese taste, it brings out the sharpness of the cheddar and is wonderful. There's also a few dashes of tobasco in this soup. Much like the dry mustard, tobasco helps the soup have a depth of flavor with out spicy heat, I mean after all theres about 1/4 t of tobasco to almost 6 cups of liquid, how spicy can it be?

Lastly I like to use the broccoli stems in my soups. They're filled with nutrients and fiber and its just so wasteful to throw them away in favor of their prettier friends the florettes. I simmer the stems in water and puree them so I get a lot of broccoli flavor in the soup, along with all the vitamins and fiber, but no one knows it in there. Witchcraft I tell you!

If you're looking for a soup that delivers big in the cheese flavor this is the one for you. If you like broccoli soup, this is the one for you! So pretty much unless you hate cheese and broccoli, you should like this soup. Enjoy!

Cheddar and Broccoli soup
makes 6 large servings
2 heads broccoli
4 c chicken stock
1 c milk
1 c water
1 onion diced fine
3 cloves garlic
3 dashes tobasco sauce
1/2 t dry mustard powder
pinch turmeric (optional, helps add yellow color to combat the green from the broccoli puree)
kosher salt & pepper
1/4 c butter (half stick)
1/2 c flour
8 oz extra sharp cheddar cheese, shredded

Prep veggies first, dice onions, mince garlic and reserve. Remove florettes from broccoli and reserve. Slice the broccoli stems thin (1/4 inch thick approx) and place into a small sauce pan with 1 cup water. Bring to a boil, reduce heat to simmer and allow stems to cook. Once stems are cooked put them into a blender with 1/2 the cooking liquid and puree until smooth.

Meanwhile, heat a large soup pan over medium high heat. Melt the butter in the pan, once it stops foaming add the onions and garlic. Stir well to coat in butter and cook until onions are starting to brown on the edges.

Add the flour and about 1/2 c of the chicken stock, whisk well, this will thicken and become a paste. Keep whisking and slowly add the remaining chicken stock. Whisk until no lumps remain. Add the milk, tobasco sauce and dry mustard and optional turmeric, whisk well to incorporate. Bring up to a simmer.

Once the soup starts to simmer add the cheese and stir well until all cheese is melted. Taste for salt & pepper, add as needed. Add the broccoli puree to the soup along with the reserved florettes.

Simmer soup for 20 minutes, stirring often to avoid burning. Once broccoli is tender taste soup again for seasoning, adjust salt & pepper as needed.


Nutrition Facts provided by SparkPeople recipe calculator
Amount Per Serving
Calories 392.9
Total Fat 23.4 g
Saturated Fat 13.5 g
Polyunsaturated Fat 0.9 g
Monounsaturated Fat 2.5 g
Cholesterol 64.0 mg
Sodium 924.2 mg
Potassium 1,046.9 mg
Total Carbohydrate 28.4 g
Dietary Fiber 9.9 g
Sugars 2.6 g
Protein 20.6 g

Friday, January 28, 2011

Italian style stuffed Pork Chops

We love stuffed pork chops. There's just something delightful about cutting into a piece of meat & discovering a surprise tasty filling stuffed inside. And when that filling is creamy cheese with tart sun dried tomatoes and zesty garlic, that just makes things even tastier.

This recipe was created for a few reasons:
1. I had some awesome thick cut pork chops that were just begging to be stuffed!
2. I've done a few stuffed chop recipes before & they've been fruit & nut stuffings, delicious but been there, done that
3. I was making polenta as my side dish so I wanted an Italian flair to the chops

So the Witch put her Witchcraft hat on & went to work. Cream cheese is always a good start as far as I'm concerned so it made the cut. Sun dried tomatoes, another natural choice, in they go. I have a bag of frozen spinach in the freezer but only wanted a touch of it, too much spinach and all you can taste is SPINACH - so a few nuggets of the green stuff thawed out was perfect! Garlic and herbs only made sense given the Italian direction we were heading, and a touch of Asiago gave the sharpness I was looking for.

Stuffing the chops is an easy process, simply take a sharp thin knife and create a pocket in the chop. Using your finger open up the pocket more, leaving the sides intact to hold the filling. All that's left then is to stuff the chop then cook it and before you know it, a delicious and impressive dinner is done. Enjoy!

Italian style stuffed pork chops
makes 3 chops
3 thick cut boneless pork loin chops
4 oz cream cheese
2 garlic cloves, minced
handful of frozen spinach, thawed and squeezed
1/4 c julienne cut sun dried tomatoes
2 T fresh grated Asiago or Parmesan cheese
3/4 t dried Italian herbs
kosher salt & pepper
drizzle of oil

preheat oven to 300F
In a small bowl mix the cream cheese, Asiago, sun dried tomatoes, spinach, garlic, herbs with a pinch of salt & pepper. Divide this cheese mixture into thirds.

Create a pocket in the pork chops and stuff one portion of the cheese mixture in it. Sprinkle stuffed chops with salt & pepper.

Heat an oven safe skillet over medium high heat. Add the oil, once pan is hot add the chops. Sear chops on 1 side, once they're nicely browned flip and put pan in the oven, cook about 5-10 minutes or until the internal temperature reaches 160F. Remove from oven and hot pan, allow to rest 5 minutes before serving.


Nutrition Facts provided by SparkPeople recipe calculator
Amount Per Serving
Calories 361.0
Total Fat 26.0 g
Saturated Fat 13.2 g
Polyunsaturated Fat 1.7 g
Monounsaturated Fat 8.7 g
Cholesterol 104.1 mg
Sodium 678.6 mg
Potassium 701.6 mg
Total Carbohydrate 5.7 g
Dietary Fiber 0.9 g
Sugars 2.7 g
Protein 26.2 g
Related Posts with Thumbnails