Friday, October 28, 2011

Hot Caramel Apple Spiced Cider

Hot spiced cider has always been an Autumnal favorite of the Kitchen Witch. When I was a kid we used those apple cider packets, tasty yes, but really, how hard is it to heat up cider and spice it?? Turns out not hard at all!! And its SO much better than the packets. The flavor of cider really shines when its heated, the crisp apple just begs for some cinnamon to compliment it.

Nothing goes better with the fresh fall flavor of apple then sweet buttery caramel. I made a batch of my favorite caramels, salted of course, and dipped a few apples into it. Oh boy were those good!! It seemed only natural to add some of that luscious caramel to the hot cider, allowing it to melt into the drink, adding a different layer of sweet, salty and rich to the mix. You can use store bought caramels if you don't want to make your own, but I promise, its a lot easier than you think and oh so much tastier! Caramel sauce (like for ice cream) would work in a pinch, too.

Finally I topped off each mug with a splash of heavy cream. You could use whipped cream instead, but honestly, I was too lazy to whip up the cream when it was going to just melt into the drink anyway. Whip the cream or not, the choice is yours. Regardless, you'll be very happy with the resulting drink, sweet, tart, salty and creamy. Hot Caramel Apple Spiced Cider is the perfect ending to a busy fall day! Enjoy!

Hot Caramel Apple Spiced Cider
makes 4 servings
4 cups apple cider
1 t cinnamon
1/4 c heavy cream
4 pieces of caramel (homemade is AWESOME but store bought will work too)

In a microwave safe bowl OR a sauce pan heat the cider and cinnamon until it simmers. Add caramels and stir until they melt into the drink. If you're in a hurry you can microwave the caramels until they just start to melt before adding to the hot cider. Once caramels are melted ladle hot cider into your favorite mugs and top with cream, whipped or not.

Isn't that Witch awesome?? She was the cake topper on my 6th birthday cake. I love her!

Nutrition Facts calculated by SparkPeople Recipe Calculator
Amount Per Serving
Calories 165.8
Total Fat 3.6 g
Saturated Fat 2.4 g
Polyunsaturated Fat 0.1 g
Monounsaturated Fat 0.9 g
Cholesterol 10.9 mg
Sodium 27.7 mg
Potassium 30.1 mg
Total Carbohydrate 8.4 g
Dietary Fiber 0.4 g
Sugars 6.6 g
Protein 0.6 g

Saturday, October 15, 2011

Israeli Couscous salad with beans and tomatoes

Israeli couscous, have you all seen or tried this yet? Ever wonder what the heck it is? Well, Israeli couscous isn't a strange and exotic grain. It's not a grain at all, rather, it's pasta, just like all couscous. Yes, you read that right, ALL couscous is really just tiny beads of pasta that cook up super quick due to their tiny size. Israeli couscous is no different except its beads are larger than normal couscous, making them more pearl like. They cook up very fast also, less than 10 minutes, and are tasty! I like to get my Israeli couscous from the health food store, they have it available in bulk and you can buy as much or as little as you'd like. It's really really cheap, too, bonus!

Israeli couscous is toasted from the factory. Personally, I wanted more of that roasty toasty flavor so I decided to further brown my couscous in melted butter. Nothing wrong with that! A small amount of onion was added for flavor, but not so much that it overwhelmed the delicate toasty flavor of the couscous. The Witch used chicken broth to cook the couscous in for additional flavor, but if you're looking to make this dish completely vegetarian water or veggie broth would work just fine also. As the couscous cooks it releases a lot of starches which make the texture of the cooked Israeli couscous more like a good risotto than couscous.

Because this was an entire meal I knew that I needed some protein in there somewhere so I added white beans that I have in my pantry. The soft texture and gentle flavor of the cannellini bean was delightful against the soft, rich creamy flavor of the couscous. Having an abundance of cherry tomatoes from the garden it was a no brainer to add a handful of the sweet red treats into the couscous. Feta cheese was in the fridge and its flavors as well as very granular texture again worked fabulously with the couscous. Now all it needed was a dressing! In a small mason jar, or any jar with a lid, add the juice of half a lemon, a touch of honey to counteract the tart of the lemon and 2 parts olive oil. I just eyeballed the amount in the glass jar, when it looked like I had a 2:1 ratio of oil to lemon juice I stopped. It was about 3T of oil. A touch of garlic and fresh herbs including mint, oregano and parsley completed this easy and tasty dressing. The dressing will make a lot more than you need for one serving, you'll actually be able to get about 3 couscous salads out of this dressing, so save the leftovers in the fridge for another tasty salad.

The final results of this are savor, rich, creamy, tart, sweet and plain yummy. The herbs in the dressing added great flavor, just enough to keep you interested in taking another bite. The tomatoes give bursts of sweet tart flavor that counter the rich creamy taste of the couscous. A nice salty tang is provided by the feta and the creamy beans kept me full for hours! This recipe was developed as a quick and easy lunch for myself. Imagine my surprise when the Little Witch wanted to try some (shock!) and then declared that she LOVES couscous and wanted more! (double shock!) If you're looking for a quick lunch, easy side dish or a meatless main course, look no further than this Israeli couscous dish. Enjoy!


Israeli couscous salad with beans and tomatoes
makes 1 main dish sized serving
1/2 c Israeli couscous
3/4 c chicken broth OR water
2 t butter
1 T minced onions
1 T minced green pepper (optional)
6-8 cherry tomatoes
1/3 c white beans (cannellini beans), drained and rinsed (1 can will make 3 salads)
2T feta cheese
3t dressing, recipe follows

Lemon herb dressing
makes enough for 3 salads
juice of 1/2 lemon
2 parts olive oil, approx 3T
1t honey
1 clove garlic sliced thin
pinch kosher salt & pepper
fresh minced herbs: parsley, mint and oregano (small bit of parsley, 5 leaves each mint & oregano)

Make dressing first: combine all ingredients in a small lidded jar and shake well to mix. Set aside.

Prepare salad:
In a small sauce pan heat butter over medium high heat until it foams. Once the foaming stops add the uncooked couscous, stir to coat all pearls in butter. Toast for 2 minutes then add the onions. Stir to coat onions in butter and continue to toast for 3-4 minutes longer, until couscous is browned and smells nutty.


Add the broth or water and bring to a boil then reduce heat to simmer. Add the beans, cover the pan and allow to cook for about 5 minutes. Check couscous for tenderness, if soft all the way through then drain couscous of any remaining liquid. Return to pot. Add the dressing, tomatoes and feta, stir well to coat everything evenly. Enjoy!


Nutrition Facts calculated at SparkPeople recipe calculator
Salad only, no dressing 1 Serving
Amount Per Serving

Calories 459.6
Total Fat 9.6 g
Saturated Fat 4.8 g
Polyunsaturated Fat 0.2 g
Monounsaturated Fat 1.2 g
Cholesterol 25.0 mg
Sodium 308.7 mg
Potassim 294.2 mg
Total Carbohydrate 16.6 g
Dietary Fiber 4.8 g
Sugars 0.7 g
Protein 17.7 g

Nutrition Facts calculated at SparkPeople recipe calculator
Lemon herb dressing only -- 3 Servings
Amount Per Serving

Calories 130.5
Total Fat 14.0 g
Saturated Fat 2.0 g
Polyunsaturated Fat 2.0 g
Monounsaturated Fat 10.0 g
Cholesterol 0.0 mg
Sodium 96.3 mg
Potassium 14.9 mg
Total Carbohydrate 2.9 g
Dietary Fiber 0.1 g
Sugars 2.1 g
Protein 0.1 g

Friday, October 14, 2011

Pork Red Chili

Chili is a great dish to serve in fall, is slow cooked flavors will warm bellies on the coldest of days. It's also very budget friendly, with the bulk of the ingredients being pantry staples. Most of the time red chili is made with beef. Being a rebellious rule breaking Kitchen Witch, I decided to use pork in mine this time. Green chili with pork is amazing, so I figured why not try it with the red version. I found country style boneless pork ribs on managers special for $2.80 and couldn't resist. These ribs do need a long slow braise to maximize their flavor as well as make the darn things tender. Chili seemed like a perfect match for the cut of meat I had on hand.

So, in addition to the super cheap package of pork there was something else that really made me want to make chili, other than the fact that its delicious. The Witch is a savvy shopper - get this deal! I scored a new Food Network 5.5 qt dutch oven, enamel covered cast iron, with a metal handle on the lid making it oven proof, for $46 at Kohl's!! The pan is normally $100, on sale for $70, I had a 20% off coupon AND a $10 off coupon, making my total before tax $46. Not too shabby!!! And the best part, other than the screamin' deal I got, is that its green!! My favorite shade of avocado green! I LOVE IT!

Back to the chili! After browning the pork and onions in the dutch oven I added the spices and allowed them to toast to develop their flavor. I used my favorite Black Canyon Chili Powder blend from Savory Spice - it's combination of cocoa powder, cinnamon, chili powders, garlic and toasted onion really make red chilies shine, in this Witches' opinion. The cinnamon and cocoa powder really remind me of a good slow cooked mole, in a fraction of the time. If you don't have Black Canyon chili powder, well you can order some from Savory Spice OR you can make a knock off version at home by combining unsweetened cocoa powder, cinnamon, chili powder, onion and garlic powders and you'll have a fair representation on what the Black Canyon powder is all about. The pork in this chili was amazing, tender, flavorful and very rich. It worked so well with the cumin and ancho chiles that I may never make a beef chili again!

Pork Red Chili
makes 4 generous servings
1 lb country style pork ribs, boneless
1 large onion diced
5-6 cloves garlic peeled and smashed but left whole
2 t ground cumin
1 T Black Canyon chili powder
1 T ground ancho chilie
4 bay leaves
kosher salt
pepper
2 cans diced tomatoes
water
1 can beans, kidney, black, your choice, drained & rinsed

In a dutch oven heat over medium high heat and brown pork ribs. Brown all 4 sides well then add the diced onions. Allow onions to soften and brown slightly, about 5 minutes. Add the spices and stir well, sautee for about 3-4 minutes. Spices will stick to the bottom of the pan, that is fine.

When spices are very fragrant add 2 cups water and scrape up browned bits from bottom of pan. Add the diced tomatoes and cover. Reduce heat to low and simmer for 2 hours.

After 2 hours have passed stir the meat, it should be starting to get very tender and fall apart. Allow it to shred naturally while stirring. Add the 2nd can of tomatoes, drained beans and reseason with salt & pepper. Cover again and allow to simmer for 1 1/2 hours longer. Once done shred up remaining chunks of pork - you should be able to squeeze the chunks with your tongs & they will just fall apart. Serve with corn bread or tortilla chips. Top with jalapenos if desired.


Nutrition Facts calculated at SparkPeople Recipe Calculator
Amount Per Serving
Calories 331.0
Total Fat 12.2 g
Saturated Fat 4.0 g
Polyunsaturated Fat 0.1 g
Monounsaturated Fat 0.0 g
Cholesterol 65.0 mg
Sodium 1,835.9 mg
Potassium 252.5 mg
Total Carbohydrate 27.7 g
Dietary Fiber 8.4 g
Sugars 6.2 g
Protein 28.2 g

Wednesday, October 5, 2011

Jalapeno Corn Cakes

Today I'd like to introduce you to a fabulous foodie and cook, Phyllis Davis. Phyllis isn't a guest blogger; rather she has been a guest in the Witches' house for various cooking dates. Please allow me to introduce Phyllis Davis!

"I was a caterer in Texas in the 70's, a sous chef for six years at the Broadmoor Cooking School during the 80's and assisted: Jacques Pepin, Marcella Hazen, Guiliano Bugialli, Stephan Pyles, Paula Wolfort, Martha Stewart, Ken Hom, and others, became the Food and Restaurant Critic for KKTV in the 80's, taught private cooking classes throughout my cooking life, and now I have the pleasure of cooking with you, Andrea."

Holy cow how did I get so lucky to find a friend and foodie with such a varied and rich history? I'm one lucky Witch, that's for sure! Phyllis and I have a great time cooking, chatting, knitting and generally enjoying each others company. Most recently we made 2 dishes, sweet corn gelato (to be posted soon) and jalapeno corn cakes. Both recipes were delicious and will be/have been repeat offenders in the Witches' kitchen already! The corn cakes were particularly delicious, I loved the crunch of corn, slightly crispy exterior and gentle heat of the jalapeno and the cool sour cream topping was perfect. I've made these twice since then and LOVE them! They are really good for breakfast, too, if you are into a more savory type of AM meal.

Confession time: Phyllis and I made these dishes in August when corn season was at its peak. Yours truly has had a run in with a little thing called LIFE - between a beloved dog passing away, getting a new puppy and a Little Witch starting preK, we have been busy, hence the lack of posts lately AND the unseasonality of this post.

Jalapeno Corn Cakes
Makes 6 servings, 2 cakes each
Source: Sunset Magazine
1 lg egg
1 c milk
3/4 c. medium-grind cornmeal, preferably stone ground
1/2 c. flour
3/4 t. kosher salt
2 t. baking powder
1 t. chopped marjoram (optional, we omitted)
2 green onions, chopped, plus more for garnish
1 jalapeno, seeded and chopped
2 c. corn kernels (fresh or frozen)
1/4 c. veg or canola oil
Sour cream

Whisk egg, and milk and add the cornmeal, flour, salt, baking powder & marjoram stirring to combine.


Fold in chopped onions, jalapeno, and corn.


Heat 2 T. oil in large nonstick skillet over med heat and scoop 1/4 c. portions of batter into pan. Cook, turning once, until puffed and brown - total about 6 minutes.


You can also make smaller bite size cakes, they are wonderful appetizers!

Nutrition Facts provided by SparkPeople recipe calculator
Amount Per Serving
Calories 272.4
Total Fat 14.0 g
Saturated Fat 2.8 g
Polyunsaturated Fat 3.6 g
Monounsaturated Fat 6.8 g
Cholesterol 38.3 mg
Sodium 428.5 mg
Potassium 224.0 mg
Total Carbohydrate 32.2 g
Dietary Fiber 3.0 g
Sugars 3.9 g
Protein 6.7 g

Wednesday, September 14, 2011

Technique: Breaded chops

Has this happened to you - you bread and fry up some chops and get your taste buds all ready for a delicious crispy exterior, juicy meat and end up with a crust that falls off and bone dry overcooked chops. Yuck! However once prepared properly you can say good bye to the dry chop blues and hello to a delicious, quick and cheap dinner that the whole family will love. Breaded pan fried pork chops might seem simple, and they are! But don't let their simplicity fool you, there is a technique to getting something as simple as breaded meats right.

Breaded pork chops are a blank canvas for whatever you want them to be. Looking for something simple and clean? Add lemon wedges to each serving and enjoy. The acidity of the lemon really makes the juicy pork sing. Looking for more comfort food? Make a simple gravy to top your chops with an voila! The flavor profile is up to you!

In the recipe I've included some tips and techniques to breading meat that always yields me great success. Having 3 containers to make your 'breading station' is essential to me. I also prebread my meats and allow them to rest with the breading on them before frying for at least 15 minutes ahead of time. This allows the breading to adhere to the meat and gives you a better final result. The same process outlined here works the same for chicken, pork or beef (think chicken fried steak!). Enjoy!

Breaded Pork Chops
makes 3 servings
3 loin cut boneless pork chops
1 egg
1/4 c flour
approx 1 cup crumbs made from 4 slices of white bread
2 sprigs thyme
1 T chopped parsley
kosher salt
pepper
season salt
lemon cut into wedges for serving (optional)
oil for frying, up to 1/2 c

Allow the bread slices to stale during the day or dry out in a hot oven. You want them to be similar to toast texture on the exterior, with out the browning. Once bread has dried out & staled break into chunks and place into food processor with the steel blade attached. Add 1/2 t kosher salt, pepper to taste, thyme removed from stems and parsley. Pulse until you have crumbs. There will be a few larger crumbs, that is ok. You want the majority to be small and crumbly. Break up the larger chunks with your hands. Reserve the crumbs for use later.

Begin by removing the fat strip from the pork chops. I do this because I want to pound these chops from the 1 inch thickness that you buy into thinner larger pieces. If the fat strip is left intact it makes this process a lot harder.

Using a meat mallet or heavy bottom pan pound the meat out until its doubled in size and is half as thick.

Season chops with seasoned salt and set aside while you prepare the breading station.

Make a 3 stage breading station:
you'll need 3 rectangular pieces of plastic wear OR 2 plates and 1 bowl (for eggs)
1st container place the flour
2nd container the egg, whipped up like scrambled eggs, incorporating as much white as possible
3rd container the bread crumbs
a sheet tray with a cooling rack set inside of it to receive the breaded chops.

~*~Kitchen Witch Tip: Drop a few pieces of bread crumbs into the oil. If they sizzle and start to brown after a minute then you're ready to go. If they brown up right away the oil is too hot, remove pan from heat and allow to cool before continuing. If the crumbs don't sizzle at all let the pan heat up more. This is an easy test if you don't have a thermometer available.~*~

Bread chops by placing into the flour first. Coat each side with a thin layer of flour, patting off any excess. Next dip the floured meat into the egg wash. Coat both sides with egg. Third, dip egged meat into the bread crumbs. Coat both sides with crumbs, pressing crumbs into the meat for best adhesion. Place breaded pork chops on the cooling rack and allow to rest for 5 minutes minimum before frying. This resting period is very important: it allows the breading to 'stick' to the meat better by absorbing moisture from the meat as well as the egg in the breading. You will get a better crust with a 5 minute rest. I usually bread the chops then heat up the pan while the chops are resting.

Heat the oil in a heavy bottom or cast iron skillet over medium heat until its hot.

Once oil is up to temp fry the chops. Cook for 3-5 min or so on the first side, flipping when the edges are opeque and the breading has browned. Cook on 2nd side, it will take less time then the first side did. You are looking for an internal temperature of 145F for pork. Given that the chops are pounded out this won't take long at all.

Remove chops from the oil and drain. Serve with lemon wedges squeezed onto chops just prior to enjoying.


Nutrition Factsprovided by SparkPeople recipe calculator
Amount Per Serving
Calories 413.7
Total Fat 21.3 g
Saturated Fat 1.6 g
Polyunsaturated Fat 4.7 g
Monounsaturated Fat 9.1 g
Cholesterol 99.4 mg
Sodium 1,291.9 mg
Potassium 66.3 mg
Total Carbohydrate 26.1 g
Dietary Fiber 1.3 g
Sugars 0.1 g
Protein 26.6 g

Tuesday, August 23, 2011

Roasted corn and jalapeno cheddar polenta

Polenta is like the red head step child of the side dish world. Most people don't even know what polenta is here in the US. Its only when its referred to as grits, as most southerns know it as, that it gets any recognition. And, unfortunately, the recognition isn't that warm or welcome. Why, I wondered, are people so frightened of polenta. Is it the name? Do people just not know what it is? Could it be the texture? Could it be that maybe they've just never had good polenta? My best guess is a combination of all the above. I hope today that I can demystify polenta and introduce some of you to a new and tasty side dish.

Polenta is corn meal that's been slow cooked to rehydrate it. As mentioned it is known as grits in the south. But please, don't let the name grits turn you off. Yes there is a texture to polenta. However if it's cooked properly it won't be gritty or rough, rather the corn meal softens and becomes al dente and delicious. It has a great corn flavor and stands up well to rich and hearty dishes. There are different grinds to polenta, from instant (not recommended) to coarse grind super slow cooking ones, the choice is yours. Most supermarkets will have 'quick cooking' polenta available and the Kitchen Witch feels that this is a great place to start. After you've made it and decide you love its wholesome corny goodness then please try the coarser grinds, I hear they're loads tastier. I have a bag of Bob's Red Mill coarse grind polenta in the pantry and can't wait to try it! The quick cooking variety will take about 20 minutes to cook up into a creamy corny pudding. What you add to it to flavor it is pretty much endless!

When I created this side dish it was to accompny green chili pork stew. I was looking for something that would go well with the stews liquidy part and what pairs better than corn? I had an ear of corn in the fridge which I roasted under the broiler - you could of course do this over your grill - knowing that the sweet corn would add bursts of flavor as well as a roasted smokiness. Jalapenos seemed natural, they go well with corn as well as the green chili. Onions & garlic add the background flavors to make it more dimensional and the cheese adds the final layer of deliciousness. I left most of the seeds and veins in the jalapeno and honestly it was NOT hot at all. I could have used another 2 peppers before any heat was felt. Use your discression on how hot you want it for your family. I served this polenta in its creamy puddling like form but polenta is the master of make overs! If creamy pudding isn't your thing, no worries, simply pour your polenta into a sheet pan lined with plastic wrap and allow to cool. Once cooled you can slice your now firmed up polenta into any shape you desire and pan fry it in a bit of oil until its golden browned, flip and brown on second side. The exterior has a crispy brown exterior and the inside is a smooth creamy treat. This is a great way to use up left over polenta and its awesome with eggs.

I hope you try polenta in the future and embrace it as a quality side dish that the whole family can enjoy! Play around with the ingredients and add ins, making each batch as individual as you are. Happy cooking!


Roasted corn and jalapeno cheddar polenta
makes 4 servings
1 cup polenta (coarse corn grits)
3 cups chicken broth
1 ear of corn roasted and kernals cut from cob
1/2 onion diced
1 jalapeno diced
2 cloves garlic minced
1/2 c cheddar cheese
2 T butter
1 t kosher salt
black pepper to taste

Begin by roasting the corn in the oven. Set your oven rack on the highest setting and put it on broil. Place the shucked corn cob on the rack under the broiler. Roast until you have a few blackened kernels, rotate and roast evenly all over cob. Don't be alarmed if you hear popping, this is normal if your corn is very fresh. Its the liquid in the kernel expanding as it heats and essentially 'popping'. The popping is usually my indicator that I need to check the corn. Once roasted remove from oven and allow to cool, then cut the kernels off the cob once cool enough to handle.

In a sauce pan heat the butter over medium high heat. Add onions and sautee for 2 minutes. Add the garlic and diced jalapeno, sautee for 5 min longer until the garlic starts to toast slightly and the onions have softened. Add the roasted corn kernels and stir well to coat in the fat.

Add the chicken stock to the veggies in the pan. Using a whisk slowly whisk in the polenta. Whisk until all polenta is incorporated then switch to a wooden spoon. Bring the polenta up to a boil then reduce the heat to low. Cover polenta and cook for 15-20 minutes (or to instructions on package) stirring often to avoid scorch spots and lumps. Once polenta has cooled remove from heat and stir in the cheddar cheese, serve and enjoy.


Nutrition Facts provided by SparkPeople recipe calculator
Amount Per Serving
Calories 296.9
Total Fat 12.0 g
Saturated Fat 6.9 g
Polyunsaturated Fat 1.0 g
Monounsaturated Fat 3.5 g
Cholesterol 30.4 mg
Sodium 1,685.6 mg
Potassium 183.3 mg
Total Carbohydrate 38.5 g
Dietary Fiber 1.6 g
Sugars 1.7 g
Protein 9.0

Saturday, August 20, 2011

Summer Squash Gratin

The Witch has some SERIOUS over achievers in her garden right now. Yes folks, its that time of year again, ZUCCHINI and CROOKED NECK SQUASH is here!! Yay says the Witch as she pulls her first veggies out of the garden. Hooray for my beloved green zucchini and tasty yellow crooked necks! My mind swims with ideas on how to prepare these treats from the garden. But after a few weeks the song changes from YAY zucchini! to UGH! more freaking zucchini?? What the hell am I supposed to do with all of these???? After your friends and family have taken on their fair share you're still left with TONS of green and yellow fruits and the usual prep method of planks sauteed in olive oil until golden brown just isn't seeming as delicious as it did 2 weeks ago.

So after some serious squash overload I went to my favorite go to place for recipes, blogs! While browsing I saw that Siri over at Siriously Delicious had posted one for Summer Squash and potato gratin. Gratin you say? Hmmm...I like cheese. Yes, gratin it is! Cheese is a key component to gratin. A quick trip through the fridge shows Emmental Swiss cheese, something the Little Witch picked out (she has great taste! What can I say?), a small chunk of mozzarella and as always Asiago. Those 3 cheeses sound pretty darn good together, the swiss for a robust cheese flavor, the mozz for the melting factor and Asiago has a pungent flavor that's just delicious.

When seasoning the dish I kept it simple, salt, pepper, garlic and onion powder. Powder?? Yes, powder. I used garlic and onion powder fairly often, in specific dishes, mostly because I like the way they perform in some ways. In dips, sauces and dressings the powders are great because you don't get a sharp bite that you can get from fresh garlic and onions. I like it in marinades too, as the garlic powder won't burn like fresh garlic will. The main reason you'll see me use onion powder or dehydrated onions in place of fresh is because my Witchy Sissy has an onion allergy, poor thing, and can't have fresh onions. Powdered or dehydrated is fine, however. So when I know she'll be eating a dish I'll use the powdered stuff. In the case of this gratin I used it for 2 reasons: I wanted a light flavor of onion, this is a squash gratin, not an onion one and I feared a fresh onion would overpower the squashs' delicate flavor. And 2, my Sissy was going to be eating it. 'Nuff said! The simple seasonings really highlighted the flavors of the squash and cheese resulting in a delicious side dish that makes me excited to pull more zucchini and crooked neck squash out of the garden. Thank you, gratin!

Summer Squash Gratin
makes 8 side dish servings or 4 main dish servings
1 zucchini
1 yellow crooked neck squash
3 oz good quality Emmental Swiss cheese
2 oz mozzerella cheese
1 oz Asiago or Parmesean cheese
1 t Kosher salt
1/4 to 1/2 t ground black pepper
1/2 t garlic powder
1/2 t onion powder
4 sprigs thyme OR 1t dried thyme
about 1/2 c heavy cream (a little less is just fine)
1/2 c fresh bread crumbs

Preheat oven to 350F

Slice crooked neck squash in half and remove the seeds if desired. The larger the squash get the more pronounced the seeds are. Its a personal preference, if you dislike the seeds, remove them, if not leave them in.

Using a food processor with a slicing disc OR a mandolin slice the zucchini and yellow squash into thin rounds. Place slices on paper towel to absorb moisture. You will want a single layer of squash on each towel, yes you'll go through quite a bit. Don't skimp on this step or you will have a watery gratin.

Shred cheeses and reserve cheese.

Spray a casserole dish with non stick spray.

Begin assembling the gratin

First layer: yellow squash first. Use about 1/2 of the yellow slices in the first layer. Sprinkle squash with about 1/4 t kosher salt, some black pepper and a light dusting of garlic and onion powder. Next layer 1/4 of the shredded cheeses on top of the seasoned squash slices.

2nd layer: zucchini rounds. Use 1/2. Season as above (salt, pepper, onion & garlic powder) then top with 1/4 of the cheese. Pour 1/2 the cream over the squash on this layer.

3rd layer: Yellow squash, seasoned as above and add the thyme, then cheese.

4th layer: Remaining zucchini slices, seasoned and the remainder of the cheese. Pour remaining cream over top of the cheese. Top the cheese with the bread crumb.

Bake at 350F for 45 minutes or until browned on top and bubbly. Allow to cool for about 10 minutes before serving so the cheese has time to solidify before slicing. Enjoy!


Nutrition Facts provided by SparkPeople recipe calculator
Amount Per Serving
Calories 127.3
Total Fat 9.6 g
Saturated Fat 5.9 g
Polyunsaturated Fat 0.2 g
Monounsaturated Fat 1.2 g
Cholesterol 30.2 mg
Sodium 372.7 mg
Potassium 169.7 mg
Total Carbohydrate 4.2 g
Dietary Fiber 0.8 g
Sugars 1.3 g
Protein 7.9 g

Thursday, August 11, 2011

Vanilla Bean pudding

My friend Kelly requested a good vanilla pudding recipe. I immediately started thinking about what a good vanilla pudding would be; rich and creamy, solid but not gummy, complex in vanilla flavor, not just sweetened milk. Its a lot harder to come up with a GOOD vanilla pudding than you'd think! The Witch tried a few different variations, one version was too eggy in flavor, one wasn't sweet enough. Simple fixes resulted in a smooth, velvety, rich, sweet and vanilla is the flavor with all of its complex deliciousness. And I absolutely love the specks of vanilla bean and how they burst when you chew them releasing even more vanilla. Delicious!

Guess what else I learned while making this pudding? The Witch learned that sometimes its not a great idea to recycle plastic things. Why?? Well, allow me to explain. The little Witch sees the pudding cups at the grocery store and of course asks for them. I politely decline, telling her that mommy can make pudding that tastes a lot better than what comes in those cups. Then she says "yeah, but what about the cups? I want the plastic cups Mom." Great...but wait! Then it hits me! Just save the little plastic bowls that mandarin oranges and fruit cocktail come in. Done! "Sure sweetie, Mommy can make it in cups, no problem!"


I make the vanilla pudding. I strain the pudding to ensure its velvety smoothness. I lovingly ladle the pudding into said cups, cover and refrigerate them. We wait 4 hours before tasting them. Finally! I take a bite excited to taste my rich vanilla flavor...why does it taste like fruit? Like mandarin oranges...oh wait...this was a cup of mandarin oranges and guess what? Plastic absorbs flavors. And when plastic gets hot it releases those flavors. Right into my vanilla pudding! So, the lesson here is that unless you want fruit and odd flavors in your vanilla pudding, use glass or porcelain for your pudding. I now use tea cups and they work perfectly, and lets be honest, they look a lot better than plastic cups.

Vanilla Bean Pudding
makes 8 (1/2 cup) servings
1/2 c + 2T sugar
1/4 c corn starch
3 cups 2% milk
1 cup heavy cream
2 egg yolks
2 vanilla beans, seeds scraped out
1 t vanilla extract
pinch salt

In a heavy bottom pan add 1/2 c sugar, cornstarch and the salt. Whisk well together to break up starch.

Over medium high heat add the milk and cream along with the scraped vanilla seeds AND the pods, whisking well to dissolve sugar and cornstarch. Bring to a boil and boil for 3 minutes whisking often to avoid hot spots and burning.

Whisk up the egg yolks with remaining 2 T sugar. Add 1 cup of hot pudding to the yolk, whisk well, quickly. Add the yolk mixture to the boiling pudding whisking to incorporate. Bring back to the boil and cook for 2 minutes longer, whisking to avoid scorch spots.

Turn heat off. Add the vanilla extract, stirring well.

Pour cooked pudding through a fine mesh sieve to strain out vanilla pods as well as any lumps or egg pieces. This will ensure a velvety smooth pudding. Pour strained pudding into tea cups and cover with plastic to avoid a skin from forming. Refrigerate for 24 hours before serving.

I just love all those vanilla beans!

Nutrition Facts provided by SparkPeople recipe calculator
Amount Per Serving
Calories 228.1
Total Fat 13.4 g
Saturated Fat 8.2 g
Polyunsaturated Fat 0.6 g
Monounsaturated Fat 3.9 g
Cholesterol 73.7 mg
Sodium 69.2 mg
Potassium 24.9 mg
Total Carbohydrate 23.7 g
Dietary Fiber 0.0 g
Sugars 19.3 g
Protein 4.0 g

Tuesday, August 9, 2011

Curried chicken salad

Chicken salad is another one of those classic foods that the Kitchen Witch wouldn't even try until last year. Why?? Mayo! Let me be the first to tell you when you decide you don't like something like mayo it really really really limits your food choices, especially in summer. Potato salad? Nope. Tuna salad? Oh heck no! Chicken salad?! Don't even waste my time. That's how it used to be around here until the Witch put on her big girl pants & got over her mayo aversion. Ok, sure, I still don't love mayo, but I'll enjoy some chicken salad and not be grossed out about it. How mature of me! When the weather is hot outside who wants to stand in an even hotter kitchen and cook? Not this Witch, that's for sure!! Enter the wonder that is chicken salad. There are so many versions of chicken salad, its as varied as your individual tastes. Recently my tastes were telling me curry, and rather than heat up the kitchen making a curry base I decided to just make a curried chicken salad.

Now, as you may or may not know, the Witch is a all about keeping on a budget. this chicken salad was the brain child of wanting curry, stuff on sale & what I had in my pantry. Here's how it came together and its approximate costs. Rotisserie chickens were on sale for $4 each, so I got one and picked it clean and used half of it ($2). About a month ago the store had a BOGO sale on dried fruit: I picked up some dried mangos with no real intent of how or where to use them. Seeing as how I enjoy a burst of sweetness in my chicken salad and mango is awesome with curry, I decided to dice some up and add it to the salad ($3 a bag, BOGO, $1.50 a bag, used less than 1/4 bag so about .25). Walnuts and pecans, what I had on handalong with a rib of celery added a nice crunch and nutty flavor (approx $.50 in nuts and celery). Curry powder and cardamom were in my pantry already, along with garlic and onion powders (cost less than .25 total for all spices). Lastly the mayo and sour cream were already in my fridge, I'll approximate their costs at .50 total. All in all my lunch for 2 people cost $3.50. And no heating up the kitchen, bonus!!

The flavors on this salad was so good. The cardamom and curry powder set the base flavors, spicy but not hot, rich and complex and just plain delicious. The creamy mayo and sour cream round out the flavors. Bursts of sweetness came from the mango which was a delightful contrast to the crunchy nuts and celery. And the rotisserie chicken provided its own savory delicious flavor. Next time I make this, and there WILL be a next time, I think I'll make some naan too. The curried salad on fresh soft naan would be out of this world good. If you don't have naan you can use regular bread, crackers or just eat it plain. Enjoy!

Curried Chicken Salad
makes 2 servings
1/2 rotisserie chicken, picked of its meat including wings, skin & bones discarded
1 t curry powder
2 cardamom pods ground and green pod discarded
1/8 t each garlic powder and onion powder
1/2 t kosher salt
pinch ground black pepper
1/3 to 1/2 c mayo
1/4 c sour cream
1 rib celery diced
1/4 nuts, walnuts and pecans
4 slices dried mango, diced

Mix the spices with the mayo and sour cream. Stir until very smooth and allow to rest for about 20-30 minutes.

~*~Kitchen Witch Tip: When ever I'm making a salad or dressing I like to use powdered or granulated garlic and onion. You get all the flavor with out the sharpness that fresh can give you. It is important to let your dressing rest for about 30 minutes before eating it as this gives time for the garlic and onion powders to rehydrate and achieve maximum flavor.~*~

Dice the mango and celery. Chop up the shredded chicken meat. Chop the nuts and add everything into a mixing bowl.

Pour the spiced mayo blend over the chicken and veggie/nut mix. Stir well to coat everything well. Best if allowed to rest for 30 minutes before serving as this will rehydrate the mango slices as well as the onion & garlic powders.


Nutrition Facts provided by SparkPeople recipe calculator
Amount Per Serving
Calories 604.8
Total Fat 54.6 g
Saturated Fat 11.1 g
Polyunsaturated Fat 7.4 g
Monounsaturated Fat 6.6 g
Cholesterol 77.7 mg
Sodium 1,017.5 mg
Potassium 183.8 mg
Total Carbohydrate 14.3 g
Dietary Fiber 2.0 g
Sugars 8.6 g
Protein 19.8 g

Monday, August 8, 2011

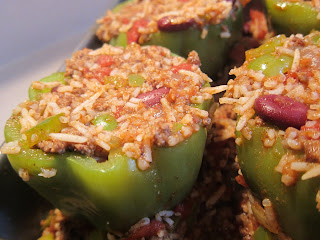
Chili style stuffed bell peppers

Growing up the Kitchen Witch was NOT a pepper fan. From bells to spicy jalapenos, she hated them all. Green bell peppers might not have been spicy but they sure were bitter. And bitter is a flavor that I struggle with to this day. As the years have progressed the Witch has learned to embrace the bell pepper as an ingredient, its bitter green flavor is awesome in so many places - I can't imagine a fajita with out one! But to eat the whole bell pepper is still a bit outside of my comfort zone. Now the Witchs' husband LOVES bitter. And he loves bell peppers. And he's been clamoring for stuffed bell peppers for a while now. So when green peppers went on sale for .50 each I planned my stuffed bell pepper attack. One that hopefully even the Witch would enjoy.

It was a gloomy rainy day the day these were made so a chili style filling seemed in order. The chili style filling also gave me the perfect opourunity to use my Black Canyon chili powder blend from Savory Spice. This stuff is amazing!!! Its a blend of chile peppers, cocoa powder, garlic, toasted onion, Saigon cinnamon and Mexican oregano. The cinnamon and cocoa powder sound strange I'm sure but really they're used often in Mexican cooking, Mole is loaded with cinnamon and cocoa and its delicious!! Don't worry, your chili won't taste like a dessert, rather, it has a spicy flavor that makes you wonder exactly WHAT that delicious component is. The rich flavors blended perfectly with the ground beef, spicy tomatoes, kidney beans and rice in the peppers.


And about those peppers. The Witch decided to blanch them first, to par cook the pepper in an attempt to cook some of the bitterness out of them. It worked pretty well, the peppers were tender yet not mushy, flavorful and not too bitter. The tops of the peppers are diced up and added to the chili mix. And simply because I had it and needed to use it up, I capped each bell pepper with a crown of shredded Monterey Jack and cheddar cheese. All in all I have to say I enjoyed the chili filling a lot more than I enjoyed the entire stuffed pepper, but that's my own strange palette at work. The Witches' husband loved the peppers and really liked the chili style filling. If you're looking for a fun retro type dish with great flavors, give this one a try!

Chili Style Stuffed Bell Peppers
makes 4 servings
4 bell peppers
1/2 lb ground beef
1 can tomatoes with jalapenos
1 can kidney beans, drained and rinsed
1 T black canyon chili powder blend
OR 2t chili powder, 1/4 t ground cinnamon, 1/2 t ground cumin 1/4 t cocoa powder
1/2 onion diced
3 cloves garlic minced
1 1/2 c cooked rice
1/2 c water
1 t kosher salt
1/8 t black pepper
4 oz shredded Monterey jack cheese or colby jack

Bring a large pot of water to boil for blanching the peppers
Preheat oven to 350F

Slice the tops off the peppers and remove the seeds and pithy membranes. Chop up the tops for use in the stuffing. Dice the onions and mince the garlic.

Salt the water generously and blanch the bell peppers for 5 minutes.


Brown the beef in a skillet over medium high heat. Add the onions and garlic when been if 1/2 browned. Add the chili powder, salt & pepper, stir well to coat. Cook about 3 minutes until it smells fragrant.

Add the tomatoes, chopped bell peppers, beans and water. Simmer for 5 minutes. Stir in the cooked rice and set aside.

In an 8x8 square pan place about 1 cup of the chili filling at the bottom. Place each of the blanched and drained peppers in the pan and fill with the chili mixture. Any remaining filling can be stuffed into the bottom of the pan to help support the peppers. Top each stuffed pepper with shredded cheese. Bake for 30 minutes or until the cheese is melted and bubbly.

Allow to cool for at least 5-10 minutes before serving.


Nutrition Facts provided by SparkPeople recipe calculator
Amount Per Serving
Calories 471.4
Total Fat 21.6 g
Saturated Fat 9.8 g
Polyunsaturated Fat 0.9 g
Monounsaturated Fat 7.7 g
Cholesterol 72.5 mg
Sodium 1,185.2 mg
Potassium 698.4 mg
Total Carbohydrate 46.2 g
Dietary Fiber 8.8 g
Sugars 2.3 g
Protein 24.4 g

Friday, July 22, 2011

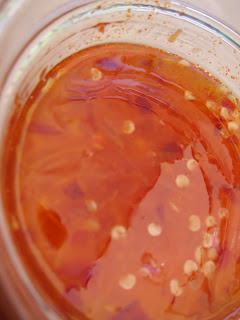
Sweet Chili sauce

When I made eggrolls the other day we had a Thai sweet chili dipping sauce to go with it. This sauce was from the Asian market and was very flavorful, like spicy sweet and sour sauce. As we ate the eggrolls the sauce quickly depleated. Not wanting to make a special trip to the Asian market just for the Sweet Chili sauce, I decided to use my witchcraft and just make a batch to use with the last of our eggrolls.

Seriously, it took 10 minutes total. And that includes how long it took to assemble my ingredients. Talk about quick! I made the sauce much like I do my sweet & sour, sugar and vinegar, thickened with a bit of cornstarch. To make it more like the Thai sweet chili sauce we had enjoyed I added finely grated carrot, garlic and of course chili paste. I was absolutely thrilled when the clear sauce took on the orange hue that the bottled one had. The carrot adds sweetness, earthiness as well as coloring to the sauce. Sambal chili paste added the heat as well as more orange color. The great thing about making your own chili sauce is that you can adjust the heat. I made mine a bit spicy and it was perfect. I can also see using this for my sweet & sour stir fries. Yum!

Sweet Chili sauce
makes about 12 servings
1 cup sugar
3/4 c white vinegar
1/2 c water
1-2 T chili paste
3 cloves garlic crushed but left whole
1 carrot fine grated
1 T corn starch
pinch of salt

In a small sauce pan combine the vinegar, water, sugar, garlic and carrot. Bring to a boil and cook at high boil for 3 minutes.

Make a cornstarch slurry of cornstarch and equal amounts water and slowly add to syrup then add the chili paste and a pinch of salt and boil for 3 minutes longer.

Taste and add more chili paste if needed. Remove garlic before serving.


Nutrition Facts provided by SparkPeople recipe calculator
Amount Per Serving
Calories 75.3
Total Fat 0.1 g
Saturated Fat 0.0 g
Polyunsaturated Fat 0.0 g
Monounsaturated Fat 0.0 g
Cholesterol 0.0 mg
Sodium 149.8 mg
Potassium 36.6 mg
Total Carbohydrate 19.5 g
Dietary Fiber 0.4 g
Sugars 18.0 g
Protein 0.0 g

Wednesday, July 20, 2011

Eggrolls

Recently I reconnected with a good friend from high school, Tammi. We hadn't seen each other in over 10 years and it was great to catch up with her again. What was the basis of this reunion you may ask? Eggrolls. Tammi's mom made the BEST eggrolls my young palette had ever experienced. They weren't cabbage based eggrolls like most Chinese restaurants, no rather these rolls were filled with delightful clear noodles, egg and beef. They were simple and delicious. I had been trying to recreate these babies for years with no luck. Thanks to facebook I messaged my old friend to see if her mom would be willing to share the eggroll recipe with me. I was delighted when she said yes, and even offered to come over to show me how they're done!

The delightful clear noodles used in these eggrolls are bean threads. They are made from mung beans - the same bean that we get bean sprouts from. You have to soak the threads in hot water first to rehydrate them before use. They are unexpected in eggrolls, honestly these eggrolls are the only ones I've ever known to have bean threads in them. Its those bean threads that set this roll aside from others. Well that and fish sauce. Seeing as how the creator of these eggrolls is Thai descent it makes sense that she uses fish sauce in them. Fish sauce is salty and if used in large quantities can have an overpowering fishy flavor. If used judiciously it adds a nice mellow salty flavor, not at all fishy.

After you've got the filling ready to go, all that's left is rolling. It takes a little bit of practice to get it right; too little filling and the rolls fall apart in the hot oil. Too much filling and the rolls are hard to roll and can burst while frying. I found that it takes about 3T of filling to make a nice plump eggroll. We were able to get 2 packages of eggroll wrappers stuffed and had about 2 cups of filling left over still. The extra filling could be frozen for future eggrolls; I think my leftover filling will find its way into a salad with a sesame ginger dressing. The eggrolls freeze nicely before frying.

Eggrolls
makes at least 24 rolls
Source: Tammi's mom SueBun
2 packs eggroll wrappers
1 pack bean thread noodles
6 eggs, beaten - reserve 1 for sealing the rolls
about 1/2 lb bean sprouts
1 lb ground beef
4 cloves garlic minced
up to 1T fish sauce
oil for frying

Begin by soaking the bean threads in hot water to rehydrate. You'll need about 1/2 to 2/3 of the package of bean threads.

Heat a wok or large skillet over high heat. Once hot scramble eggs (5 of them, reserve 1 for sealing the rolls). Once cooked remove and reserve.

Add about 1T oil to the wok and cook garlic until it just starts to brown. Add the ground beef and break up while browning. Once browned add the bean sprouts, stir well. Add the scrambled eggs to the beef. Now drain the bean threads and snip them with scissors into smaller pieces. Add bean threads to the beef and stir well.


Add fish sauce to taste. Start light and add more as needed. Fish sauce is similar to soy sauce in it salt content. If you use too much it'll have a fishy flavor, which is not what you're going for here. 4 times around the wok to start with, stir well and taste. Not seasoned enough? Do it again. I ended up doing 3 installments of fish sauce to get the seasoning where it was needed.

Start rolling the eggrolls by placing about 2-3T of filling on the eggroll wrapper, placed on a diagonal. Pull one end up over the filling, rolling it and using the end to help tighten the roll. Roll 1/2 way up the wrapper before folding in 2 of the sides. When you have a small triangle left at the end cover that with beaten egg and finish rolling. Press to seal.

Fry eggrolls in 350F oil. Cook until golden brown. Remove from hot oil, drain and serve with sweet chili sauce and soy sauce. Enjoy!


Nutrition Facts provided by SparkPeople recipe calculator
Amount Per Serving
~*~Nutrition info is based on an unfried eggroll. Add approx 75 calories per eggroll when deepfried. The fat will change also, however the amount depends on length of time in oil, type of oil used, etc.~*~
Calories 150.7
Total Fat 4.6 g
Saturated Fat 1.7 g
Polyunsaturated Fat 0.4 g
Monounsaturated Fat 1.9 g
Cholesterol 62.6 mg
Sodium 169.9 mg
Potassium 73.2 mg
Total Carbohydrate 19.6 g
Dietary Fiber 0.6 g
Sugars 0.8 g
Protein 7.7 g

Tuesday, July 19, 2011

Roasted tri color potatoes with herbs and cheese

Roasted potatoes are a staple in the Witch household. The browned bottoms, crispy and chip like compliment the soft and creamy insides while the skin is crispy and salty. If you're a potato lover you have got to try these!

The potatoes take about 30 minutes to roast, making them an ideal side dish. While you're working on the main dish these little gems mind their own business, getting all delicious in the oven with very little interaction from you. Adding an herb oil to the finished potatoes brings out all the bright flavors in the herbs and compliments the earthy potato nicely.

If you've never tried a Peruvian blue potato this is a great place to experiment. They taste like a regular potato but have a great blue color. Their flavor is slightly more earthy and really good. The blues are my favorite roasting potatoes, not just for their flavor, but its fun to eat blue food! Baby Yukon golds, Red Bliss or any fingerling potato will work fine here too. I hope you enjoy this easy and tasty dish!


Roasted potatoes with herbs and cheese
makes 4 servings
8 small potatoes, red bliss, yukon gold and Peruvian blue are all fantastic
3 T olive oil
3/4 t kosher salt, divided
ground pepper to taste
fresh herbs including chives, parsley, rosemary and thyme, minced
fresh grated Asiago cheese, or cheese of your choice, about 1/3 c grated

Preheat oven to 425F.

Wash and scrub potatoes. Cut potatoes in half. Pat potatoes dry with paper towels.

Place potatoes on a sheet pan and drizzle with 1.5 T of oil, 1/2 t kosher salt and pepper. Toss potatoes to evenly coat in oil and salt. Place potatoes cut side down and put into the hot oven.

Roast for 30 minutes until the bottoms are browned and the potatoes are soft.

While potatoes roast make the herb oil by mincing your herbs very fine and stirring into the remaining oil with the last 1/2 t of salt & pepper. Stir well.

Once potatoes are roasted remove from sheet pan and put into a bowl. Pour the herb oil over top and toss. Add your grated Asiago cheese, toss. Top potatoes with any extra cheese, if desired, and enjoy.


Nutrition Facts provided by SparkPeople recipe calculator
Amount Per Serving
Calories 382.3
Total Fat 13.1 g
Saturated Fat 2.8 g
Polyunsaturated Fat 1.1 g
Monounsaturated Fat 8.0 g
Cholesterol 6.3 mg
Sodium 465.4 mg
Potassium 1,431.4 mg
Total Carbohydrate 59.4 g
Dietary Fiber 7.5 g
Sugars 2.7 g
Protein 8.6 g

Monday, July 18, 2011

Sweet and spicy barbecue sauce

The Witch has shared a few barbecue sauce recipes on this blog before. And honestly I've not made either of them again because they weren't just right. Let's get a few things straight first: The Witch is very paticular on what kind of BBQ sauce she likes. It can't have any HFCS. It must be sweet, spicy and tangy. Not mustardy. So when a good friend and awesome cook suggested I try her BBQ sauce I said why not??

Boy oh boy that was the best "Why not" decision I've made in a LONG time!! This sauce is GOOD people. Really really good. And easy, too!! The list of ingredients is long - please don't let that intimidate you. Almost all of the ingredients are things that you should have in your pantry. The liquid smoke is one that you might not have, but its readily available at the grocery store in the ketchup/steak sauce section. It comes in 2 flavors, hickory and mesquite. I like the hickory for sauces but please use which ever smoke flavor you like the most.

The sauce is sweet from honey, brown sugar and a kiss of molasses. Its tangy from tomato paste, vinegar and Worcestershire sauce. The spice come to you courtesy of chili powder, a mere 1/2 teaspoon, yet it flavors the sauce greatly. The Witch ground ancho chilies specifically for this sauce, they're my favorite chilies, sweetish and spicy but not HOLY HELL THIS IS HOT spicy. To grind your own chilies into chili powder couldn't be easier: get about 6 dried chilies of your choice, break them into smaller pieces discarding the stems and some of the seeds. Place them into a grinder (I have a dedicated coffee grinder that's for spices only) and grind until they are powdered. That's it! Homeground ancho powder!

After mixing up the sauce and allowing it to simmer for an hour or more your house will smell amazing. Try not to eat all the sauce before slathering it onto your favorite foods. I simply grilled some thick cut pork chops and glazed them with this sauce. It was amazing!! Everyone in the Witch household agreed that this is our new barbecue sauce. Thanks again Jenni for the awesome sauce recipe!!

Sweet and spicy barbecue sauce
Source: Jenni
makes about 2 cups of sauce, 8 generous servings
2 1/4 tablespoons vegetable oil
1/2 cup minced onion
1 1/2 cups water
1/2 cup tomato paste
1/2 cup white vinegar
1/2 cup brown sugar
2 1/2 tablespoons honey
2 tablespoons Worcestershire sauce
2 teaspoons kosher salt
1/4 teaspoon coarsely ground black pepper
1 1/4 teaspoons liquid smoke flavoring
2 teaspoons whiskey
3 cloves garlic, minced
1/4 teaspoon smoked paprika
1/2 teaspoon onion powder
1 tablespoon dark molasses
1/2 tablespoon ground red chile powder (I used ground ancho peppers)

In a sauce pan heat the oil over medium high heat. Add the onions and cook for 5 minutes until slightly softened and the edges start to brown.

Add the remaining ingredients to the pan. Whisk well to incorporate. Bring up to a boil then reduce to a low simmer and allow to simmer uncovered for 1.5 hours or until sauce has thickened. Stir every 15 min or so and scrape down the sides to avoid burning and hot spots.

Serve with your favorite grilled meats. Enjoy!


Nutrition Facts provided by SparkPeople recipe calculator
Amount Per Serving
Calories 149.8
Total Fat 4.5 g
Saturated Fat 0.3 g
Polyunsaturated Fat 1.3 g
Monounsaturated Fat 2.6 g
Cholesterol 0.0 mg
Sodium 674.2 mg
Potassium 288.9 mg
Total Carbohydrate 31.5 g
Dietary Fiber 1.0 g
Sugars 28.5 g
Protein 0.9 g

Friday, July 15, 2011

Cheesy veggies with bacon

It was a typical week night: The Witch has been busy (probably playing on facebook or blogging, but busy nonetheless) and suddenly, the Husband is home! Oh joy, its so good to see you Husband but holy crap! When did it get so late? What's for dinner??? I should have thought about this hours ago! A quick inventory yields pork chops, I decide to simply bread and pan fry them. We'll need vegetables, of course. What can I get the girl to actually eat? More importantly, what do I have on hand?

A can of corn. Zucchini. Cherry tomatoes. Onions, garlic, of course. And bacon. Bacon, why yes! The little Witch loves bacon, I can get her to eat the veggies if there's bacon in them. Hmm...there's extra cheese in the fridge too. She likes cheese. The combo of cheese and bacon would be the double whammy to veggie consumption I was sure of it!

And I was right! She passed up everything else on the plate and demolished the veggies. She even had seconds!! And much to everyone's surprise, she ate it ALL, zucchini and cherry tomatoes included. She claims to hate zucchini, and I saw her start to tell me that she wasn't going to eat that part, but after she put it in her mouth all doubt was gone. This side dish was a hit to say the least - I hope you enjoy it as well!

Cheesy veggies with bacon
makes 4 servings
4 strips bacon, sliced into bits
1/4 onion diced fine
1 clove garlic minced
2-3 ears corn, taken off cob OR 1 drained can of corn
1 zucchini diced
about 15-20 cherry tomatoes OR 3 roma tomatoes diced
4 oz cheddar cheese shredded
1/4 c white wine or water

Cook the bacon in a large sautee pan until crispy. Remove and drain bacon, reserve for later use.

In the same skillet use 4 T of the rendered bacon fat, discarding the rest, and cook the onions and garlic until they start to brown, about 5-7 minutes. Add the diced zucchini and cook until golden, another 10 minutes or so. Stir frequently to avoid hot spots & burning. If using fresh off the cob corn add it now too.

Once the zucchini has started to turn golden add the corn (if using canned) and cherry tomatoes. Stir well to coat everything in the bacon fat. Cover and allow to cook another 5-10 minutes, stirring ever few minutes.

Deglaze the pan with the wine or water. Stir well scraping the bottom to dissolve the cooked on browned bits. Simmer for 4-5 minutes to reduce liquid.

Once the tomatoes burst add the cheese in an even layer over the top and cover with bacon pieces. Cover and remove from heat. Allow cheese to melt, about 2-3 minutes and serve.


Nutrition Facts provided by SparkPeople recipe calculator
4 Servings
Amount Per Serving
Calories 217.8
Total Fat 14.0 g
Saturated Fat 7.3 g
Polyunsaturated Fat 0.6 g
Monounsaturated Fat 2.8 g
Cholesterol 39.8 mg
Sodium 417.4 mg
Potassium 303.8 mg
Total Carbohydrate 13.9 g
Dietary Fiber 4.6 g
Sugars 0.8 g
Protein 9.0 g

Monday, July 4, 2011

Polynesian kabobs

Kabobs are one of the Witches' favorite things to grill. Why? Well, first of all they're really pretty! I love all the colors of veggies lined up on skewers next to perfectly grilled and slightly charred meats. The smaller chunks of meat means that theres more surface area for the marinade to make contact with the meat, therefore more flavor in every bite. They also are quick cooking since the pieces are smaller, an added bonus when its hot outside and standing around a hot grill while a hungry family wonders if its done yet. Yes kabobs are one of summer's perfect foods!

Best part of kabobs is how versatile they are. Want garlic & herb? Go for it! How about BBQ sauce? Sounds good to me. But what about Polynesian? Hmm...the sweet, spicy flavors of Polynesia is perfect for the grill!! The inspiration for this recipe was from my friend Eric. He had us over for dinner and made Polynesian kabobs. I was in heaven!! Grilled chunks of chicken and beef in a deep dark marinade, oh boy it was good!! The grilled pineapple was the crowning glory on this kabob fest. Eric's marinade was so flavorful and delicious that I knew the Kitchen Witch would be recreating this in her own home. Soon!

The marinade has a lot of Polynesian flavors, ginger, garlic, molasses. Yes, molasses. It adds the deep dark color, sweetness and a depth of flavor that is amazing. When the hot fire kisses the molasses marinade it caramelizes and seals in the meats natural juices making one of the best kabobs I've ever had the pleasure of putting into my mouth. The Kitchen Witch took a few liberties with Eric's marinade, no real surprise there, and added a touch of cinnamon, coriander, chili powder and ginger with just a bit of vinegar to balance the sweetness of this flavorful sauce.

The result is a sweet and savory kabob, spiced just right and absolutely delicious. The veggies are a great compliment to the grilled meats; grilling them brings out the natural sweetness and enhances the flavors. Finally the fresh pineapple, caramelized from the grill, brings all the flavors of Polynesia together. These Polynesian kabobs will take your tastebuds on a trip to an exotic island vacation, all with out leaving the comfort of your home. Enjoy!

Polynesian kabobs
makes 6 to 8 servings
Inspired by Eric
2 lbs meat, chicken, pork or beef, your choice, cut into 2 inch chunks
2 zucchini, cut into 2 inch pieces
2 bell peppers, cut into 2 inch squares
1 onion cut into large wedges
1 pineapple, cored, skinned and cut into 2 inch chunks
1/3 c molasses
2 T brown sugar
1/4 c soy sauce
1 T rice vinegar
1 inch ginger minced
2-3 cloves garlic
3/4 t allspice, ground
1/4 t ground coriander
1/8 t ground cinnamon
1/8 t chili powder
1/4 t red pepper flakes (optional)
2 T oil

Mix the soy sauce, molasses, oil, brown sugar, ginger, garlic and spices in a bowl. Stir until sugar is dissolved.

Pour marinade over meat pieces in a resealable bag. Allow to marinade for 2 hours.

Chop veggies into 2 inch chunks and toss with 1T of oil, salt & pepper.

If using bamboo skewers soak in water for a minimum of 30 minutes before skewering and grilling.

Skewer meat onto soaked skewers
Skewer veggies and brush with oil
Skewer the pineapple chunks

On a preheated grill cook the meat and veg/fruit kabobs until cooked through and slightly charred on the edges. Pork should cook to an internal temperature of 145F, chicken to 160F and beef at 130F for medium. Remove and serve with rice.


Nutrition Facts provided by SparkPeople recipe calculator
Amount Per Serving - based on 1 lb pork loin and 1 lb chicken thighs, values will vary based on cut of meat you use
Calories 325.6
Total Fat 12.4 g
Saturated Fat 3.2 g
Polyunsaturated Fat 2.2 g
Monounsaturated Fat 5.6 g
Cholesterol 78.5 mg
Sodium 594.6 mg
Potassium 885.2 mg
Total Carbohydrate 31.7 g
Dietary Fiber 2.1 g
Sugars 23.0 g
Protein 24.4 g
Related Posts with Thumbnails