Showing posts with label Asian. Show all posts

Wednesday, March 21, 2012

Chopped at Home: Beets, Endive, pork and sweet chili sauce

A round of Chopped at Home happend this past weekend at the Kitchen Witches' home.  Good friend and cooking buddy Eric brought the ingredients for our challenge.  This time we had the following to work with:

Pork Loin roasts (2 of them, rolled and tied from the butcher)
4 bunches of fresh beets
Endive
Sweet Chili Sauce

Our rules were simple:  Make something for dinner using the secret ingredients and any pantry items I had on hand and the meal needed to be as low carb as possible.

The beets were easy.  We decided to roast them with some olive oil, salt & pepper.  When they were half way done we drizzled them with the sweet chili sauce.  The sweetness of the beets was maximized by the roasting and the sweet chili sauce was a nice glaze.  The heat in the chili sauce wasn't very prominent, it really cooked out, but ever now & then you'd get a hint of spice and it was a nice contrast to the beets.  We decided to throw the endive into the roasting pan with the beets when they were 3/4 of the way done.  The bitterness of the endive was tempered by the sweet beet and chili sauce glaze.   I am a tried & true beet hater.  I even grew some a few years ago to see if homegrown beets would be better than store bought ones (turns out nope, beets taste like beets regardless of where they're grown LOL!).  But you know what???  These beets, they were amazing!!  Really really good.  Sweet, earthy and delicious.  They will definitely be made again!

Now, onto the pork!  A wet paste of dijon mustard, thyme, extra hot horseradish, garlic and S&P was made from my pantry ingredients.  I also had fresh parsley and rosemary on hand so I minced up a lot of that, too.  We decided to half the roasts, slather them with the mustard sauce and herbs then re-roll the pork into a nice bundle.  More mustard on the outside covered with the fresh herbs and the pork went into the oven.  It LOOKED good, the mustard paste tasted good, sure hope it is good!  Verdict:  Success!!  The strong flavors of the mustard rub accented and seasoned the pork perfectly.  The fresh herbs added a great spring time flavor, as well as color, and really lightened things up.  When the pork was paried with the beets, well it was divine!  Sweet beets, savory pork laden with herbs and mustard.  Yeah it was good stuff!!!  The pork is defiantly another hit and one I'll be making again!

This round of Chopped at Home was incredibly successful in this Witches' opinion.  Eric, I'm pretty sure that we'd hear Ted Allen telling us that we are indeed the Chopped (at home!) CHAMPIONS!  Now where's our check for $10,000??  Ha ha ha!

Beets and endive with sweet chili glaze
Makes 4 servings
4 bunches beets, washed and peeled
6-8 heads endive, trimmed and halved
about 4-6T olive oil
kosher salt and pepper
1 jar sweet chili sauce (or make your own, awesome recipe here!)

Herb and Mustard Roasted Pork
makes 4 servings
1 pork loin roast, about 1.5 lbs
2T dijon mustard
1/2 t dried thyme
1/8 t white pepper
1/2 t kosher salt
1 t extra hot prepared horseradish
4 springs rosemary
1/4 head parsley minced
Butches twine for tying roast

Prepare beets and endive:
Preheat oven to 450F.  Peel the beets and trim the tops & root end.  Put them into a roasting pan and drizzle with 2-3T oil, kosher salt & pepper.  Reduce oven to 375F after putting the beets in.  Roast beets for about 45 min, stirring twice during that time, then add about 1/2 bottle (or 1/2 c) sweet chili sauce.  Stir well to coat beets evenly.  Continue roasting for another 30 minutes.  Add trimmed endive to roasting pan, drizzle with the remaining oil and sweet chili sauce.  Stir well to coat endive in the reduced sauce glaze and roast for 30 min longer.  Bottoms of beets will be deeply browned and caramelized.

Prepare pork:
Mix the wet rub by combining mustard, thyme, salt & white pepper and horseradish into a small bowl.  Stir well to combine.  Finely mince the parsley and rosemary.

Unwrap pork and remove the butcher twine/wrap.  Slice pork roast in half long wise.  Slather the inside cuts of the pork with the mustard mixture, about 1T for the inside.  Sprinkle herbs on the mustard and press both halves of the pork together.

Using butchers twine tie the roast back together, using 3-4 knots.  Coat the outside of the roast in remaining mustard mixture and then encrust it with the remaining herbs.  Place crusted roast on a sheet pan and bake for 60 minutes, or until a thermometer reads 145F minimum for medium-med well cooked pork, up to 160F.  Do not let it cook longer than 160F.  Remove roast and allow to rest for 15-20 minutes before slicing.  Remove and discarding strings as you slice the roast.  Enjoy!


Friday, July 22, 2011

Sweet Chili sauce

When I made eggrolls the other day we had a Thai sweet chili dipping sauce to go with it. This sauce was from the Asian market and was very flavorful, like spicy sweet and sour sauce. As we ate the eggrolls the sauce quickly depleated. Not wanting to make a special trip to the Asian market just for the Sweet Chili sauce, I decided to use my witchcraft and just make a batch to use with the last of our eggrolls.

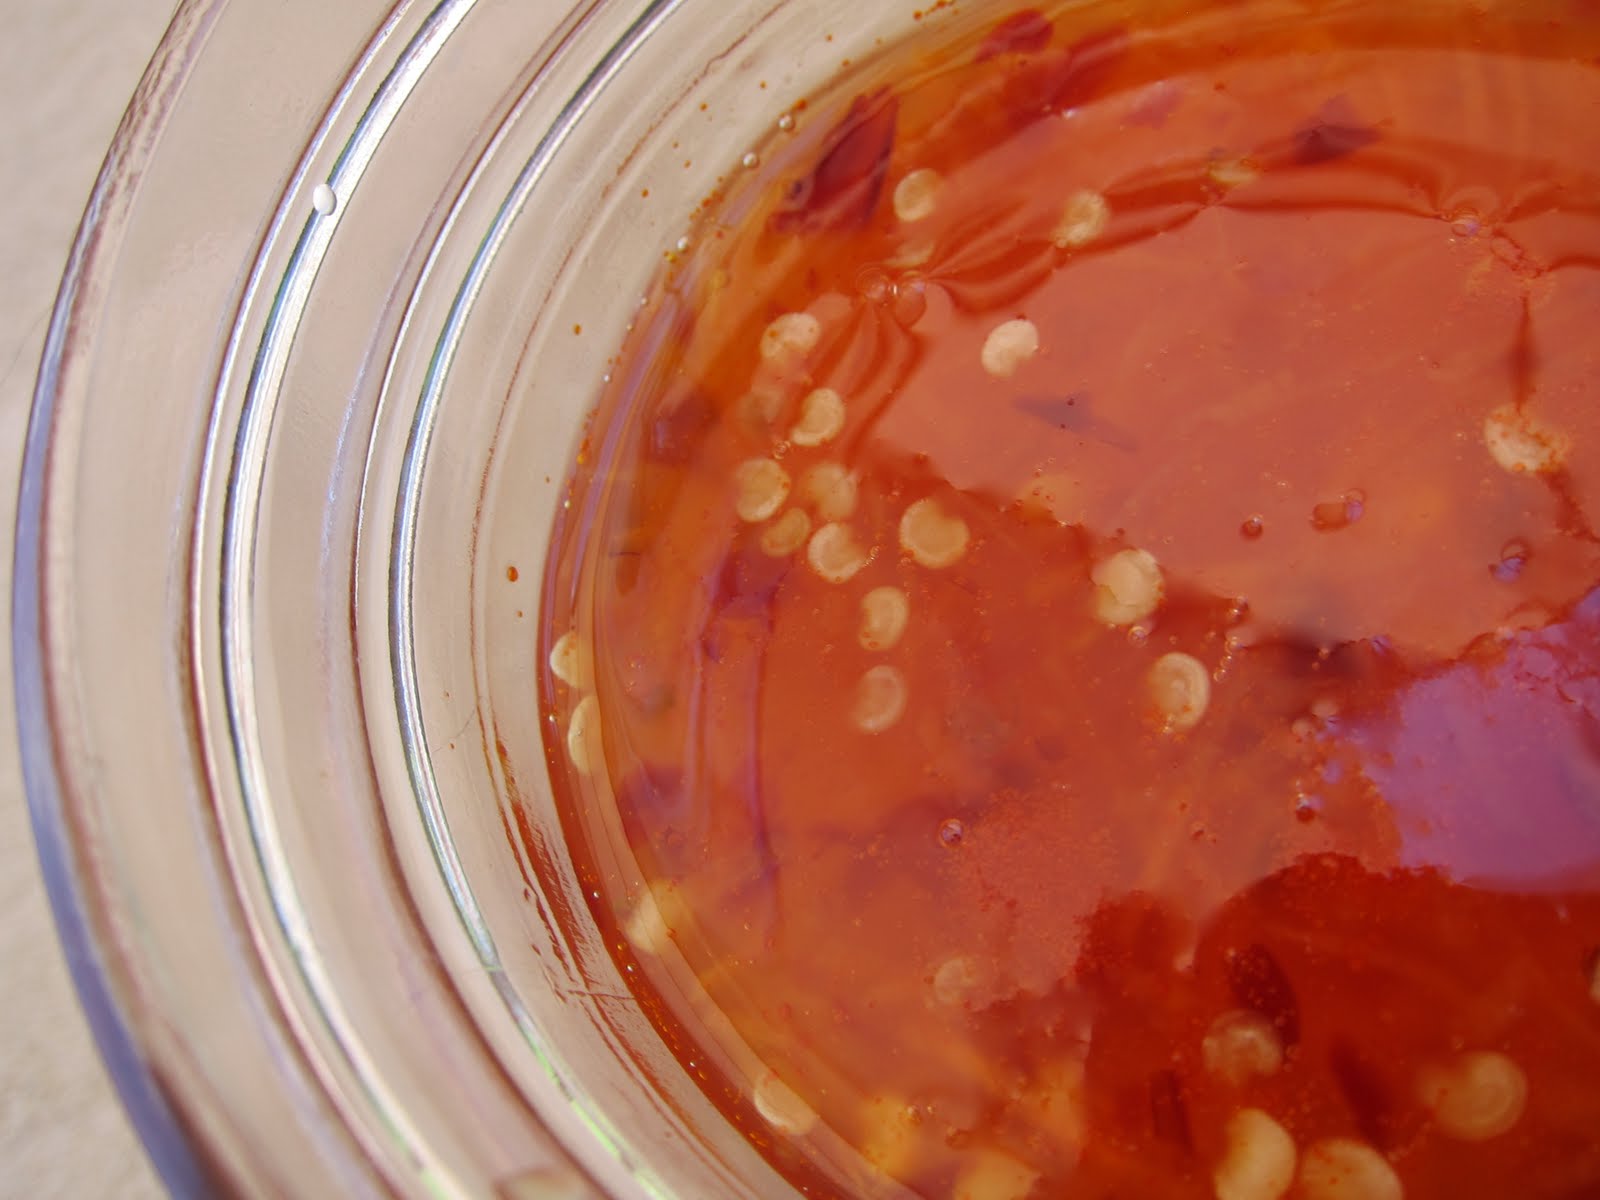
Seriously, it took 10 minutes total. And that includes how long it took to assemble my ingredients. Talk about quick! I made the sauce much like I do my sweet & sour, sugar and vinegar, thickened with a bit of cornstarch. To make it more like the Thai sweet chili sauce we had enjoyed I added finely grated carrot, garlic and of course chili paste. I was absolutely thrilled when the clear sauce took on the orange hue that the bottled one had. The carrot adds sweetness, earthiness as well as coloring to the sauce. Sambal chili paste added the heat as well as more orange color. The great thing about making your own chili sauce is that you can adjust the heat. I made mine a bit spicy and it was perfect. I can also see using this for my sweet & sour stir fries. Yum!

Sweet Chili sauce
makes about 12 servings
1 cup sugar
3/4 c white vinegar
1/2 c water
1-2 T chili paste
3 cloves garlic crushed but left whole
1 carrot fine grated
1 T corn starch
pinch of salt

In a small sauce pan combine the vinegar, water, sugar, garlic and carrot. Bring to a boil and cook at high boil for 3 minutes.

Make a cornstarch slurry of cornstarch and equal amounts water and slowly add to syrup then add the chili paste and a pinch of salt and boil for 3 minutes longer.

Taste and add more chili paste if needed. Remove garlic before serving.


Nutrition Facts provided by SparkPeople recipe calculator
Amount Per Serving
Calories 75.3
Total Fat 0.1 g
Saturated Fat 0.0 g
Polyunsaturated Fat 0.0 g
Monounsaturated Fat 0.0 g
Cholesterol 0.0 mg
Sodium 149.8 mg
Potassium 36.6 mg
Total Carbohydrate 19.5 g
Dietary Fiber 0.4 g
Sugars 18.0 g
Protein 0.0 g

Wednesday, July 20, 2011

Eggrolls

Recently I reconnected with a good friend from high school, Tammi. We hadn't seen each other in over 10 years and it was great to catch up with her again. What was the basis of this reunion you may ask? Eggrolls. Tammi's mom made the BEST eggrolls my young palette had ever experienced. They weren't cabbage based eggrolls like most Chinese restaurants, no rather these rolls were filled with delightful clear noodles, egg and beef. They were simple and delicious. I had been trying to recreate these babies for years with no luck. Thanks to facebook I messaged my old friend to see if her mom would be willing to share the eggroll recipe with me. I was delighted when she said yes, and even offered to come over to show me how they're done!

The delightful clear noodles used in these eggrolls are bean threads. They are made from mung beans - the same bean that we get bean sprouts from. You have to soak the threads in hot water first to rehydrate them before use. They are unexpected in eggrolls, honestly these eggrolls are the only ones I've ever known to have bean threads in them. Its those bean threads that set this roll aside from others. Well that and fish sauce. Seeing as how the creator of these eggrolls is Thai descent it makes sense that she uses fish sauce in them. Fish sauce is salty and if used in large quantities can have an overpowering fishy flavor. If used judiciously it adds a nice mellow salty flavor, not at all fishy.

After you've got the filling ready to go, all that's left is rolling. It takes a little bit of practice to get it right; too little filling and the rolls fall apart in the hot oil. Too much filling and the rolls are hard to roll and can burst while frying. I found that it takes about 3T of filling to make a nice plump eggroll. We were able to get 2 packages of eggroll wrappers stuffed and had about 2 cups of filling left over still. The extra filling could be frozen for future eggrolls; I think my leftover filling will find its way into a salad with a sesame ginger dressing. The eggrolls freeze nicely before frying.

Eggrolls
makes at least 24 rolls
Source: Tammi's mom SueBun
2 packs eggroll wrappers
1 pack bean thread noodles
6 eggs, beaten - reserve 1 for sealing the rolls
about 1/2 lb bean sprouts
1 lb ground beef
4 cloves garlic minced
up to 1T fish sauce
oil for frying

Begin by soaking the bean threads in hot water to rehydrate. You'll need about 1/2 to 2/3 of the package of bean threads.

Heat a wok or large skillet over high heat. Once hot scramble eggs (5 of them, reserve 1 for sealing the rolls). Once cooked remove and reserve.

Add about 1T oil to the wok and cook garlic until it just starts to brown. Add the ground beef and break up while browning. Once browned add the bean sprouts, stir well. Add the scrambled eggs to the beef. Now drain the bean threads and snip them with scissors into smaller pieces. Add bean threads to the beef and stir well.


Add fish sauce to taste. Start light and add more as needed. Fish sauce is similar to soy sauce in it salt content. If you use too much it'll have a fishy flavor, which is not what you're going for here. 4 times around the wok to start with, stir well and taste. Not seasoned enough? Do it again. I ended up doing 3 installments of fish sauce to get the seasoning where it was needed.

Start rolling the eggrolls by placing about 2-3T of filling on the eggroll wrapper, placed on a diagonal. Pull one end up over the filling, rolling it and using the end to help tighten the roll. Roll 1/2 way up the wrapper before folding in 2 of the sides. When you have a small triangle left at the end cover that with beaten egg and finish rolling. Press to seal.

Fry eggrolls in 350F oil. Cook until golden brown. Remove from hot oil, drain and serve with sweet chili sauce and soy sauce. Enjoy!


Nutrition Facts provided by SparkPeople recipe calculator
Amount Per Serving
~*~Nutrition info is based on an unfried eggroll. Add approx 75 calories per eggroll when deepfried. The fat will change also, however the amount depends on length of time in oil, type of oil used, etc.~*~
Calories 150.7
Total Fat 4.6 g
Saturated Fat 1.7 g
Polyunsaturated Fat 0.4 g
Monounsaturated Fat 1.9 g
Cholesterol 62.6 mg
Sodium 169.9 mg
Potassium 73.2 mg
Total Carbohydrate 19.6 g
Dietary Fiber 0.6 g
Sugars 0.8 g
Protein 7.7 g

Saturday, April 16, 2011

Yakitori Sauce

Here in Colorado Springs there's an awesome little Japanese restuarant that I've been going to for over 25 years now, called The House of Yakitori. They serve, yes that's right, Yakitori! Yakitori for those of you who don't know is skewered pieces of chicken, cooked over a charcoal grill, glazed with a delightful sweet sauce that is similar to teriyaki, but yakitori sauce is thicker, richer and a lot more flavorful than teriyaki sauce. For years I've been saying that I need to make my own yak sauce (as we fondly refer to it) and yet getting it just right has elluded the Witch, until now!

After many, many, many taste tests at the restaurant I was fairly confident that I knew what was in the sauce. Soy sauce, that was a given. Sugar, most likely brown sugar seemed right as well. And yet, time after time, it STILL wasn't yak sauce. Good teriyaki sauce, sure but yak sauce, no. What was missing I wondered?

Hours were spent at the Asian Pacific grocery, staring at the products in the 'SAUCES' aisle (and let me tell you thats a BIG aisle there!) wondering what I needed to take my sauce from good teriyaki to holy cow that's it Yakitori sauce. Then it hit me. Mirin! Mirin is a rice wine product with a very high sugar content. And it is EXACTLY what my yak sauce was missing.

The joy on the faces of my daughter, nephew, sister and husband was aparent when I offered them a sample of my yak sauce. At first they all looked at it like "oh sure Witch, you've claimed to make yak sauce before and its just NOT the same!" Then they try a sip. Their faces changed from dismay to delight, eyes light up and my wonderful wonderful nephew Ben even proclaimed "this is BETTER than yakitori sauce, it has more flavor and isn't as sweet as theirs!" The boy is almost 10 and is a genius, what can I say? :)

So here it is dear readers. Yakitori sauce. Its rich, thick, syrupy, sweet, salty, savory, umami laden and delicious. Perfect on grilled meats, especially chicken and beef. Because of its high sugar content it will burn quickly on the grill so use a judicious hand when dolling out the sauce over the coals. I sincerely hope you all enjoy this as much as we do!

Yakitori sauce
makes about 8 servings
1/2 cup soy sauce
1/2 cup mirin
1/2 cup brown sugar
1/2 cup water
2 T rice vinegar
2 cloves garlic whole, crushed with back of knife

Combine everything in a sauce pan and bring to a boil. Reduce the heat and simmer. Remove garlic cloves after 5 minutes of simmering. Continue to cook until sauce has reduced and is a thick syrup.


Chicken skewers:
1 lb chicken thighs boneless and skinless, cleaned and cut into chunks for skewering
2 T yakitori sauce
1 T soy sauce
bamboo skewers, soaked in water a minimum of 30 min before grilling

marinate chicken in the sauces for 1 hour. While chicken marinates soak the bamboo skewers in water. The moister the skewers are the less chances there is that they'll burn up on the grill.

Skewer about 2 oz of chicken on each skewer. Grill over hot charcoal until done.
Drizzle with yakitori sauce when finished.


Nutrition Facts provided by SparkPeople recipe calculator
Yakitori sauce only
Amount Per Serving
Calories 101.4
Total Fat 0.0 g
Saturated Fat 0.0 g
Polyunsaturated Fat 0.0 g
Monounsaturated Fat 0.0 g
Cholesterol 0.0 mg
Sodium 1,054.0 mg
Potassium 85.3 mg
Total Carbohydrate 28.0 g
Dietary Fiber 0.1 g
Sugars 26.4 g

Nutrition Facts
Chicken skewer with sauce, 1 each
Amount Per Serving
Calories 183.5
Total Fat 2.7 g
Saturated Fat 0.7 g
Polyunsaturated Fat 0.7 g
Monounsaturated Fat 0.8 g
Cholesterol 57.3 mg
Sodium 1,113.4 mg
Potassium 244.6 mg
Total Carbohydrate 28.0 g
Dietary Fiber 0.1 g
Sugars 26.4 g
Protein 14.6 g
Protein 1.0 g

Saturday, January 22, 2011

Chopped at Home week 1: Pork Wonton soup

I'm a lucky Witch! Why you ask? Because I've got a good friend whos amazing in the kitchen AND has a kid about the same age of the Little Witch. We've been having 'cooking play dates' where the kids play and the cooks, well cook! We've made quite a lot of delicious things - the cheese blintz pancakes were one of our creations.

This past weekend, my buddy came over with a hodge podge of ingredients. It was his idea that we'd play our own version of "Chopped", the cooking contest show from Food Network. On the show the contestants are given an ingredients basket and they have 30 minutes to create an edible dish using all of the strange ingredients. In the Witches' house, we take the mystery ingredients, spread them out on the kitchen table and then discuss what our plan of attack is. There is no time limit! Sure, its not the same as Chopped, but then again there's no TV crew to film us, either.

One of this week's mystery ingredients was pork hocks. All I could think to do with these was to cook them down & make a stock out of them. Pork stock. Ok sure, you've never heard of it but that doesn't mean that you shouldn't try it. Right away the Witch gets her trusty dutch oven out and starts the hocks browning. Throwing in a basic mire poix of celery, onion & carrot was only natural for stock making. I threw in a bit of garlic and ginger for a bit of Asian flavor. 2 hours later, we were witness to an extremely flavorful pork stock that was just begging to be made into a soup.

The wontons were just premade frozen wontons from the Asian market. Use whatever frozen wontons you like, or you can make your own. When we ladled the soup into the bowls and topped them with slices of green onions, well it was like being in a good Chinese restaurant. Rich. Flavorful. Unctuous and filled with umami. This soup was GOOD!! I'd have to award the Chopped championship to us, for sure! With a rockin' soup like this the competition didn't stand a chance. Oh wait...there was no competition. Well whatever, the soup was still good!

Pork Wonton Soup
makes 4 servings
5-6 pork hocks - unsmoked
2 carrots, peeled and cut into thirds
2 ribs celery, cut into thirds
1 onion, rough chop
3 cloves garlic, peeled and crushed but left whole
1 inch ginger, cut roughly, you don't even have to peel it
kosher salt & pepper to taste
frozen pork wontons
water
drizzle of oil

In a dutch oven or other heavy bottomed pot, heat over medium high heat and add oil. Once hot add the pork hocks and allow to brown. This will take about 5 minutes per side.

After first side is browned add the veggies to the pan, onions first, then carrots then celery and garlic. Allow to cook on 2nd side about 5-10 minutes, stirring veg once or twice to avoid burning.

Once the pork has browned and the veg have a slight bit of color on them add water, enough to cover the hocks in 2 inches of water (about half the pan full). Bring up to a boil then reduce to a simmer. Allow to simmer uncovered for 1 hour.

After 1 hour stir things around and add some salt and pepper (best guess is about 1/2 t kosher salt and 1/8 t pepper) and the ginger. Allow to simmer for another hour. The stock will start to thicken as the collagen is dissolved from the pork hocks enriching the stock. the stock will also reduce by about half, concentrating the flavors so be sure not to over salt initially. You can always add more salt later on.

Once stock is done, about 2 hours, strain off solids and discard them. Rinse out the stock pot, return the strained liquid to the pot and add 8 frozen wontons to the stock. Allow wontons to simmer in stock for 5-10 minutes, or until cooked through.

Serve soup with a drizzle of soy sauce and green onions if you have them.

Wednesday, January 12, 2011

Sesame Shrimp Lo Mein

Recently the Witch got brave, and with a little help from her friends, went to the Asian Pacific Grocery store. Why this place intimidated me for so long is a mystery, I'm just so glad that I've discovered it! As a lover of Asian flavors I was in foodie heaven with all those different types of soys, sauces, chili pastes and noodles. Oh, the noodles!! SO many choices: rice noodles, ramen in every variety you can imagine and a few you've never thought of, lo mein noodles, etc. The ones that really caught my eyes were the nested egg noodles. Something about them spoke to me, and I'm really glad I listened to their call!

The lo mein noodles are thin, yet have nice texture to them, light yet hearty enough to stand up to the intense heat of a wok. Their flavor is exactly what a lo mein dish needs. Once you've tried real Asian noodles in lo mein you won't be going back to plain old pasta as a substitution.

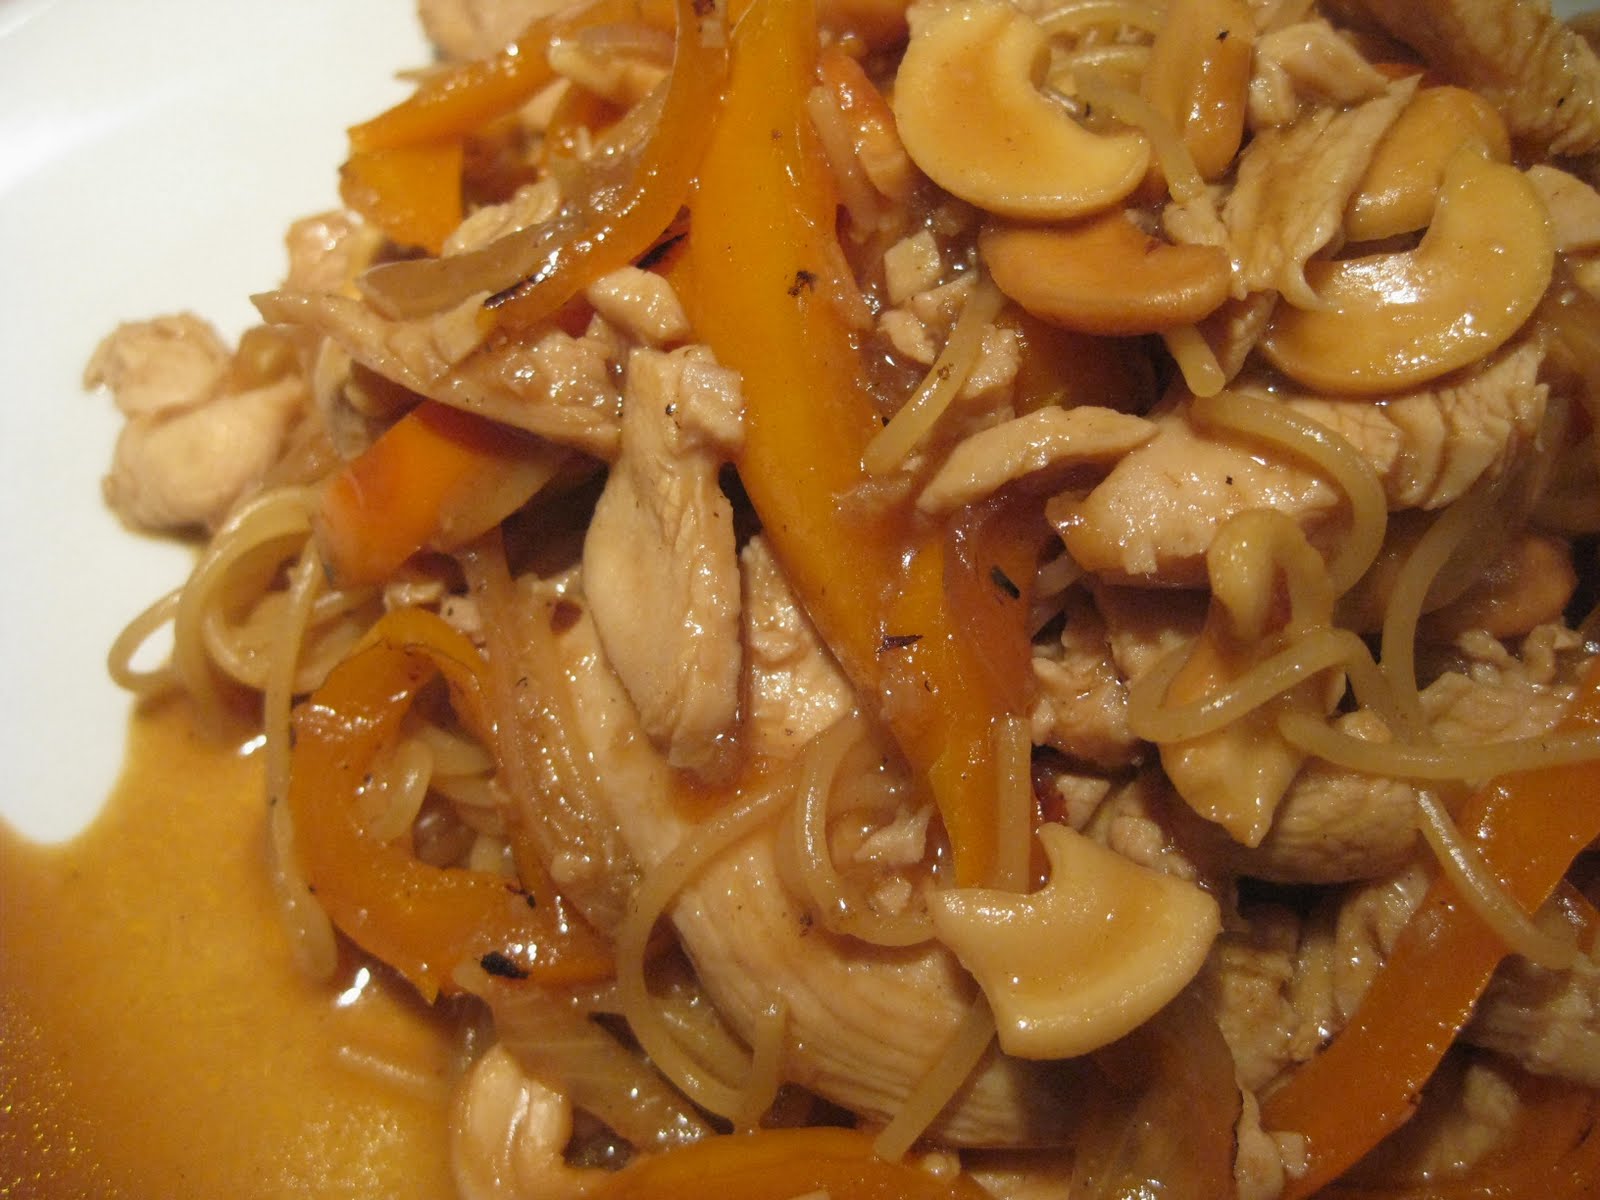
The flavors on this are inspired by sesame chicken, our most ordered dish from Chinese restaurants. The Witch chose to use a bit of tahini in the sauce to really bring the sesame flavor home, however I'll be the first to admit that the sauce needs a bit of tweeking. It was good, quite good, don't get me wrong, but its not perfect. I don't quite know what's missing, maybe a touch more acid? Less tahini? The flavor & texture of the sauce was very similar to peanut sauce, thick and rich, spicy and sweet, but SOMETHING was missing. If you all have any suggestions please let me know! Despite the sauce not being up to my high standards of perfection this dish was devoured and not a single left over noodle was to be found. Which just means that I need to make it again, and work on that sauce!

Sesame Shrimp Lo Mein
makes 4 servings
1 lb shrimp, defrosted, deveined and peeled, removing tails
red bell pepper, julienne
1 bunch scallions, sliced on the bias
1 large carrot, julienne
1 stalk celery, sliced thin on the bias
4 bunches of Asian egg noodles
3 T soy sauce
2 T white wine
3 cloves garlic
1 T tahini
2 T water
2-3T sugar
2 t Sriracha
sprinkle of sesame seeds for garnish
2 T oil for stir fry

Chop all vegetables and set aside first.
Peel and devein shrimp and pat dry.
Mix up the sauce ingredients in a bowl and reserve.

Cook noodles according to instructions on bag & reserve.

Heat a wok or large skillet over high heat. Add the oil and stir fry the veggies until they start to brown & have softened slightly. Push the veg aside in the pan and add the shrimp. Cook about 1/2 to 3/4 of the way through then add the sauce, stirring to coat everything evenly. After sauce is added throw the noodles in and stir fry about 1-2 minutes longer. Shrimp will finish cooking in this time. Garnish with sesame seeds and enjoy!


Nutrition Facts provided by SparkPeople recipe calculator
Amount Per Serving
Calories 374.6
Total Fat 12.0 g
Saturated Fat 1.3 g
Polyunsaturated Fat 4.1 g
Monounsaturated Fat 5.4 g
Cholesterol 185.8 mg
Sodium 963.5 mg
Potassium 784.3 mg
Total Carbohydrate 38.3 g
Dietary Fiber 5.2 g
Sugars 16.3 g
Protein 28.1 g

Thursday, December 2, 2010

Chicken with scallion and ginger sauce

Today's recipe comes to you courtesy of Design, Wine & Dine. Design, Wine & Dine is an exceptional cook, I've made many recipes from her blog and have loved them all! If you haven't done so already, please check out her site, I promise you'll enjoy what you see, she has a real flair with the camera and makes some killer dishes! Thanks Design, Wine & Dine for this delicious recipe, I knew when I saw it on your blog that it'd be a hit here and I was not mistaken.

Based on Design, Wine & Dine's recommendation I used the velveting process on my chicken. As usual it didn't disappoint. In addition to making the chicken flavorful, soft and yummy, the cornstarch helps thicken the sauce. The ginger in this dish isn't overpowering, its fresh bright flavor is perfect on a cold December night. The gentle onion flavor of scallion pair wonderfully with the light, crisp flavor of the white wine. Add the salty umami laden soy sauce with the velveted chicken and you've got a dish that is, well, its just down right delicious!

Chicken with scallion and ginger sauce
Makes 4 servings
Adapted from Design, Wine & Dine
1 lb chicken breast, cut into 2 in chunks
1 bunch scallions, cut on the bias into 1 inch pieces
1/2 bell pepper
3 inches ginger root, peeled and sliced into thin rounds
3 cloves garlic, sliced thin
3/4 c plus 1 T white wine
2 T soy sauce
1/2 c water
1 t sugar
3 T olive oil
1 T corn starch
1 egg white
1 t kosher salt
1/4 c salted cashews, optional
drizzle sesame seed oil, optional

Prepare chicken by marinating in velveting marinade:
~Cut chicken up and place into a bowl
~Sprinkle the kosher salt over chicken, using hands mix to evenly distribute over all the chicken pieces
~Next add 1 T white wine, mix well
~Next add the corn starch and mix well
~Next add the egg white taking care not to froth the egg with your hands
~Lastly add 1T oil and mix well.
Allow chicken to marinate for 30 minutes.


While chicken is marinading, cut up all your veggies & have them ready to go.


When 30 min is up bring a sauce pan of water to boil. Add the marinated chicken to the water in 3 batches, cooking for about 30 seconds, or until the outside just turns white. The chicken will finish cooking in the stir fry. Reserve par cooked chicken pieces and discard the boiling water.

Stir Fry instructions:
In a large sautee pan or wok, heat the remaining oil over medium high heat. Once hot add the ginger and garlic, stirring to keep garlic from burning. Cook about 30 seconds.

Add the par cooked chicken next, stir to coat in oil. Cook about 3 minutes, stirring often to avoid burning of the garlic.

Add the peppers, cook about 1-2 minutes, stirring often. Add scallions and white wine. Deglaze pan with the wine, scraping up any bits from the bottom. Allow wine to reduce by about half.

Add the soy sauce, water & sugar, cook for 2-3 minutes or until sauce has thickened slightly. If your sauce isn't thick enough you can add about 1T corn starch mixed with 1-2T water, add as much of this slurry as needed to achieve the proper thickness of sauce.

Add cashews and drizzle with sesame oil. Serve with hot cooked rice and Srirracha sauce if desired.


Nutrition Facts provided by SparkPeople recipe calculator
Amount Per Serving
Calories 351.7
Total Fat 16.0 g
Saturated Fat 2.6 g
Polyunsaturated Fat 2.0 g
Monounsaturated Fat 10.3 g
Cholesterol 68.4 mg
Sodium 1,084.6 mg
Potassium 561.7 mg
Total Carbohydrate 13.1 g
Dietary Fiber 1.5 g
Sugars 2.3 g
Protein 31.2 g

Wednesday, December 1, 2010

Filipino Adobo drumsticks

While blogsurfing the other day I discovered yet another delicious sounding recipe: this one was from Gina at Gina's Skinny Taste. She has a lot of delicious, low cal and Weight Watchers friendly recipes on her blog and everything I've tried from her site has been very yummy. When I ran across Filipino Adobo chicken I had to stop and look. Soy sauce, vinegar, bay leaves, garlic and pepper. That's it! Well hell, that sounds delicious, different and just plain GOOD! So I decided then & there that I must make it.

When I went to my grocery store I found a family pack of chicken drumsticks, 14 of them, for $4.50. That price told me that I was on the right track with this dinner idea! Vinegar I have on hand at all times along with soy sauce. All in all, including pantry items, I'd have to estimate the total cost of this meal, including side dishes of green beans and brown rice, to be about $6. And that's enough for 7 meals!! You just can't beat that!

This recipe was beyond simple and easy. And it could easily be adapted for the slow cooker (just omit the water in the cooking process). The taste was pretty good, however I will make a few changes next time I make this; one of which will be to add some honey to the marinade. I think a little sweetness would help cut the acidity of the vinegar. I'll also cook up some peppers and onions, the sweetness from the veg would play nicely with the savory chicken. All in all, this is a very cost effective family friendly meal that we'll be making again I'm quite sure!


Filipino Adobo drumsticks
makes 4 servings, 2 drumsticks each
From Gina's Skinny Taste
8 chicken legs, skinned if desired
1/3 c soy sauce
1/3 c cider vinegar
6 bay leaves
6 pepper corns, crushed (or 1/4 t ground pepper)
6-8 cloves garlic, papers removed and clove crushed
1/2 c water

Mix the soy sauce, vinegar, pepper, garlic and bay together in a bowl. Pour over chicken legs and allow to marinate, 1 hour minimum up to overnight (the Witch let them go for over 24 hours, the flavors really penetrated the meat and it was delicious). Turn the chicken every 4 hours or so to ensure even marinating.

Heat a large skillet with a lid or a dutch oven over medium high heat. Add the chicken and marinade to the pan, along with 1/2 cup water. Bring to a boil then reduce to medium low heat and cover, cooking for about 45 minutes.

Remove lid and increase heat to medium high and allow sauce to reduce some. You will have a LOT of sauce, so don't worry about reducing it too much. Cook about 15 minutes over medium high heat.

Remove bay leaves and serve chicken legs with sauce and rice.


~*~Kitchen Witch NOTE: Personally, I think the sodium count in this inaccurate. The nutritional calculator doesn't understand that the soy sauce used in the marinade makes a LOT of sauce and chances are really good that all the sauce won't be consumed. Please don't let its high number scare you, honestly I'd say the real sodium count should be about 1/3 of that listed~*~
Nutrition Facts provided by SparkPeople recipe calculator
Amount Per Serving
Calories 169.6
Total Fat 4.3 g
Saturated Fat 1.1 g
Polyunsaturated Fat 1.0 g
Monounsaturated Fat 1.3 g
Cholesterol 95.5 mg
Sodium 1,296.1 mg
Potassium 366.1 mg
Total Carbohydrate 4.6 g
Dietary Fiber 0.4 g
Sugars 1.6 g
Protein 27.2 g

Tuesday, November 16, 2010

Miso glazed chicken stir fry with asparagus and scallions

If you're read this blog with any regularity you'll know that Asian flavors are a favorite of the Witch household. Which is why when I asked the Husband what he wanted for dinner, and he promptly replied "Asian" I was not surprised. Rather I was wondering what I could do that I haven't done recently.

The first thing I knew I had to do was get some green vegetable. Last weeks teriyaki lo mein, while delicious, was missing a green veg component and I was bound, set and determined NOT to make that mistake twice. So off to the grocery store we went. Broccoli was my original intent of vegetation, however when I saw asparagus on sale I quickly changed my mind. A comment of "Ooh, asparagus Mom, can we get that please?" from the little Witch sealed the deal. Something Asian with asparagus it was! I also grabbed a bunch of scallions, which were on sale too, and started planning my meal.

Velveting the chicken is my go to method for all Asian inspired dishes. Its really simple, takes 30 minutes of marinade time, and the results are hands down the best way to go. If you love the soft, melt in your mouth chicken you get from Chinese restaurants, you'll love velveting! For more details about velveting please read this post. Best of all, the ingredients you'll need to produce this silky smooth soft chicken are pantry staples, can't beat that! If you don't stock white wine in your house you can substitute 1 T chicken stock and 1 T rice vinegar.

The sauce was next on my list. There was about 2T of my homemade teriyaki sauce left over in the fridge, adding that seemed like a great idea. I augmented the sauce with a bit more white wine, a little water and a big heaping scoopful of white miso paste. Miso paste can be difficult to locate, its taken the Witch years, and I do mean YEARS to find it locally. Finally I found it in the refrigerated section of my health foods store. It was $6 and should last me for at least 4-6 recipes. Not too shabby! If you can't find miso paste locally there are a lot of merchants online that you can order it from. Miso is soybean paste. The texture it gives the sauce is reminiscent of peanut sauce, thick, creamy and delicious. Its flavor is delicate and savory, perfectly matched for velveted chicken and tender asparagus. The lighter the miso, the gentler the flavor: it ranges from the very mild white or yellow to red and brown, getting more intense in flavor as the color darkens.

The Kitchen Witch is beyond pleased with the results of this dish. The flavors were light, delicate and yet bold all at once. The bright green colors of asparagus and scallion paired beautifully with the white chicken and golden sauce. Miso glazed chicken stir fry with asparagus and scallions is one of the best Asian inspired dishes to come out of the Witches' kitchen yet. I do hope you try and enjoy it as much as we did!

Miso glazed chicken stir fry with asparagus and scallions
makes 4 servings
4 scallions, sliced, greens sliced and reserved for garnish
1 carrot sliced thin
1 stalk celery sliced thin
1/2 bunch (.5 lb) asparagus spears, cut into 2 inch pieces
1 t ginger freshly grated
4 cloves garlic, pressed or minced fine
2 chicken breasts sliced thin against the grain
1 egg white
3 T white wine, divided
3 T corn starch, divided
1 t kosher salt
3 T canola oil, divided
2 T teriyaki sauce (my recipe is here)
1/2 c water, divided
2 T soy sauce
2 T white miso paste

Begin by marinading the chicken in the velveting marinade:
slice chicken thin (1/8 in) across the grain, place into a medium size bowl
coat chicken with salt, toss with fingers to evenly distribute
next add 1 T white wine and mix again with fingers to evenly distribute
add egg white and mix with fingers, taking care not to froth the egg white
add 1 heaping T of the corn starch, coating each piece using fingers to distribute
finally add 1 T canola oil, using fingers to distribute evenly
Cover with plastic wrap and allow to marinate for at least 30 minutes.

Prep your veggies while chicken is marinading.
Prepare the sauce by combining the teriyaki sauce, 2 T white wine, remaining corn starch, 2 T water and the miso paste. Stir well to incorporate all ingredients.

After chicken has marinated bring a pan of water to the boil. Once boiling add 1/4 of the chicken, stir well to break up any clumps. Once the outside turns white, about 30 seconds, remove from water and reserve. Repeat with remaining chicken until finished.

Heat a large sautee pan or a wok over high heat. Add 2 T canola oil. Add the ginger and garlic, stir fry for about 30 seconds, until very aromatic and it just starts to brown.

Add the prepped vegetables next. Stir well to evenly coat in oil/garlic/ginger mixture. Stir fry for about 1 minute. Add 1/4 c water and cover. Allow to steam for 2-3 minutes.

Add parcooked chicken. Stir fry about 2 minutes before adding the sauce mixture. Once chicken is cooked thru and veggies are crisp tender, add the sauce. Stir well as sauce thickens quickly. Cook about 1 minute longer. Serve with hot cooked rice.


Nutrition Facts provided by SparkPeople recipe calculator
Amount Per Serving
Calories 350.5
Total Fat 12.3 g
Saturated Fat 1.2 g
Polyunsaturated Fat 3.6 g
Monounsaturated Fat 6.5 g
Cholesterol 68.4 mg
Sodium 533.9 mg
Potassium 902.0 mg
Total Carbohydrate 23.5 g
Dietary Fiber 4.6 g
Sugars 2.2 g
Protein 47.1 g

Friday, November 12, 2010

Teriyaki Chicken Lo Mein

For a few years now I've been making my own teriyaki sauce. Imagine my surprise when I saw Pam from For the Love of Cooking post a recipe for teriyaki chicken by Ellie Krieger - and the sauce was pretty much exactly the same as mine! Ellie is an awesome cook/nutritionist so when I saw that her recipe mimicked my own, well I was a pretty darn proud Witch. Seeing Pam's wonderful chicken thighs reminded me of just how delicious teriyaki can be and set the wheels of creativity in motion! Thanks Pam for the inspiration!!

The teriyaki sauce in question is not a thick, syrupy sauce like many of use have had in restaurants. While I do not discount the deliciousness of those sauces, I do have to discount the corn syrup that they use. Those thick sauces tend to be too sweet for me anymore, too. The store bought teriyaki sauces don't have enough flavor for this Witch, which is why I started making my own. I add flavorful things like garlic, ginger, honey and red pepper flakes to mine, taking the once syrupy sweet sauce to a new gently sweet, tangy, flavorful delight. Oh sure, the sauce is still sweet, it is teriyaki after all. I've sweetened my sauce with a modest 1/4 c of brown sugar and a touch of honey.

After much thought I decided to make a lo mein type of dish. The little Witch LOVES anything with soy sauce in it and she likes noodles a lot too, so lo mein was a natural choice. Originally I had planned on broccoli making it into this dish as well, however the broccoli had other plans for me, like going into the compost pile rather than into the skillet. I do think that the dish needs something green, pea pods would be awesome, or the afore mentioned broccoli would have been nice too. As always feel free to add or subtract anything that you and your family likes.

I used the velveting method of marinading the chicken, as the Witch is apt to do anymore when making Asian food. It really gives great flavors to the chicken and makes it unbelievably tender. I used a bit of the teriyaki sauce in the velveting marinade which helped build the layers of flavor. The sauce was simply more of the teriyaki sauce and a bit of the pasta cooking water. A handful of cashews at the end added a bit of crunch. I still wish I had something green to add to it, but that just means that I'll have to make it again. The family hopes that I decide to do that soon!

Teriyaki Chicken Lo Mein
makes 4 servings
Sauce: (Makes more than the recipe calls for, so you'll have some left over)
1/2 c soy sauce
1/4 c brown sugar
1 T honey
1/4 c white wine (can use chicken stock)
1/4 c rice vinegar
1 t sesame oil
1 t fresh ground ginger
4 cloves garlic minced
few dashes crushed red pepper

Lo Mein
1/2 box Barilla angle hair pasta or your favorite long pasta
2 chicken breast
1 T white wine
1/2 t kosher salt
1T + 1/4 c teriyaki sauce
1 egg white
1 heaping T corn starch
3 T canola oil, divided
1 bell pepper sliced thin
1/2 onion sliced thin
1/4 c cashews

Prepare the teriyaki sauce by combining all ingredients in a small sauce pan. Stir well to dissolve. Bring to a boil then reduce to simmer for about 15 minutes. Reserve and allow to cool.

Prepare chicken via the velveting method.
Slice chicken thin across the grain and place in a medium size work bowl.
Using fingers, toss chicken with salt to evenly coat.
Next add the teriyaki sauce and coat chicken.
Next coat chicken with egg white being gentle as not to froth the egg.
Next is the cornstarch, coat evenly.
Finally coat in oil and allow to marinade for a minimum of 30 minutes.

After chicken has marinated bring a pot of water to the boil. Once boiling add chicken (in 4 batches) and stir to separate. Once the outside turns white remove chicken and reserve to cook later.

Cook pasta until al dente, drain and reserve.

Heat a large skillet over medium high heat. Add 2T canola oil. Stir fry the peppers and onions about 2 minutes, until onions start to soften and brown. Add the reserved chicken and 2 T of the teriyaki sauce. Stir fry another 1.5 to 2 minutes longer. Add the cooked pasta along with another 2-3T of the teriyaki sauce and cook about 1 minute longer, so sauce thickens and everything is evenly coated.


Nutrition Facts provided by SparkPeople recipe calculator
Teriyaki sauce
Amount Per Serving
Calories 55.8
Total Fat 0.6 g
Saturated Fat 0.1 g
Polyunsaturated Fat 0.2 g
Monounsaturated Fat 0.2 g
Cholesterol 0.0 mg
Sodium 902.0 mg
Potassium 80.2 mg
Total Carbohydrate 13.6 g
Dietary Fiber 0.2 g
Sugars 12.1 g
Protein 1.1 g

Nutrition Facts provided by SparkPeople recipe calculator
Teriyaki chicken lo mein
Amount Per Serving
Calories 412.9
Total Fat 14.8 g
Saturated Fat 1.8 g
Polyunsaturated Fat 3.4 g
Monounsaturated Fat 7.5 g
Cholesterol 68.4 mg
Sodium 159.6 mg
Potassium 486.0 mg
Total Carbohydrate 33.9 g
Dietary Fiber 3.0 g
Sugars 1.4 g
Protein 35.8 g

Sunday, October 24, 2010

Satay Chicken with Peanut Sauce

Oh look, another recipe from Jenn at Jenn's Food Journey!! Jenn and I have become pretty good blogging friends - and she make some awesome food! I love that her recipes are usually quick for busy weeknights, have ingredients that I keep stocked in my pantry and always deliver on taste. I've told Jenn that if she keeps up these delicious recipes I'll have to rename my blog to "Andrea the Kitchen Witch cooks everything on Jenn's food Journey". She's good, people! If you haven't done so already, please take a look at her awesome blog. You and your taste buds will be happy you did!

When I made this recipe I had to adjust it based on what we had and our personal tastes. (WHAT?? The Witch not follow a recipe? Shocker, right?) And while my almost 4 yr old little Witch might be an adventurous eater, she still does NOT like spicy, so that had to be adjusted as well. I left the spicy stuff out of the dipping sauce knowing that the additional heat would not be welcomed by the little Witch. I decided to leave the Sriracha in the marinade, its heat was gentle and not overpowering and provided the perfect 'oomph' of heat that you need in a peanut sauce. If I had a more heat tolerant preschooler I would have added the Sriracha to the dipping sauce as well. Feel free to adjust to your families taste/spice levels.

The chicken was moist, flavorful and succulent. The dipping sauce was rich, flavorful and addicting! I cooked the chicken indoors on my George Foreman grill. All in all the entire dish took less than 15 minutes to cook, not including the marinade time. Satay chicken with peanut sauce was a family pleasing, delicious meal that we'll be revisiting often! Thanks again Jenn for such a delicious recipe!!

Satay Chicken with Peanut Sauce
makes 4 serving
recipe adapted from Jenn's Food Journey
For the marinade:
4 chicken breasts, boneless & skinless
2 T peanut butter
juice of 1/2 lime
1 t Sriracha or other hot sauce
3 T soy sauce
1 clove garlic minced (garlic press)

For the sauce:
1/4 c peanut butter (creamy)
3 T soy sauce
juice of 1/2 lime
1/2 t paprika
1/4 c water

Mix the marinade ingredients together and stir until well combined. The peanut butter will make the mixture look grainy, that is OK. Pour over chicken breast in a zip top bag and allow to marinade for at least 30 minutes - The Kitchen Witch let hers marinate for 6 hours, it was delicious!

Cook chicken by which ever method you prefer, I used an indoor grill (George Foreman) however you can also use an outdoor grill. You can pan sautee this however you'll need to add oil to the pan to avoid sticking (the nutritional values do not include any additional cooking oil).

While chicken cooks make the sauce by mixing all the ingredients in a small sauce pan. Heat over medium high heat and bring to a boil. Sauce will thicken after a short boil, stir well to avoid burning. Cook about 1 minute and serve with chicken.


~*~NOTE: Nutritional info assumes that all of the peanut sauce will be consumed. We ended up having a lot of it left over, almost half. So depending on how much sauce you have the numbers provided could be substantially lower~*~

Nutrition Facts provided by SparkPeople recipe calculator
Amount Per Serving
Calories 368.8
Total Fat 10.9 g
Saturated Fat 1.8 g
Polyunsaturated Fat 2.7 g
Monounsaturated Fat 4.7 g
Cholesterol 136.9 mg
Sodium 1,356.0 mg
Potassium 656.3 mg
Total Carbohydrate 5.6 g
Dietary Fiber 1.2 g
Sugars 1.8 g
Protein 59.8 g

Sunday, September 26, 2010

Fried Rice - with chicken and veggies

Fried rice is something that the Witch craves like nothing else. For years she tried to make it at home and had little success. Ok, no success. Turns out there are a few tricks to making successful fried rice at home, and lucky for you the Kitchen Witch is here to share those secrets.

First secret: You DO need cold cooked rice. And this does NOT mean minute rice. I've tried many many times to use minute rice and the results are dismal. Having a rice cooker helps immensely as well, if you're rice cooking challenged like the Witch is. I got my rice cooker - its a small 3 cup one - for $10 at Walgreens. It works great, too!

Second secret: Have all your ingredients ready to go so you can just cook, not prep & then cook. Stir frying goes fast. From start to finish we're looking at 5 minutes of cooking time, max. Having all your veggies, eggs and meat ready to go will only assist you in the cooking process. Don't ignore this secret!

Third secret: Cook in batches. Don't try to cook the veggies, then cook the eggs and then add the rice. You will end up with a nasty, ugly mess of egg covered veggies and slimy rice. Been there, done that. Cook the veg first, remove it. Cook the eggs, remove them. Cook the rice then add everything else back to the pan, stir it all together and that's that!

Fried rice isn't that hard once you learn the techniques. Experiment with the veggies and flavors that you like the most. Its a great way to use up left overs and recreate them into a whole new, yummy and different dish. Enjoy!

Fried Rice
makes 4 generous servings
3 cups cold cooked white rice (basmati is nice)
3-4 T oil
4 green onions sliced thin, including 1/3 of the green part (reserve 1T for garnish)
1 carrot diced fine
3 cloves garlic, minced
1 red or green bell pepper, diced fine
1 stalk celery sliced thin
4 eggs, whipped for scrambled eggs
3-4 T soy sauce
1 chicken breast, cooked and diced
1 handful of frozen peas

*~*Kitchen Witch Tip: Prep all your ingredients and have them ready to go. This is very important when making fried rice or stir fries because they move quick and you won't have time to slice & dice while the 1st step is cooking. Take the time to gather your mies en place (a French term meaning everything in its place, as in set up before cooking) and you'll have a far greater success.~*~

Heat a wok or large cast iron skillet over high heat. Once its screamin' hot, literally smoking, add 1 T of the oil and the veggies. Stir rapidly to ensure even cooking and avoid burning. Cook the veggies for 1-2 minutes or until they start to brown and wilt. Remove from pan and set aside.

Add a touch more oil to the hot pan. Add the whipped eggs. Scramble eggs and remove from pan once they've just set up. You will be adding these back to the rice so a little underdone now is fine, they'll cook longer later in the process.

Add the remaining oil to the hot pan. Add the cold rice and press it down into the pan to maximize surface contact. Let it cook undisturbed for 30 seconds to 1 minute. Using a spatula stir fry the rice, scraping up any cooked on bits from the bottom of the pan. Cook rice until its nicely fried and has color on most of the grains. Add the soy sauce, chicken, veggies and 3/4 of the scrambled eggs. Stir well to incorporate all ingredients. Cook for 1-2 minutes or until everything is warmed through.

Transfer cooked fried rice to a serving bowl and top with remaining eggs and reserved green onions. If desired drizzle with soy sauce before serving.


Nutrition Facts
provided by SparkPeople recipe calculator
Amount Per Serving
Calories 413.6
Total Fat 16.4 g
Saturated Fat 2.5 g
Polyunsaturated Fat 4.0 g
Monounsaturated Fat 8.3 g
Cholesterol 246.7 mg
Sodium 1,033.2 mg
Potassium 632.5 mg
Total Carbohydrate 41.8 g
Dietary Fiber 1.7 g
Sugars 2.8 g
Protein 24.9 g

Wednesday, September 22, 2010

Sweet & Sour chicken

Sweet and sour chicken was one of the first 'Chinese food' dishes the Witch ever tried. I have no doubt that its about as inauthentic of a Chinese dish you can find, but boy is it ever good! Deep fried chunks of chicken and a gloopy red overy sweet sauce, mmm sounds great, right? Ok, so maybe it does, but it doesn't have to be a deep fried over sweetened nightmare, not if you employ a little Kitchen Witchcraft.

I used the velveting technique for the chicken, exactly like I've done before for Schezwan Chicken, rather than deep frying it. Deep frying might taste delicious but boy, is it a caloric blow. Velveting the chicken makes it very tender, soft on the outside and really allows the gently sweet and tangy sauce cling to the meat and veggies.

Speaking of veggies, I went with a tomato of all things! A tomato in Chinese food, really Kitchen Witch? Yes! When I made the Pan seared steaks with sweet & sour sauce the recipe called for an onion and 2 tomatoes. It was delicious! I knew then that I wanted to use the same sauce pretty much and the same veggie combo. I wasn't sorry, either. The tomato really cooked down into the sauce and added great sweetness, sourness and fresh flavor. A red bell pepper and an onion round out the flavors. I also added a drained can of water chestnuts, mostly because I had them but also because I really enjoy their crunch. Play around with the veggies, use whatever you have on hand and what you like.

All in all I have to say this was pretty good. The sauce wasn't over overpoweringly sweet or sour, which was nice. I do think that next time I'll cook my onions first, they didn't really get cooked down enough for my liking (we all know how I adore caramelized onions!) so I'd do the onions first, then add the garlic & ginger, then the rest of the ingredients. That just means I'll have to make this again. I'm pretty sure the family will be happy as they all really liked this dish.

Sweet & sour chicken
makes 4 servings

Chicken and velveting marinade
2 chicken breasts cut into bite size chunks
1 T corn starch
1 T white wine
1 T oil
1 egg white
1/2 t kosher salt

Sauce
2 T ketchup
2 T rice wine vinegar
1 T soy sauce
1/2 c chicken stock or water
2 T sugar
1 T corn starch

Veggies
1 bell pepper cut into 1 inch pieces
1 tomato peeled and cut into chunks
1 onion sliced thin
1 can water chestnuts
2 cloves garlic minced
1 t ginger fresh grated

2 T oil for stir fry
cooked rice

Cut chicken into bite sized pieces. Place in a bowl and add the kosher salt, mix well to coat. Then add the wine, mix well to coat. Next add the egg white mixing well but not enough to froth the egg. Next sprinkle the corn starch over the chicken, mix well. Finally add the oil and mix to coat. Cover and allow to marinade at room temp for 30 minutes.

While this is marinading prep all veggies and assemble the sauce. Reserve 3 T of the sauce and mix the 1 T corn starch in, making a slurry. Set aside until later.

Bring a pot of water to a boil. Work in 3 batches and add the coated chicken to the boiling water. Allow to simmer for 30 seconds to 1 minute. You will pull the chicken just after the outside turns white. It is NOT fully cooked at this time. Repeat until all chicken is done this way.

Heat a large cast iron skillet or a wok over high heat. When pan is hot add the oil, the garlic and ginger, stir fry quickly until it starts to brown, about 30 seconds max.


Add the veggies and chicken next. Stir fry and cook about 5 to 10 minutes, until veggies are tender crisp and chicken is cooked through.

Add the sauce and stir to coat everything in sauce. Add the corn starch slurry and stir well to distribute. Once thickened remove from heat and serve with hot cooked rice.


Nutrition Facts provided by SparkPeople recipe calculator
Amount Per Serving
Calories 303.6
Total Fat 12.1 g
Saturated Fat 1.2 g
Polyunsaturated Fat 3.5 g
Monounsaturated Fat 6.5 g
Cholesterol 69.1 mg
Sodium 592.4 mg
Potassium 418.2 mg
Total Carbohydrate 16.8 g
Dietary Fiber 1.1 g
Sugars 9.1 g
Protein 29.5 g

Wednesday, September 15, 2010

Pan Seared Steak with Sweet & Sour sauce

Last week the Kitchen Witch had house guests. We cooked and ate to our hearts content. This was one of the delicious things we made. The recipe was discovered on The Steamy Kitchen's blog and what a discovery it is indeed! It was SO GOOD, even the uber picky 3 yr olds liked it! Seared steaks, rich sauce, what more can you ask for?

The sauce is what really sold me on this dish. It has lots of Asian flavors yet isn't 'Asian'. We paired the steak with Caesar salad and smashed potatoes, both of which will be posted in the next few days, and all the flavors paired nicely. We decided to quadruple the sauce for the steaks because 1/2 c sauce just didn't seem like enough for 4 people. Turns out that quadrupling the sauce was a bit excessive - doubling it would have been OK. I am posting the SINGLE batch of sauce recipe here, feel free to double, triple or quadruple it as you see fit. I just ask that you find a bowl big enough to hold it all, unlike the Kitchen Witch.

The key to success here is to have everything prepped and ready to go. The steaks cook faster than you'd think, so if you wait to slice your onions while they cook you run the risk of the steaks overcooking or the onions not being done in time. Either way isn't good. The onions need to be sliced very thin, a mandolin or sharp knife is essential here. The sauce was perfect, sweet, sour, fresh and different, and it complimented the rich beef perfectly. If beef isn't your thing you could put this sauce on chicken or pork, or make it for a stir fry.

Pan Seared Steak with Sweet and Sour Tomato and Onion Sauce
makes 4 steaks
Adapted from Steamy Kitchen

2T canola oil
Four 1 1/4 inch thick steaks, cut your choice (New York Strip was used), at room temperature
salt and pepper to season steaks
1 whole onion, sliced very thin
1 tablespoon minced garlic
2 whole tomatoes, cut into 8 wedges each

Sauce (whisk in small bowl)
1 tablespoons ketchup
1 1/2 tablespoons unseasoned rice vinegar (or white vinegar)
1/4 cup water
2 tablespoons sugar
1 teaspoon soy sauce

Prep the onions, tomatoes and garlic and set aside. Mix the sauce ingredients together as well so they're ready to go when the time comes.


Heat a large skillet over high heat until a bead of water sizzles upon contact and immediately evaporates. You want that pan super hot to get the best sear on the steaks as possible. Add 1 tablespoon of cooking oil to the pan and let the oil heat up. The Witch used a stainless steel pan rather than cast iron here because the sauce is acidic and it would have reacted with the iron pan. Please don't use teflon, it can't get hot enough to sear the steaks properly.

While the pan is heating, brush the remaining 1 tablespoon of cooking oil on each side of the steaks. Season with salt and pepper and carefully lay them in the hot pan, not touching. Cook for 3-4 minutes per side or until you reach your desired level of doneness. Instant read thermometer should read 120F at the center of the steak for medium-rare. Keep in mind that the steaks will continue cooking while resting, so if 130F is your target temp, pull the steaks at 125F.


Remove steaks to a plate and tent loosely with tin foil. Return the skillet to medium heat. You should still have some oil left in the pan. Add the garlic and onions to the pan and cook for 2 minutes. Push the garlic/onions to one side of the pan and add the tomato wedges. Cook the tomatoes 1 minute.


Add the sauce mixture and simmer until slightly thickened and the tomatoes and onions are nicely coated with the sauce.


Now you’ll have to taste and adjust – how sweet and how sour is a personal preference, plus your tomato may be juicy sweet or a bit acidic. (Make sure you taste a bit of the tomato too)

* Too puckery acidic? Add 1/2 teaspoon of sugar
* Not sour enough? Add 1/4 teaspoon of rice vinegar
* Need a little more salt? Add 1/4 teaspoon of soy sauce
* Sweet and Sour too strong? Add 1 tablespoon water

Pour the sweet and sour tomato onion sauce on top of steaks.


Nutrition Facts provided by SparkPeople recipe calculator
Amount Per Serving
Calories 602.5
Total Fat 28.2 g
Saturated Fat 0.5 g
Polyunsaturated Fat 2.2 g
Monounsaturated Fat 4.2 g
Cholesterol 0.0 mg
Sodium 866.0 mg
Potassium 273.1 mg
Total Carbohydrate 16.8 g
Dietary Fiber 1.7 g
Sugars 8.5 g
Protein 65.4 g

Friday, June 25, 2010

Chinese style chicken techinque, water velveting and Kung Pao chicken

While browsing one of my favorite food blogs, Home Cooking in Montana, I found the technique for velveting chicken. Ellie made Kung Pao chicken using the velveting technique on the chicken and the photos made me drool. I knew right then & there that the Kitchen Witch needed to make this. One look at Ellie's site and the Husband agreed wholeheartedly. Ellie also talks about how to precook the chicken for later use, if this is something you'd like to know more about, click on over & check out her blog. You'll be happy you did!

After reviewing the technique I decided to tackle it. It was not hard at all! It involves a few little steps but all in all, really simple. But is all this really worth it? I mean I've been making stir fry chicken dishes for years, how can this velveting really make it better?

I don't really know is the short answer. Witchcraft is the logical answer. I'm sure a lot of science goes into it as well. All I can tell you is that it indeed is worth every single second of time you invest into it. The results will rival those of your favorite Chinese restaurant. Chicken so soft, so tender, so juicy that its almost unreal. How can a simple 30 minute marinade and a quick plunge into simmering water transform a lowly chicken breast into this dish of greatness? Who cares, so long as it does. And it does lovely readers, oh it really does.

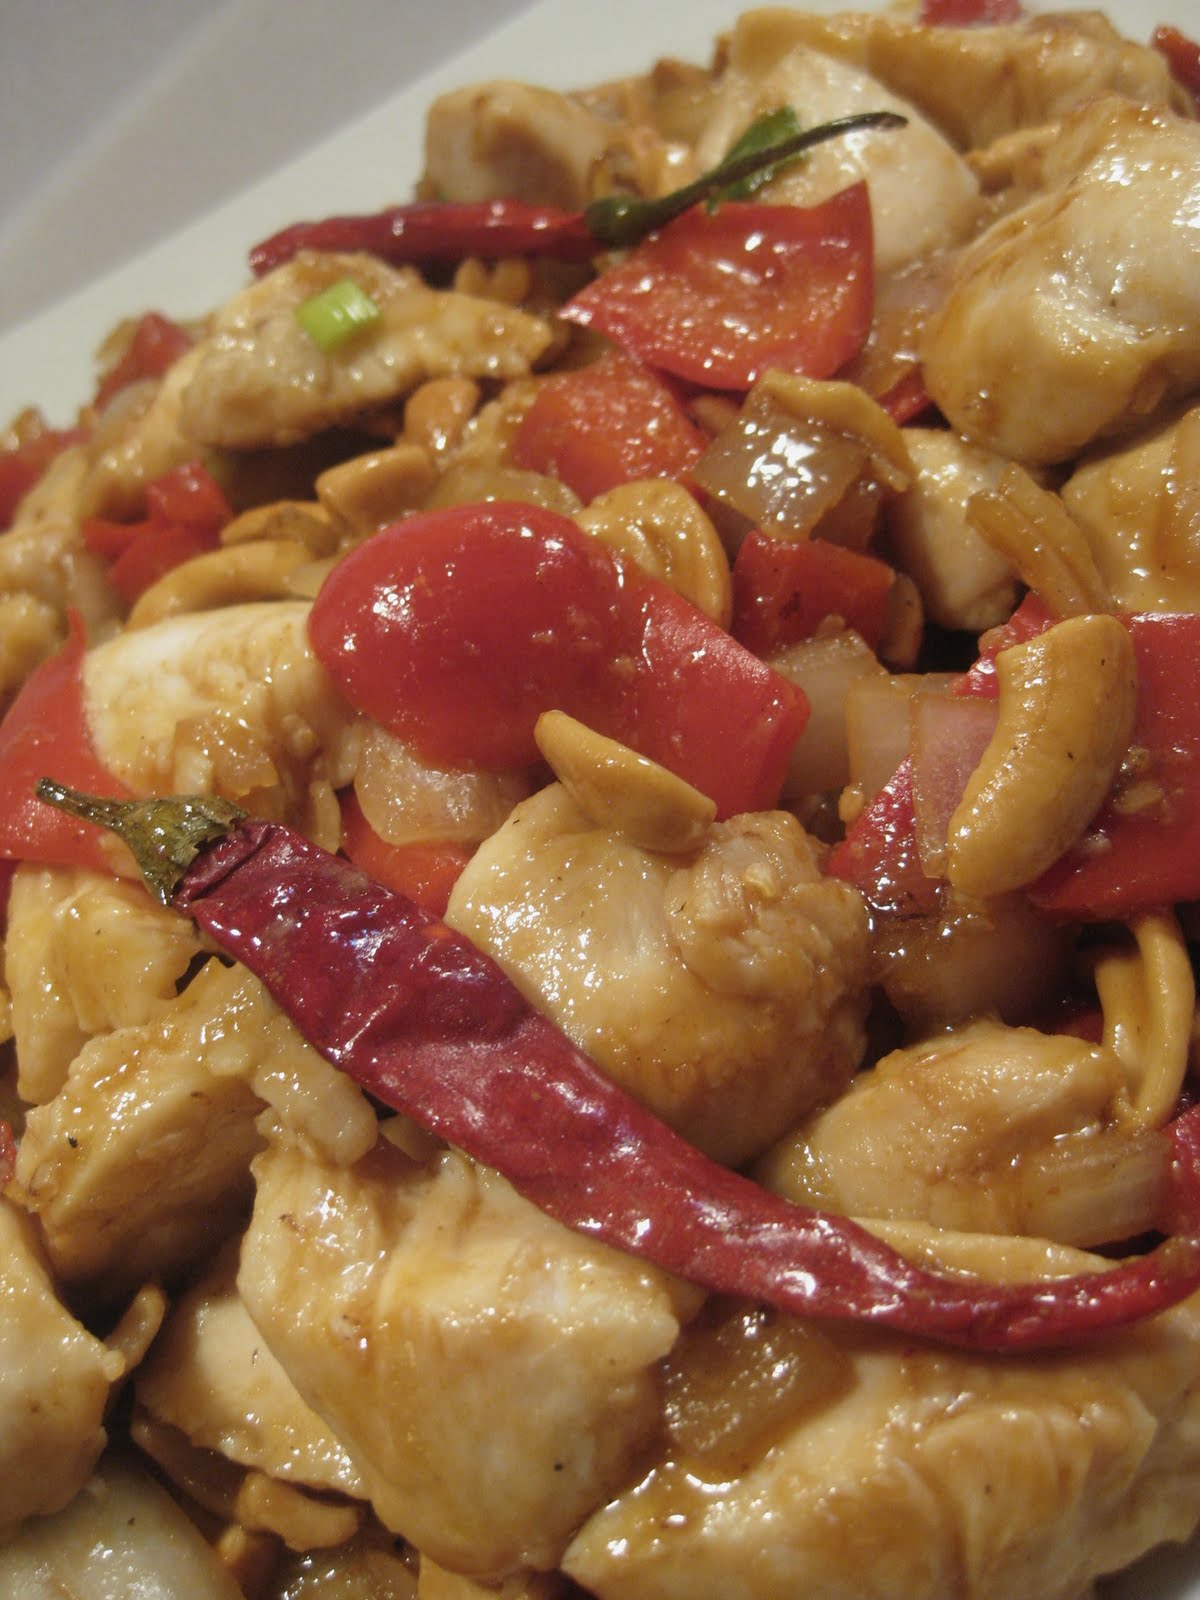
The Kung Pao sauce is from Ellie as well. I really enjoyed the flavors it provided. I will admit I was dubious that only an onion and a red bell pepper would be enough vegetables, much less enough variety, but I was very pleasantly surprised. The onions weren't overpowering, rather they were almost sweet. The red bells provided beautiful color and a sweet crunch. I chose to use cashews rather than the traditional peanut here because of a peanut allergy in the family. Feel free to use whatever nut you like.

Lastly lets talk about the heat, after all, what's Kung Pao with out some heat, right? I bought 4 small long thin dried hot chilies at my Mexican grocery, it cost me a whopping .03. Yes that's 3, three cents. I crumbled up 2 of the peppers into my sauce, the 3rd was broken into a few pieces and added to the stir fry. The last was pure garnish. A bit of Sriracha in the sauce and like magic, you've got Kung Pao chicken that will make you forget the name of that little Chinese place down the street.

Kung Pao chicken using water velveting technique
makes 4 servings
You will need:
1 lb chicken breasts or thighs, boneless & skinless, cut into 1 inch pieces
1 onion, diced
1 red bell pepper, cut in 1 inch dice
1-2 T oil
1 T minced garlic (+/- depending on taste)
1 T minced ginger (+/- depending on taste)
3-4 dried chilies or chili flakes
1/3 to 1/2 c cashews

Velveting Marinade
1/2 tsp kosher salt or to taste
1 T white wine
1 egg white
1 T cornstarch
1 T oil


Kung Pao sauce

2-4 tsp Sriracha
6 T water(or stock)
2 T white wine
2 T sugar
4 T soy sauce
1 scallion sliced thin

Apply the velveting marinade.
1. Sprinkle in the salt while stirring the meat.
2. Stir in the wine.
3. Add the egg white and gently mix to coat each piece of chicken making sure not to froth the egg.
4. Sprinkle in the cornstarch, coating each piece.
5. Add the oil and stir to coat. Let the meat marinate for 30 minutes.


Prepare other ingredients:
While the chicken marinates, prepare the other ingredients and the sauce. Have them ready.

In a small bowl, mix together all of the ingredients for the sauce and set it aside.
Make rice if desired to serve with dish.


Velveting the chicken: Using the water method.
Bring a pot of water with just one tablespoon oil to a boil.

Once the water boils, lower the heat to maintain a very gentle simmer.

Scatter in the marinated chicken, stir to separate and keep stirring gently until the coating turns white.

Remove the chicken pieces quickly with a slotted spoon or strainer.

Set the chicken aside.


Prepare the Kung Pao:

Heat a cast iron skillet or wok over medium high heat. Once its hot add 1-2 T oil to the pan. Add the garlic and ginger, stir fry until its light brown, 30 seconds to 1 minute max. Add the vegetables, chilies and the velveted chicken. Stir fry 1-2 minutes, until the chicken is done. Add the sauce and nuts, stir to coat and thicken sauce, 30 seconds longer.

Transfer to a serving dish and enjoy!


Nutrition Facts provided by SparkPeople recipe calculator
4 Servings
Amount Per Serving
Calories 393.1
Total Fat 20.1 g
Saturated Fat 2.7 g
Polyunsaturated Fat 4.8 g
Monounsaturated Fat 11.2 g
Cholesterol 68.4 mg
Sodium 799.6 mg
Potassium 541.7 mg
Total Carbohydrate 20.1 g
Dietary Fiber 1.9 g
Sugars 7.3 g
Protein 32.0 g
Related Posts with Thumbnails