Showing posts with label Mexican. Show all posts

Monday, April 9, 2012

Tamales: Pepper Jack and roasted green chiles

For Spring Break the Witch and family went on a little trip to Santa Fe, NM.  The weather was beautiful.  The scenery was stunning.  The food, oh my the food!!  It was amazing, delicious, and abundant.  I would love to have taken home a 55 gallon drum of green chili alas it wouldn't fit in my car.   Before embarking upon our voyage I asked the assistance of a friend who grew up in the Santa Fe area for her list of hot spots not to be missed while in the Land of Enchantment.  Arielle suggested that I stop by Alicia's tortilleria and get myself  'some of the best tortillas in all of New Mexico'.  Not one to pass by the 'best of' anything, I quickly obliged.  The Kitchen Witch left the great state of New Mexico with 3 lbs of corn tortillas, a dozen flour tortillas and 2 lbs of prepared masa harina -  all for $8.75!!  

Today the Kitchen Witch is going to do a photo tutorial on tamale assembly.  I forgot to get a photo of the finished tamales, we were too hungry and excited to try them to remember photography, so please forgive me.  You can find prepared masa harina in most Mexican grocers for a very affordable price, or you can make your own.  Masa Harina is available in the flour section of your grocery store.  Just make sure you get masa "For TAMALES" (there is a masa for tortillas and the grind/texture is different).   These tamales were meat free but feel free to fill your tamales with what ever you like.  The cheese/green chile mix was delicious and light.  I can't wait to make these again.  

Oh and Arielle, you were SO right!  Alicia's tortilleria is amazing, their tortillas are like nothing I've ever had and I wish I had quadrupled my order.  Looks like I need to go back to Santa Fe soon to replenish my supply!

Tamales
makes about 16 tamales
2 lbs prepared masa harina 
corn husks, rehydrated (soak husks in hot water for 1 hour minimum before making tamales.  The longer they soak the easier they are to work with.  Rip one or 2 small husks into strips for tying the tamales) 
3/4 lb pepper jack cheese shredded
4 green chiles roasted, peeled and diced

Begin by gathering all your ingredients and prepping your workstation.  I like to lay a few paper towels down for the wet corn husks to rest on while spreading the masa.

Take a large corn husk and unfold any edges.  Place it with the long side facing you and spread about 3T masa on the husk, making a layer about 1/8 thick, thick enough so the ridges of the corn husk don't show through the masa.  Spread masa to the end of the large end, leaving about 1 inch on the sides of the husk. (the husk shown was a HUGE one, I didn't spread the masa to the ends here cause it would have been a big tamale otherwise!)

Place a small amount of cheese then green chiles in the middle of the masa.

Fold the husk over itself, so the masa ends touch each other, sealing the filling.  Gently press down to release air trapped in the tamale.  

  Fold the end up towards the open end of the tamale and wrap the sides of the husk around the tamale, tucking the end into the husk fold.  If your husk is small or rips while folding, take another husk and wrap it around your torn one and continue.  No one will ever know!

Using a small piece of husk that's been torn into strips, tie the tamale to hold it shut.


Stack tamales in a steamer for cooking.  Repeat until you're out of ingredients.

Steam tamales in a steamer for 45-60 minutes.  The masa will firm up as it steams.  Allow tamales to cool a little before removing the corn husk and enjoying!  Tamales also freeze wonderfully.  Simply freeze tamales after wrapping, before steaming them.  They will last up to 3 mo in the freezer if kept air tight.  Steam from frozen, allowing 60-75 min for cooking.

Tuesday, March 6, 2012

Carnitas

Carnitas is a Mexican dish meaning "little meats" but we traditionally know it as braised then fried pork.  This carnitas dish accomplishes exactly that, with 3 ingredients.  The simplicity of the dish is deceptive once you try the pork.  Salty and crispy, almost bacon like in aroma and taste, yet tender and succulent and completely addictive.  All that from 3 ingredients?  You bet it's Witchcraft!  I got this recipe from my friend and cooking buddy Phyllis.  She acquired it from Diana Kennedy when she was working as her soux chef in the '80's.  Knowing that the recipe is a tried and true one from Phyllis - and that she worked directly with the chef creator -  really sealed the deal for this Kitchen Witch.  Carnitas were on the menu!

Here's how these carnitas go down.  Get your pork - butt (shoulder) or country style ribs are great choices.  You want to make sure you have plenty of fat and connective tissues - therein lies the secret to these great carnitas.  Either have your butcher (or yourself if you've got the knife skillz to do that) debone the butt, or find a boneless variety, and slice the meat into 2 inch wide by 5-6 inch long strips.  The Kitchen Witch found a great deal on country style ribs and used those in this recipe with great success, and bonus, the ribs are already cut into the size I needed.  Less prep work = happiness!  Once your meat is deboned and cut into strips place them into your largest skillet.  If you don't have a skillet big enough a dutch oven will work as well, it just takes a bit longer to cook off the liquids.  Sprinkle the meat with kosher salt then cover with water so the meat is covered just barely in liquid.  Bring it to a boil, then reduce to a hard simmer (medium heat, you want bubbles breaking the surface) and allow it to simmer until all the water has cooked off.  Once the water has cooked off you'll hear a distinct difference in the sound of the cooking, it changes from simmer to a sizzle.

As the meat is simmering in the water it is braising, cooking and becoming tender and delicious.  The connective tissues are also breaking down and becoming flavorful while the fats are rendering out of the pork.  The fat sits on top of the water while it's simmering and once that water is gone, the meat begins to sizzle.  Here's the real secret of good carnitas, frying the pork in it's own fat (or confit).  Allow the meat to fry and brown in the rendered fat, it takes about 5-10 minutes per side.  Be sure to flip the chunks to brown evenly.  This will make your cooking pan look like an utter disaster but I promise you all that the extra clean up is totally worth it.  And the crispy parts on the bottom of the pan, well those are just bonus treats for the cook.  Yay!  Once the meat is evenly browned remove it from the pan and either serve as chunks or shred and eat with tortillas.

From start to finish these took about 2 hours and were some of the most amazing pork I've ever made.  Tender and succulent, crispy and indulgent all at once.  I really hope you try and enjoy this dish soon!

Carnitas
makes 8 servings
SOURCE: The Cuisines of Mexico by Diana Kennedy
3-4 lbs of boneless pork shoulder (butt) or country style ribs
2 t kosher salt
water

Cut pork into strips about 1 inch wide and 4-5 inches long.  If using country style ribs they are precut so no extra work is needed.

In a large skillet or deep pan add the pork. Sprinkle with salt.  Add water to the pan to cover the pork.  Heat the pan over high heat until boiling then reduce the heat to an aggressive simmer (medium heat).  Cook until the water cooks out and only pork and fat are left in the pan.  Continue to cook pork in the fat until browned, turning pieces to brown evenly on all sides.

Serve with your choice of warmed corn or flour tortillas and toppings of your choice.


Nutrition Facts calculated at SparkPeople recipe calculator Amount Per Serving Calories 503.2 Total Fat 36.6 g Saturated Fat 13.6 g Polyunsaturated Fat 3.2 g Monounsaturated Fat 15.8 g Cholesterol 147.9 mg Sodium 580.3 mg Potassium 557.6 mg Total Carbohydrate 0.0 g Dietary Fiber 0.0 g Sugars 0.0 g Protein 40.6 g

Monday, August 8, 2011

Chili style stuffed bell peppers

Growing up the Kitchen Witch was NOT a pepper fan. From bells to spicy jalapenos, she hated them all. Green bell peppers might not have been spicy but they sure were bitter. And bitter is a flavor that I struggle with to this day. As the years have progressed the Witch has learned to embrace the bell pepper as an ingredient, its bitter green flavor is awesome in so many places - I can't imagine a fajita with out one! But to eat the whole bell pepper is still a bit outside of my comfort zone. Now the Witchs' husband LOVES bitter. And he loves bell peppers. And he's been clamoring for stuffed bell peppers for a while now. So when green peppers went on sale for .50 each I planned my stuffed bell pepper attack. One that hopefully even the Witch would enjoy.

It was a gloomy rainy day the day these were made so a chili style filling seemed in order. The chili style filling also gave me the perfect opourunity to use my Black Canyon chili powder blend from Savory Spice. This stuff is amazing!!! Its a blend of chile peppers, cocoa powder, garlic, toasted onion, Saigon cinnamon and Mexican oregano. The cinnamon and cocoa powder sound strange I'm sure but really they're used often in Mexican cooking, Mole is loaded with cinnamon and cocoa and its delicious!! Don't worry, your chili won't taste like a dessert, rather, it has a spicy flavor that makes you wonder exactly WHAT that delicious component is. The rich flavors blended perfectly with the ground beef, spicy tomatoes, kidney beans and rice in the peppers.


And about those peppers. The Witch decided to blanch them first, to par cook the pepper in an attempt to cook some of the bitterness out of them. It worked pretty well, the peppers were tender yet not mushy, flavorful and not too bitter. The tops of the peppers are diced up and added to the chili mix. And simply because I had it and needed to use it up, I capped each bell pepper with a crown of shredded Monterey Jack and cheddar cheese. All in all I have to say I enjoyed the chili filling a lot more than I enjoyed the entire stuffed pepper, but that's my own strange palette at work. The Witches' husband loved the peppers and really liked the chili style filling. If you're looking for a fun retro type dish with great flavors, give this one a try!

Chili Style Stuffed Bell Peppers
makes 4 servings
4 bell peppers
1/2 lb ground beef
1 can tomatoes with jalapenos
1 can kidney beans, drained and rinsed
1 T black canyon chili powder blend
OR 2t chili powder, 1/4 t ground cinnamon, 1/2 t ground cumin 1/4 t cocoa powder
1/2 onion diced
3 cloves garlic minced
1 1/2 c cooked rice
1/2 c water
1 t kosher salt
1/8 t black pepper
4 oz shredded Monterey jack cheese or colby jack

Bring a large pot of water to boil for blanching the peppers
Preheat oven to 350F

Slice the tops off the peppers and remove the seeds and pithy membranes. Chop up the tops for use in the stuffing. Dice the onions and mince the garlic.

Salt the water generously and blanch the bell peppers for 5 minutes.


Brown the beef in a skillet over medium high heat. Add the onions and garlic when been if 1/2 browned. Add the chili powder, salt & pepper, stir well to coat. Cook about 3 minutes until it smells fragrant.

Add the tomatoes, chopped bell peppers, beans and water. Simmer for 5 minutes. Stir in the cooked rice and set aside.

In an 8x8 square pan place about 1 cup of the chili filling at the bottom. Place each of the blanched and drained peppers in the pan and fill with the chili mixture. Any remaining filling can be stuffed into the bottom of the pan to help support the peppers. Top each stuffed pepper with shredded cheese. Bake for 30 minutes or until the cheese is melted and bubbly.

Allow to cool for at least 5-10 minutes before serving.


Nutrition Facts provided by SparkPeople recipe calculator
Amount Per Serving
Calories 471.4
Total Fat 21.6 g
Saturated Fat 9.8 g
Polyunsaturated Fat 0.9 g
Monounsaturated Fat 7.7 g
Cholesterol 72.5 mg
Sodium 1,185.2 mg
Potassium 698.4 mg
Total Carbohydrate 46.2 g
Dietary Fiber 8.8 g
Sugars 2.3 g
Protein 24.4 g

Wednesday, March 16, 2011

Chicken Enchiladas with refried beans

Chicken enchiladas are always a hit in the Witch household. However the last few times I've made them they just weren't quite right. I made special note of a few areas that I felt just weren't working, and vowed to make some changes next time I prepared enchiladas.

The chicken was one place that I knew needed work. In the past white meat chicken breasts were all I'd even consider eating. I'd season it, cook it, dice it and make enchiladas. And every single time I was underwhelmed: the chicken was too chunky, not the right flavor, not at all what I was thinking it should taste like! Now a days my palette has expanded and I understand the beauty of using thighs. The meat isn't as dark as you'd think, so haters, give it a try! They aren't greasy, fatty or gross. As a matter of fact, they're lots more flavorful than the breast, it shreds like you want chicken to shred and has the flavor that I wanted in an enchilada. I slow braised the chicken in some spices in the oven, you could use a slow cooker, then shredded it. The chicken stayed moist, shredded perfectly and most of all had the flavor that I was hoping for. WIN!!

The next area to attack was the tortilla. Rater than add extra calories by flash frying I've always softened my tortillas in heated up enchilada sauce. That's how my Dad taught me, that's how we do it on Christmas when we make our homemade enchiladas, and I was always pretty happy with that. Until last time I made chicken enchiladas. Oh the sauce softened the tortilla, sure enough, but softened it so much that it turned to mush under my fingers. Trying to roll a soggy sauce logged tortilla is disastrous. It rips, tears and splits. Despite its visual appearance, its still tasty, right? Well...no, not really! I recall that last time I made chicken enchiladas I was NOT happy with the overall flavor, the tortilla was flavorless mush, no strong corn tortilla flavor that I was hoping for. You NEED that corn flavor to meld with the chicken and sauce, its a whole enchilada experience. So this time I decided to do it the restaurant way, briefly fry each tortilla in hot oil to soften it, fill with chicken, roll and spoon enchilada sauce over the top. SUCCESS!

These chicken enchiladas were exactly like the ones we'd get in a good Mexican restaurant. They were delicious. The tortilla had flavor on its own and didn't turn to mush. The chicken was seasoned and tasty. And best of all, because the chicken is cooked ahead of time, this is an easy weeknight dinner. The assembly didn't take long and after a quick trip through the broiler to melt the cheese, dinner was done.

And because I'm a Kitchen Witch, I couldn't just discard the cooking juices from the chicken. All that chickeny flavor, spices and goodness, well to dump it down the drain was sacrilege! Instead I whipped up a quick and healthy side dish of quick refried beans. A can of pinto beans, about 1/2 cup of the chicken cooking liquid and a pinch of salt, mash them up together and voila! Refried beans that are healthy, tasty and not laden with fat and calories.

I hope you enjoy these enchiladas as much as we all did!

Chicken Enchiladas
makes 14 enchiladas
1 lb chicken thighs
1/2 t each onion and garlic granules/powder and oregano
1 t each chili powder and ground cumin
1 t cumin ground
1/2 c chicken broth or water
S&P
1 can green enchilada sauce or up to 2 cups homemade
6 oz Monterey Jack cheese
14 corn tortillas
oil for tortillas

Refried beans
1 can pinto beans, drained and rinsed
1/2 c reserved chicken cooking liquids
pinch kosher salt

Prepare chicken first
Preheat oven to 250F
Place chicken thighs in a small dutch oven or a slow cooker along with the spices, herbs and chicken broth. Add a bit of salt and pepper, cover and cook about 3 hours (on low if using a slow cooker) or until thighs are tender and easily shredded.

Remove chicken and allow to cool until easily handled. Shred chicken, discarding any gristle and fat.

Reserve the cooking liquids from the chicken for refried beans.

Assemble enchiladas
Preheat broiler in oven.
Heat a sautee pan over medium high heat. Heat oil, enough to fill pan 1/2 inch deep. Once oil is hot quickly flash fry each tortilla. Immediately place tortilla in a 13x9 pan and fill with about 2-3 T of the shredded chicken. Roll tortilla and place in pan seam side down. Repeat for all tortillas.

Spoon enchilada sauce over top of the enchiladas, top with shredded cheese.

Place on top rack of oven and heat until cheese is melted and slightly browned on top. Remove from oven, allow to cool before serving.

Top with additional enchilada sauce if desired.

Refried Beans
Put drained and rinsed beans in a small sauce pan. Add the 1/2 chicken cooking liquid and a pinch of salt. Bring to a boil. Using a potato masher smash most of the beans. The beans will thicken as they cook. Taste for season and adjust salt as necessary.


Nutrition Facts provided by SparkPeople recipe calculator
Chicken enchiladas
Amount Per Serving
Calories 333.2
Total Fat 9.3 g
Saturated Fat 1.6 g
Polyunsaturated Fat 2.9 g
Monounsaturated Fat 2.2 g
Cholesterol 76.9 mg
Sodium 427.5 mg
Potassium 491.6 mg
Total Carbohydrate 40.6 g
Dietary Fiber 6.6 g
Sugars 1.5 g
Protein 23.5 g


Nutrition Facts provided by SparkPeople recipe calculator
Refried Beans
Amount Per Serving
Calories 104.4
Total Fat 4.7 g
Saturated Fat 0.1 g
Polyunsaturated Fat 0.1 g
Monounsaturated Fat 0.1 g
Cholesterol 0.6 mg
Sodium 249.4 mg
Potassium 53.3 mg
Total Carbohydrate 18.9 g
Dietary Fiber 6.6 g
Sugars 1.1 g
Protein 5.7 g

Wednesday, June 30, 2010

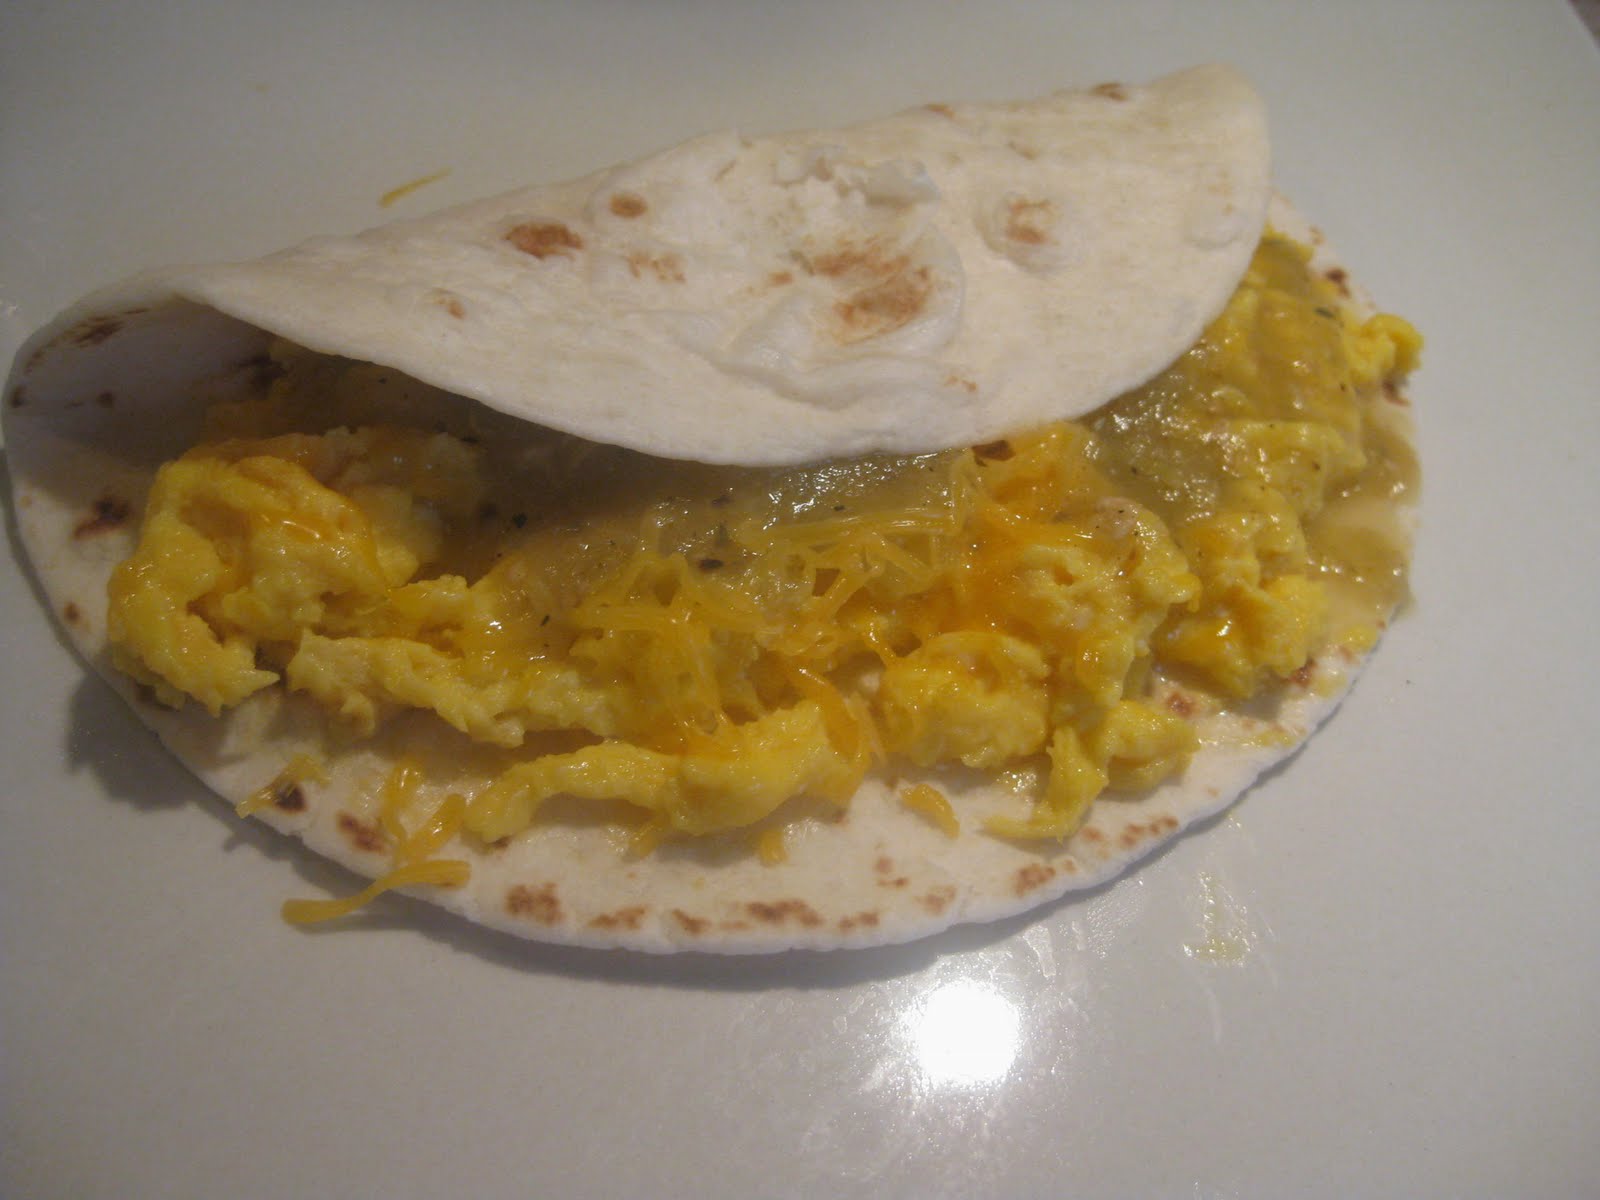
Breakfast taco

This morning I was reminded by my wonderful Witchy Sissy to use my left over roasted tomatillo sauce with eggs. I complimented her on her cooking prowess and great suggestion, when she told me that she had just read my blog on chicken enchiladas with roasted tomatillo sauce and that I was the one who mentioned it, in the blog. LOL!

Turns out the Witch was right, it was a damn good idea and it made an awesome breakfast!

If you're looking for quick, easy, portable and delicious, please look no further. From start to finish, including the time it took for my wee cast iron pan to heat up, it took about 4 minutes. If you're using a lighter weight pan I bet you can shave at least 2.5 minutes off that time.

Breakfast Taco
makes 1 taco
1 egg
1 T roasted tomatillo green chili sauce
1 T grated cheddar cheese
1 fajita size flour tortilla
pinch of kosher salt
dab of butter

Scramble egg in your favorite skillet with a dab of butter. I use my small cast iron pan for this.


Heat your tortilla in your microwave, about 20 seconds, until warm & pliable.

Heat up 1T of your roasted tomatillo sauce

Once egg is cooked transfer it to the warmed tortilla, top with shredded cheese and tomatillo sauce. Enjoy!


Nutrition Facts provided by SparkPeople Recipe Calculator
1 Serving
Amount Per Serving
Calories 243.2
Total Fat 10.4 g
Saturated Fat 3.6 g
Polyunsaturated Fat 1.2 g
Monounsaturated Fat 3.9 g
Cholesterol 221.4 mg
Sodium 327.4 mg
Potassium 68.8 mg
Total Carbohydrate 22.2 g
Dietary Fiber 0.0 g
Sugars 0.0 g
Protein 12.1 g

Sunday, June 27, 2010

Roasted Tomatillo Green Chili Chicken Enchiladas

Enchiladas are one of the Husbands' favorite Mexican dishes. I can always count on him to order an enchilada combo plate with 1 chicken, 1 beef and 1 cheese enchilada when we go out for Mexican. What can I say, the man loves his enchiladas!! And whats not to love? Spicy chili sauce, savory meats, creamy cheese and flavorful tortillas, YUM!

Most of us think that making enchiladas is hard or time consuming. I'm here to prove that wrong! Making enchilada sauce isn't hard - heck it isn't even very time consuming! All it takes is a few ingredients and a little Witchcraft, which I'm here to show you now.

Tomatillos are the secret ingredient to most green chili sauces. Tomatillos are small green fruits that look like a green tomato. They are not, however, they are members of the gooseberry family. Tomatillos have a papery skin that needs to be removed before cooking. When shopping for tomatillos look for firm fruits that are heavy for their size and paper skins that are tight and not peeling off. When you are ready to cook the tomatillos peel the papery skins off and discard. Then rinse the fruit well to remove the sticky/slimy coating that occurs when the paper is removed. The flavor of a tomatillo is tart and almost lime like. They are used often in Mexican green sauces for the acidic flavor they bring as well as the light green color. If you can't find fresh tomatillos in your grocery you can use canned ones, they are in the Mexican foods aisle, by the canned chilies.

Once the sauce is made, which takes about 30 minutes, the rest is a matter of assembly. If you are lucky enough to have left over sauce (or are smart enough to make a double batch) try it on eggs. Or heat some up and add tortilla chips, cheese and you've got chilaquiles. DELICIOUS!

Roasted Tomatillo Green Chili Enchiladas
makes 4 to 6 servings

Sauce:
4 cups chicken stock (homemade is best, boxed is acceptable)
4 Anaheim or New Mexico green chilies (long mild chilies), roasted and peeled
1 jalapeno, roasted and peeled
1/2 onion
3-4 cloves garlic
4 medium size tomatillos, roasted
Salt & pepper to taste
drizzle of oil for sautee

Enchiladas:
1 lb chicken breasts (2 breasts)
12-15 corn tortillas
shredded cheese, cheddar, queso fresco, Monteray jack, whatever makes you happy
Roasted tomatillo sauce

Roast the peppers and tomatillos. Click here for instructions on how to roast peppers indoors. Once peppers are roasted and peeled remove seed pod and as much of the veins as you desire. Set aside.

In a small sauce pan heat the oil. Once hot add the onions and garlic, stirring often to avoid burning the garlic. Allow onions to start to soften, then add the stock, peppers, tomatillos and S&P. Simmer for 20 minutes or until the chilies are softened.

Transfer the stock & peppers to a blender or food processor. Process until smooth. Return to the pan, adjust season as needed and bring to a simmer again.

Poach the chicken breasts in the green chili sauce. Cook chicken in the sauce over medium low heat, just barely simmering, for about 20 minutes or until the internal temperature of the chicken reaches 160. Remove chicken and allow to cool enough to handle.

Preheat oven to 350.

Slice chicken thin against the grain or cut into a dice. Mix 1/2 cup of the sauce in with the sliced chicken, set aside.

Spray or oil a 13x9 pan.


Submerge each tortilla into the hot sauce for 10-20 seconds, until the tortilla is softened and pliable but not so long that it starts to dissolve. (be prepared to destroy a few tortillas, it happens every time!) Place softened tortilla into the pan and spread 1-2 T of the chicken in the center. Fold ends over and place seam side down into the pan. Repeat until you run out of chicken, about 12-15 enchiladas.


Pour 1 cup of sauce over top of the enchiladas. Cover with shredded cheese. Place into a hot oven until cheese melts.

To serve, pour sauce onto the bottom of a plate. Place 2 enchiladas on top of the sauce. Garnish with your favorite toppings, including avocado, tomatoes, green onions, sour cream or lettuce.


Nutrition Facts
provided by SparkPeople Recipe Calculator
4 Servings
Amount Per Serving
Calories 442.2
Total Fat 12.2 g
Saturated Fat 5.3 g
Polyunsaturated Fat 2.1 g
Monounsaturated Fat 3.6 g
Cholesterol 96.5 mg
Sodium 1,962.8 mg
Potassium 658.7 mg
Total Carbohydrate 42.5 g
Dietary Fiber 6.2 g
Sugars 2.4 g
Protein 40.5 g

Saturday, June 12, 2010

Tamale pie, chicken version

Have you ever heard of a tiara desserts pan? If you're old like me you might remember them from the 80's. Its an awesome pan that Duncan Hines put out to go with their boxed dessert called Tiara Desserts. Its like a tart pan with a sunken part in the center, to hold a filling. They were uber cool for about a year, then fell out of vogue. I convinced my mom to buy one of the pans back in the day and when I moved out I took it with me :) She didn't even notice!

I've been making a variation of this dish for more than 20 years now. It all started with that tiara desserts pan. I baked a corn bread in the pan and filled the divot on top with taco meat & toppings, voila! Easy Mexican style dinner with minimal fuss.

Since the first time I made this dish I've been working on improving and changing it. Back in the day when I was a teen, I used a Jify cornbread mix. Now I make my own cornbread, accented with spices and roasted corn. Its a definite improvement over the boxed cornbread mix in this Witches' opinion. I've used ground beef or chicken for the meat topping, both are delicious so feel free to use whatever you have on hand.

Lastly, if you don't have a tiara desserts pan, don't fret. You can get a knock off from King Arthur Flour here or you can simply make this in an 8x8 pan. Sure it won't be as pretty but it'll taste good. And that's all that really matters, right?

Tamale Pie, chicken version
serves 6

Tamale cornbread
2 ears corn, roasted and cut off cob
1/2 c corn meal
3/4 c flour
1 t baking powder (aluminum free if you can find it)
1 t kosher salt
1/4 c butter, melted
1 egg
1/2c + 1T milk
1 t each chili powder, granulated garlic (1 clove fresh minced works too) and cumin
dash cayenne pepper, black pepper

Chicken mixture
2 chicken breasts ground coarsely (1 lb approx)
1.5 t chili powder
1 t cumin
1 t kosher salt
1/8 t pepper
3 cloves garlic minced
1 can whole tomatoes, drained
2 jalapenos, seeded
1/4 onion
juice of 1 small lime

1 can beans, black, pinto or kidney all are fine

Toppings, all optional:
shredded cheese, tomatoes, sour cream, green onions, black olives, guacamole, shredded lettuce, salsa

Roast the corn first. Shuck corn and put under the broiler of your oven with a rack at the highest position in the oven. Broil until the kernels start to brown, rotate corn until all sides are browned. Remove from oven & allow to cool slightly before slicing off the cob. Slice corn off the cob & set aside.


Make the cornbread:
Mix the dry ingredients together, including spices. Mix the wet ingredients together and whisk well to mix the egg. Pour wet over the dry, fold about 10 times until its ALMOST smooth & incorporated. Add the roasted corn then finish mixing. It won't be completely smooth, that's ok. Pour cornbread mix into a greased pan and bake at 350 for 15 min or until it tests clean in the center.

Make the sauce for the chicken next:
(While the cornbread is baking) In a blender put the canned tomatoes, jalapenos (I cut them into hunks), garlic, onion and spices. Blend until desired consistency (I made mine very smooth so the Little Witch would eat it, too).


Cook the chicken in a non reactive skillet until its 75% done. Add the sauce to the chicken, reduce heat to a low simmer, cover, and cook about 15 minutes, or until sauce has reduced by about half and chicken is cooked through.

Puree the beans in your food processor and puree until smooth. Add a touch of salt if desired.

Assembly:
Turn the cornbread out onto a plate (if using a fancy Tiara desserts pan, if using an 8x8 pan skip this step)

Spread beans in center.


Top beans with chicken mixture

Top chicken with cheese & desired toppings. Serve and enjoy!


Nutrition Facts provided by SparkPeople Recipe Calculator
6 Servings
Amount Per Serving
Calories 349.6
Total Fat 15.2 g
Saturated Fat 8.6 g
Polyunsaturated Fat 1.1 g
Monounsaturated Fat 3.1 g
Cholesterol 86.8 mg
Sodium 723.1 mg
Potassium 452.7 mg
Total Carbohydrate 38.3 g
Dietary Fiber 5.4 g
Sugars 3.3 g
Protein 17.3 g

Wednesday, April 28, 2010

Flour Tortillias


A few days ago I was blog browsing and ran across a recipe for homemade flour tortillas. I was mesmerized as Ellie from Home Cooking in Montana took 5 ingredients and turned them into beautiful flour tortillas.

Hooray, the Witch thinks, something new to make! Trying to find flour tortillas with out hydrogenated oils is hard. Oh sure the package MIGHT say 0 grams trans fat per serving but did you know that according to the FDA if there is >.5 g of trans fat they (food manufacturers) can claim that it has 0 grams? That means is that your 'trans fat free' tortilla can have up to .5 grams of trans fat in it. Am I the only one who sees a problem with this? Read your labels everyone. If you see the following words PARTIALLY HYDROGENATED OR HYDROGENATED OIL, put it down and walk away. The health risks of trans fats aren't worth it, in this Witches' opinion.

I decided to pair my flour tortillas with chicken fajitas and spicy black beans. Click on the links if you'd like the recipes. I highly recommend them, and the tortillas as well. They have a very soft and slightly chewy texture, something I really liked. They reminded me of fresh tortillas from a good Mexican restaurant, something you know wasn't sitting in a plastic bag for a week before it hit your plate.

Honestly, the hardest thing about these tortillas was rolling them out, but anytime you have to roll something out its hard. To me at least. I wasn't able to get them round but that's OK, it adds to the rustic homemade effect.

Flour Tortillas
makes 8-9 tortillas
2 cups of all-purpose flour
1 1/2 teaspoons of baking powder (I use non aluminium type)
1 teaspoon of salt
2 teaspoons of vegetable oil
3/4 cups of warm milk

In the work bowl of a food processor add the dry ingredients. Pulse to combine. Slowly drizzle in the milk and oil. You want this to form a dough ball, I had to add about 2 T additional milk as mine was too dry with 3/4 c.

Run machine 2 minutes longer to knead dough. Once its kneaded put the dough ball into a bowl, cover with plastic wrap and allow to rest for 20-30 minutes.

Divide dough into 8-9 balls (about 2 oz ea)

Roll each ball out until its very thin, less than 1/8 inch thick. Stack rolled tortillas with plastic or parchment between layers.

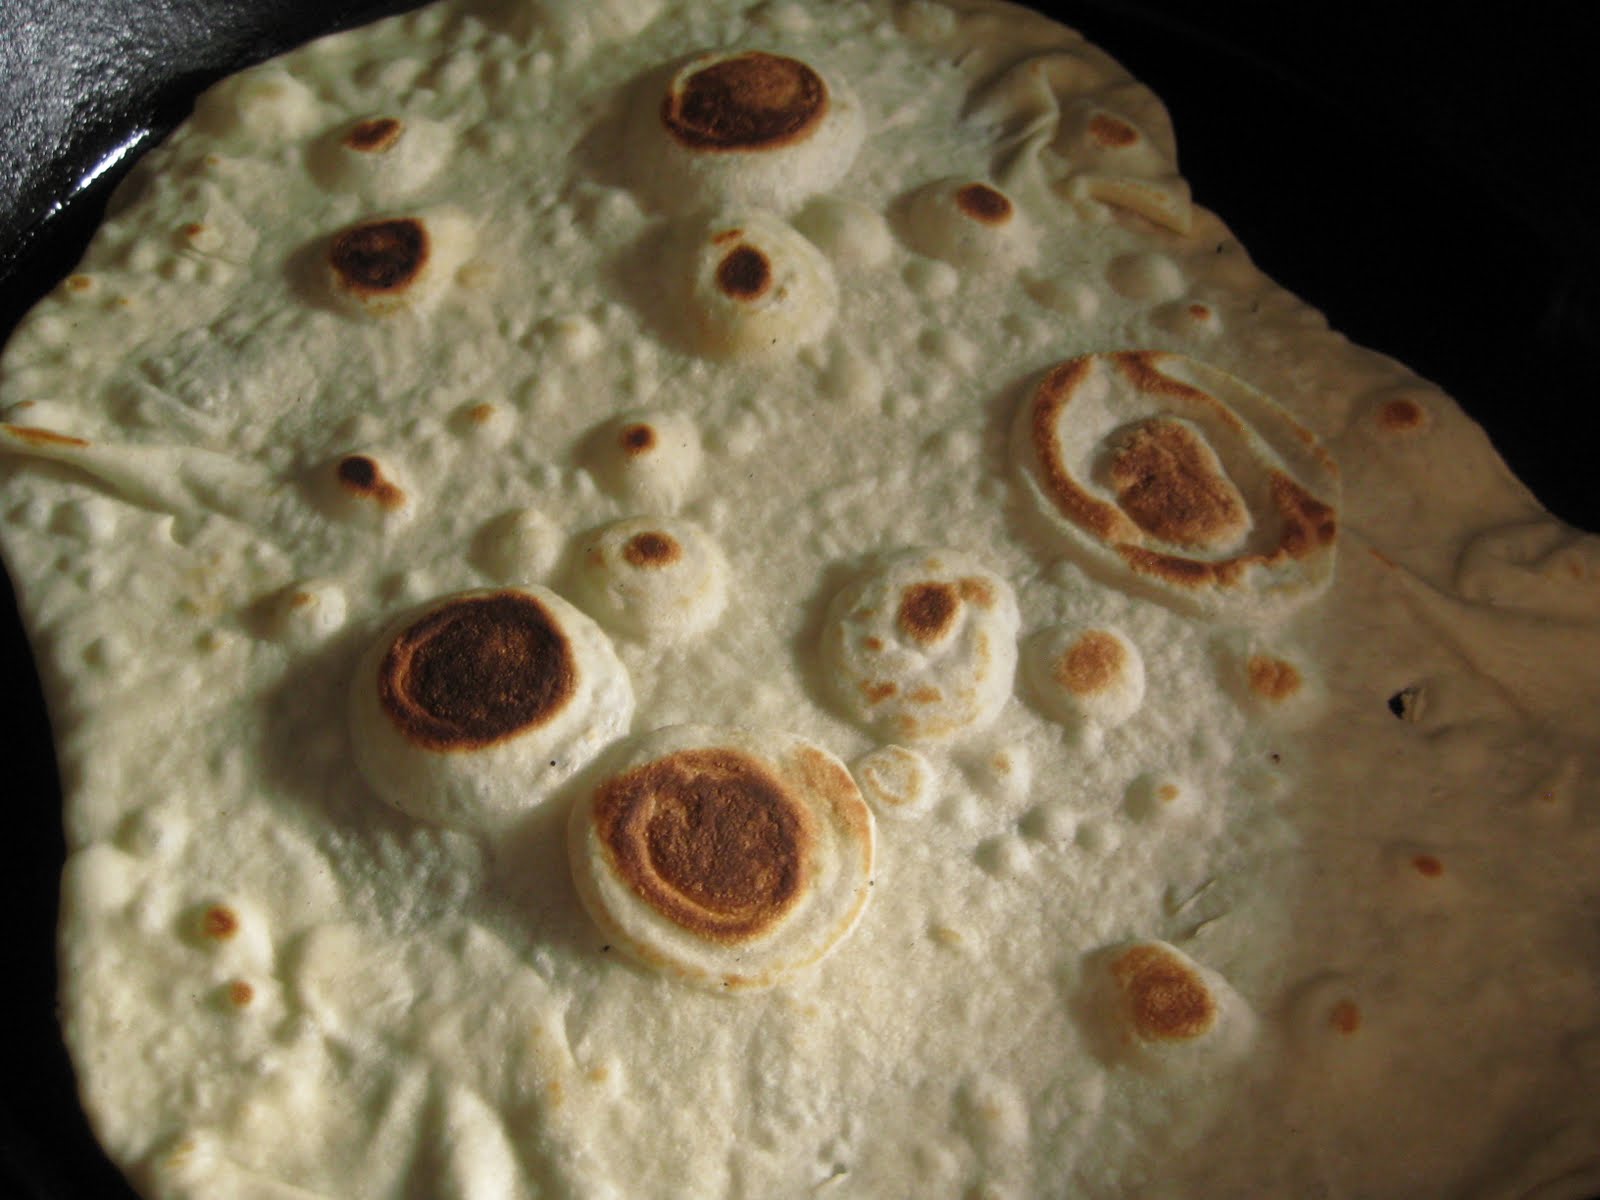
Heat a cast iron (or other heavy bottomed skillet) pan or griddle over medium high heat. Once hot add the tortilla. Cook about 1 minute on 1st side. It will bubble up with air blisters. Press the tortilla down to make as much contact with the pan as possible. Once browned, flip and cook on 2nd side.

Once 2nd side is browned remove tortilla. Continue cooking remaining tortillas.

Nutrition Facts provided by SparkPeople recipe calculator
9 Servings
Amount Per Serving
Calories 125.4
Total Fat 2.2 g
Saturated Fat 0.4 g
Polyunsaturated Fat 0.6 g
Monounsaturated Fat 1.1 g
Cholesterol 1.6 mg
Sodium 348.5 mg
Potassium 29.9 mg
Total Carbohydrate 22.4 g
Dietary Fiber 0.8 g
Sugars 1.0 g
Protein 3.5 g

Monday, March 8, 2010

Chicken Fajitas

Gee, look The Kitchen Witch is making ANOTHER Mexican dish! I told you, we like our Mexican food around here :) I realize fajitas are really more Tex-Mex but it's still considered Mexican to me.

Fajitas were always one of those things that I ordered in restaurants and never tried to make at home. I don't really know why other than the fact that they seemed intimidating. Oh how wrong I was!! With just a few basic ingredients that a well stocked pantry should have you too could be eating fajitas for dinner tonight. Oh, yeah, the good news is that the cooking time is less than 30 minutes on these babies. How awesome is that?

This dish is always a crowd pleaser too, because you can personalize your fajita to your own tastes. Hate tomatoes? No problem! Not a fan of bell peppers? Don't add them to yours. Kids want chicken and cheese only? Can do! Everyone can find something that they'll like with these gems.

Chicken Fajitas
serves 4
2 chicken breast
juice and zest of 1 lime
1 t cumin (fresh toasted and ground preferably)
1/2 t chili powder
3 cloves garlic, minced
1 T EVOO, divided
1/2 t kosher salt
pepper to taste
2 bell peppers (I used 1 small green, 1/2 of a red and 1 poblano pepper)
1 medium onion
1/2 c water
flour tortillas
toppers: sour cream, guacamole, cheese, tomatoes, fresh jalapanos, salsa, olives, etc.

Make marinade for chicken by combining lime zest, juice, salt, garlic, pepper,spices and 1/2 the EVOO together. Pour over chicken and allow to marinate for 2-3 hours. Don't go much longer than that, the acid in the lime juice will cook the chicken and after heat's applied it can dry out.

~*~Kitchen Witch Tip: if your running short on time you can pound your chicken very thin, or butterfly the breasts, exposing more meat to the marinade. 20-30 minutes in the marinade is enough time to give your chicken flavor when its very thin like this~*~

Slice peppers and onions into julienned strips. Toss with remaining EVOO to coat.

Remove chicken from marinade, pat dry for best browning. Be sure to scrape off any large pieces of garlic as well so it doesn't burn.

Cook chicken in a cast iron skillet over medium high heat. When chicken is done (160* internal temp) remove to a plate, cover with foil and allow to rest while peppers and onions cook.

Using the same pan add the oil coated peppers and onions. Cook about 5-7 minutes, stirring every few minutes, until peppers start to soften and onions brown on edged Deglaze pan with the water, scraping the cooked on bits up. This will turn your peppers and onions a deep mahogany color. Mmm...


Slice chicken thinly across the grain, squeeze a wedge of lime over top before serving with warmed flour tortillas and your favorite toppings. Enjoy!

Nutrition Facts provided by SparkPeople Recipe Calculator
4 Servings
Amount Per Serving (NOT INCLUDING TORTILLA OR TOPPINGS)
Calories 148.2
Total Fat 4.8 g
Saturated Fat 0.8 g
Polyunsaturated Fat 0.8 g
Monounsaturated Fat 2.8 g
Cholesterol 49.3 mg
Sodium 57.9 mg
Potassium 337.8 mg
Total Carbohydrate 5.7 g
Dietary Fiber 1.1 g
Sugars 0.8 g
Protein 20.4 g

Sunday, February 28, 2010

Ghetto fab Taco Meat

Its no secret, we love Mexican food here. Enchiladas, taco, mole, we love it all. Some form of tacos/nachos/tostadas/taco salad is bound to be found on our dinner table at least once a week.

Back in the day before I educated myself about nutrition and healthier eating I was a pound of burger and a packet of taco seasoning mix. Then one day I read the ingredients on that taco seasoning packet and was amazed at the JUNK in there!! Oh sure, theres spices but why is there partially hydrogenated oil? Why is it in there? Some of them have high fructose corn syrup too. Umm...again why? Why do we need corn syrup and almost plastic oil in tacos I ask??

Now a days I make my own taco mix. Its so much fresher tasting, has more flavor, less sodium and NO partially hydrogenated oils or HFCS. That makes a Kitchen Witch happy! I also throw in a fair amount of vegetables like tomatoes, peppers and beans - something the little Witch doesn't realize, so we're getting a serving of veggies in our tacos, gotta love that!

Taco meat is so very versital, last night it was transformed into nachos. Today for lunch it might become taco salad. You can change the meat too, with fantasitc results, try ground chicken for light fresh taste and save yourself a LOT of calories too!!

Oh, we call it Ghetto Fab because its not fancy gourmet like, nope its pretty ghetto. But man, sometimes its so good to slum it :)


Ghetto Fab Taco meat
serves 4-6
1 lb ground meat (beef, turkey, chicken, pork)
1 can RoTel tomatoes or store brand tomatoes with chilies
1 t chili powder
1 t cumin, fresh toasted & ground if possible
S&P
1/2 onion diced fine
3 cloves garlic minced
1 bell pepper diced
1 can beans, pinto, black or kidney, drained & rinsed
1/4 c water
2-4T vinegar based hot sauce like Taco Bell mild sauce or Franks Red Hot (optional but it really doesn't add much heat, more of a subtle spicy tang)

Brown meat, drain fat well. Add onions, garlic and bell peppers. Cook for a few minutes until the onions and garlic start to release their fragrance. Add seasonings and tomatoes, juice & all and the beans. Add the hot sauce & water if needed. Simmer for about 5 minutes or until most of the liquid has evaporated.


Makes awesome nachos, tacos, burritos, tostadas and taco salads.

Nutrition Facts provided by SparkPeople Recipe Calculator
**nutrition is based on ground beef, values will changed with different meat**
Amount Per Serving (5 servings approx)
Calories 316.0
Total Fat 19.2 g
Saturated Fat 7.6 g
Polyunsaturated Fat 0.9 g
Monounsaturated Fat 8.3 g
Cholesterol 68.0 mg
Sodium 484.1 mg
Potassium 483.6 mg
Total Carbohydrate 15.0 g
Dietary Fiber 4.2 g
Sugars 2.5 g
Protein 19.5 g

Sunday, February 14, 2010

Fresh Salsa


Recently I went shopping at a local Mexican grocery store. Holy cow, they have the best prices on produce!! Here's what I scored there for $20!!! Twenty dollars people! That's amazing!

1 head cauliflower, 3 heads broccoli, 12 jalapeno peppers, 3 pablano peppers, 3 Anaheim pepper, 4 yellow onions, 6 cloves garlic, 1 lb carrots, 1 jicima ,2 large sweet potatoes, 10 lbs potatoes, 8 tomatillios, 1 head lettuce, 2 red bell peppers, 8 roma tomatoes, 6 large limes, 36 corn tortillas, 1 lb queso fresco and 1 container Mexican crema. Phew! That's a LOT!

So what did I decide to do with my bounty? Make fresh salsa, of course! I am not a cilantro fan which is why you don't see it on my list of produce scored (however it was .25 cents per bunch, an awesome price indeed) or in my recipe for salsa. If you like it please feel free to add it.

This salsa is fresh, tangy, spicy and delicious. Its really good with tortilla chips, made into a guacamole or topping your favorite tacos, nachos or even a baked potato.

Fresh Salsa
makes about 2 cups worth, enough for 4 to enjoy with chips
2 jalapeno peppers, seeded and diced fine
4-6 roma tomatoes, diced
about 2 T of fince minced onions, rinsed
1 clove garlic, minced
juice of 1/2 lime
kosher salt and pepper

Mix everything together in a bowl. Allow to sit for at leasts 30 minutes before serving for flavors to meld. Keeps about 1 week in the fridge, or about 1 day in the Kitchen Witch household.


Nutrition Facts provided by SparkPeople recipe calculator
4 Servings
Amount Per Serving
Calories 22.6
Total Fat 0.3 g
Saturated Fat 0.0 g
Polyunsaturated Fat 0.1 g
Monounsaturated Fat 0.0 g
Cholesterol 0.0 mg
Sodium 46.2 mg
Potassium 203.5 mg
Total Carbohydrate 5.1 g
Dietary Fiber 1.2 g
Sugars 0.3 g
Protein 0.9 g

Spiced Beans


Canned beans are a staple in the Kitchen Witch pantry. My daughter LOVES beans, so anytime I can throw them into a dish, I do. Its the one thing I know she'll eat! But canned beans have a tenancy to be lackluster, to say the least. Have no fear, the Kitchen Witch is here to spice up those beans for you, turning them from a pantry staple to a quick and easy side dish.

Black beans are my personal prefereance for this dish, they go so well with cumin and lime. However the day I photographed this dish all I had on hand was pinto beans. They were pretty darn tasty, too. Almost as good as the black beans. So feel free to use whatever kind of beans you have in your pantry.

These beans are a great side dish with your favorite Mexican meal. I also like to use these beans with some grilled meats in a taco salad. They also make for mean nachos. Pretty much no matter what you decide to serve these beans with you'll be happy you did.

Spiced beans
serves 4 as a side dish
1 can beans, drained and rinsed well (black or pinto are good choices)
1 t fresh toasted and ground cumin (preground cumin seed works fine too)
1 T minced onion
1 clove garlic
1/4 red bell pepper, diced
1/2 jalapeƱo, seeded and diced (more or less depending on your preference)
1/2 c water or chicken stock
S&P
squeeze of lime juice
drizzle of oil

Heat a small saucepan over medium high heat. Add oil and onions, allow to cook about 3 minutes. Add cumin, garlic, bell peppers and jalapanos, stir well to coat in oil and cook 2 minutes.

Add beans and water or stock, stir well. Reduce heat to low and allow beans to simmer for about 20 minutes.


Nutrition Facts provided by SparkPeople recipe calculator
4 Servings
Amount Per Serving
Calories 64.3
Total Fat 0.4 g
Saturated Fat 0.1 g
Polyunsaturated Fat 0.1 g
Monounsaturated Fat 0.1 g
Cholesterol 0.0 mg
Sodium 40.5 mg
Potassium 189.6 mg
Total Carbohydrate 11.8 g
Dietary Fiber 4.0 g
Sugars 0.1 g
Protein 4.1 g
Related Posts with Thumbnails