Showing posts with label side dishes. Show all posts

Wednesday, July 4, 2012

Potato Salad - the best ever!


Happy 4th of July!  What goes better with a cook out than potato salad?  Here's a recipe for a delicious and easy one that even potato salad haters will like.  This recipe is from Andrea the Kitchen Witch archives - it's an oldie but a goodie!

Let me first say that the Kitchen Witch is NOT a potato salad kind of girl. I have this mayo hate issue that I just can't seem to get past...and cold potatoes, well lets just say there's not much to potato salad for me to like. That is until I tried this one. I've adapted it from America's Test Kitchen. I liked the techinque they used of pouring pickle juice and mustard over the hot potatoes, the potatoes absorb this flavorful liquid as they cool, so each potato piece is seasoned. That intrigued me.

Lets just review real quick like, shall we? The Kitchen Witch does not like the following things:
Mayo
Mustard (I know, I know, I try to like it but its just not my thing I'm sad to say)
cold potatoes
pickles
celery seed

And yet this recipe has all of these in it. (Well except the mayo, I used Greek yogurt this time, awesome! I have made it with mayo as well and even then it was delicious.) So its chock full of all sorts of ingredients that on their own I don't like. At all. But for some strange reason of cooking Witchcraft, when combined into this potato salad, well they are a symphony of flavors that compliment each other perfectly. And this is from a tried and true potato salad hater.

Try this one, I'm pretty sure you'll be glad you did!

Potato Salad
makes about 6 servings
4 large or 6 small red potatoes, peeled & diced into 1/2 in cubes (Yukon golds are good too)
1/2 red bell pepper finely diced
1/4 small onion, finely diced
2 large dill pickles, finely diced
1 small rib celery, finely diced
4 hard boiled eggs, diced
3 T yellow mustard
½ c pickle juice
1/4 c Greek yogurt
2T sour cream
1/2 t celery seed
S&P

Boil potatoes in heavily salted water about 7-9 min or until done but still firm. DO NOT OVER BOIL or they will fall apart.


While potatoes cook mix mustard & pickle juice w/ about 1 t kosher salt and 1/8 t ground pepper, set aside until potatoes are cooked.


When potatoes are tender and no longer crunchy inside, drain them then pour onto a sheet pan. Pour mustard mix over potatoes, stiring to coat all sides. Allow potatoes to cool at least 1 hour.

While potatoes cool chop all veggies and set aside.

Once potatoes are cooled mix the yogurt, sour cream, celery seed & a pinch of kosher salt & a few grinds of pepper until smooth & creamy.

In a large bowl add potatoes (drain off any excess mustard liquid, there shouldn't be much as the potatoes absorb this flavoring) and diced veggies. Mix well to incorporate. Add the dressing, stir well to coat potatoes in creamy sauce. Top with diced eggs & serve.


Nutrition Facts provided by SparkPeople Recipe Calculator
6 Servings
Amount Per Serving
Calories 191.3
Total Fat 4.7 g
Saturated Fat 1.7 g
Polyunsaturated Fat 0.6 g
Monounsaturated Fat 1.7 g
Cholesterol 143.1 mg
Sodium 630.6 mg
Potassium 699.3 mg
Total Carbohydrate 27.9 g
Dietary Fiber 3.7 g
Sugars 2.7 g
Protein 10.1 g

Tuesday, January 10, 2012

Zucchini Cakes

It seems that the Kitchen Witch has a love/hate relationship with zucchini.  If you've read this blog for any length of time you'll know that zucchini is something that is a staple in the Witches' garden.  Every year I say I won't worry or over plant, and yet every year I have a mini freak out -  will they grow?  Will they produce?  Will I have beautiful zucchini this year? And because it's me, every single year I over plant, too, just in case one or 2 of the plants don't do well.  In 3 years, I've never had an unsuccessful zucchini crop.  They're always TOO successful!  Despite my fretting over the wee plants in the early days they grow and become big time producers.  Before I know it I've gone from "oh my I hope they grow" to "holy shit someone needs to come get some of this zucchini!!" If you remotely like zucchini I highly recommend growing them yourself.  It's SO easy, they're very low maintenance plants, and have never failed to produce.  Oh, and the love/hate thing is because I absolutely love zucchini but as the season wanes on I grow to hate it...after all zucchini for 3 meals a day is only awesome for a few days.

Now that you've been informed about the trials and tribulations of zucchini growing, let's get to the point of today's post, shall we?  Zucchini cakes!  Oh sure they've been done before but boy, are they good!  A few weeks ago my girlfriends and I were out to lunch.  I spotted zucchini cake sliders on the menu and thought now that sounds good!  I ordered them and indeed, I was right, they WERE good!  So promptly I went to the store to buy zucchini (it's not zucchini season in Colorado currently, much to my dismay) so I could recreate these babies.  They seemed pretty basic in their ingredients, zucchini, red bell pepper and feta cheese, with some binders to hold it together.

The Witch decided to use an egg as one of the binders along with some panko breadcrumbs.  Not much, I wanted the veggie to be the star of this cake, but enough to hold it together.  The panko is very light in texture, not dense like traditional bread crumbs can be.  It helped the cakes have a nice firmness to them with out being dense or heavy.  The crunch of the red onions provided a nice contrast to the soft zucchini.  As the cakes brown the zucchini takes on a fantastic flavor, browned zucchini is the only way to eat it in this Witches' opinion!  As the cakes cook the feta softens and melts, adding it's salty flavor to each bite.  These zucchini cakes are a taste sensation, low in calories and vegetarian!   Sounds like a great lunch or side dish idea to me!


Zucchini Cakes
makes 4 cakes, 2 cakes per serving
1 medium zucchini (about 7-8 inches long) shredded
about 2T diced roasted red bell pepper
scant 1T fine diced red onion
1 clove garlic, pressed
1 egg, beaten
1/4 c panko bread crumbs
1/4 c feta cheese
approximately 1/2 t kosher salt
a pinch pepper, or to taste
about 1-2T olive oil for cooking

Shred zuccini using large holes on a box grater.  Squeeze zucchini to remove excess liquid.  Put squeezed zucchini into a small work bowl.  Add the diced roasted red peppers, garlic, onion, panko, feta and S&P.   Pour the beaten egg over top and using a fork, gently mix.  You'll want a cohesive mixture with no obvious pockets of dry bread crumbs or uncoated veggies.

Heat oil in a nonstick skillet over medium high heat.  Once hot scoop zucchini mix into 4 patties, about 1/4 c each.  Make about 1/2 inch thick by 3-4 inches diameter.  Cover skillet and fry cakes on first side until golden browned, about 5 minutes.  Cakes will still be very fragile so be careful when you flip them.  Gently flip and continue cooking covered on second side, until browned and cakes hold together.   Serve and enjoy!


Nutrition Facts provided by SparkPeople recipe calculator Amount Per Serving Calories 223.8   Total Fat 16.8 g Saturated Fat 4.9 g Polyunsaturated Fat 1.5 g Monounsaturated Fat 9.3 g Cholesterol 109.2 mg Sodium 562.1 mg Potassium 339.6 mg Total Carbohydrate 11.4 g Dietary Fiber 1.6 g Sugars 2.4 g Protein 7.3 g

Thursday, November 10, 2011

Stuffed Pumpkin with Cheese, Bacon and Chipotles

Don't forget to enter my giveaway for a FREE copy of A Cook's book for Cooks! Click HERE to enter!

Halloween may be over but that's no reason to say good bye to the beloved pumpkin. The orange squash is king of Autumn and until December 21, it's still Autumn, so bring on the pumpkin recipes! Today I happily share with you a pumpkin stuffed with cheese, bacon and chipotle chilies. Holy cow, this thing is good! And rich! And delicious!! This gorgeous dish was found at the Homesick Texan's site. I'm not from Texas (I'm from Michigan!) but this dish makes me homesick for Texas as well!!

The stuffing in this pumpkin is filled with all sorts of deliciousness: French bread cubes, Gruyere and white cheddar cheeses, thick cut bacon and spicy smoky chipotles. A touch of garlic, cumin and cream crown the already rich and flavorful filling. After a long 2 hour baking time the pumpkin is tender and easily scrapes out of it's shell. The sweet and yet bland squash play perfectly with the spicy and rich filling.

Stuffed pumpkin makes a great lunch on its own or would be perfect as a side dish. It'd also be very welcome on the Thanksgiving table. Imagine if you will, the beautiful turkey, golden brown and fragrant, the bowl of red glistening cranberry sauce, fluffy white mashed potatoes, rich brown gravy and this, amazing orange whole baked pumpkin stuffed with cheesy spicy goodness. It's truly a vision of delicious loveliness!


Stuffed Pumpkin with Cheese, Bacon and Chipotles
Source: Homesick Texan
Makes: 4 servings

One 3-to-4 pound pie pumpkin
Salt and black pepper to taste
4 ounces French bread, cut into 1/2-inch cubes
1/4 pound Gruyere, shredded (1 cup)
1/4 pound white cheddar, shredded (1 cup)
4 cloves garlic, minced
1 or 2 chipotle chiles en adobo, diced (depending on how fiery you want it)
1/4 pound cooked bacon, crumbled
1/4 teaspoon ground cumin
Small pinch of nutmeg
1/2 cup heavy cream or half-and-half

Arrange a rack in the center of the oven and preheat the oven to 350 degrees. Line a 8x8 pan or baking sheet with foil or parchment paper.

With a sharp knife, cut a circle around the pumpkin stem about 1 inch away from the stem. Remove the top and clean out the seeds and stringy bits from inside the pumpkin. (You can save the seeds for roasting, if you like.) Lightly salt and pepper the inside of the pumpkin.

Toss together the bread cubes, shredded Gruyere, shredded cheddar, garlic, diced chipotle chiles and cooked bacon, and stuff into the pumpkin. Stir the cumin and nutmeg into the cream, adding a bit of salt and black pepper to taste. Pour cream mixture into pumpkin over bread and cheese.

Place the top back on the pumpkin, and place the pumpkin into the baking pan. Bake for 2 hours or until filling is brown and bubbling.

To serve, remove the top and spoon out portions of the filling along with bits of the cooked pumpkin. You can either leave it in the pan, or by using the foil or parchment paper, you can carefully lift it out of the pan and place it on a platter. Serve warm.


Nutrition Facts calculated at SparkPeople recipe calculator
Amount Per Serving
Calories 497.3
Total Fat 30.4 g
Saturated Fat 18.7 g
Polyunsaturated Fat 0.8 g
Monounsaturated Fat 5.4 g
Cholesterol 101.9 mg
Sodium 1,691.2 mg
Potassium 1,004.7 mg
Total Carbohydrate 37.5 g
Dietary Fiber 4.9 g
Sugars 4.2 g
Protein 21.9 g

Saturday, October 15, 2011

Israeli Couscous salad with beans and tomatoes

Israeli couscous, have you all seen or tried this yet? Ever wonder what the heck it is? Well, Israeli couscous isn't a strange and exotic grain. It's not a grain at all, rather, it's pasta, just like all couscous. Yes, you read that right, ALL couscous is really just tiny beads of pasta that cook up super quick due to their tiny size. Israeli couscous is no different except its beads are larger than normal couscous, making them more pearl like. They cook up very fast also, less than 10 minutes, and are tasty! I like to get my Israeli couscous from the health food store, they have it available in bulk and you can buy as much or as little as you'd like. It's really really cheap, too, bonus!

Israeli couscous is toasted from the factory. Personally, I wanted more of that roasty toasty flavor so I decided to further brown my couscous in melted butter. Nothing wrong with that! A small amount of onion was added for flavor, but not so much that it overwhelmed the delicate toasty flavor of the couscous. The Witch used chicken broth to cook the couscous in for additional flavor, but if you're looking to make this dish completely vegetarian water or veggie broth would work just fine also. As the couscous cooks it releases a lot of starches which make the texture of the cooked Israeli couscous more like a good risotto than couscous.

Because this was an entire meal I knew that I needed some protein in there somewhere so I added white beans that I have in my pantry. The soft texture and gentle flavor of the cannellini bean was delightful against the soft, rich creamy flavor of the couscous. Having an abundance of cherry tomatoes from the garden it was a no brainer to add a handful of the sweet red treats into the couscous. Feta cheese was in the fridge and its flavors as well as very granular texture again worked fabulously with the couscous. Now all it needed was a dressing! In a small mason jar, or any jar with a lid, add the juice of half a lemon, a touch of honey to counteract the tart of the lemon and 2 parts olive oil. I just eyeballed the amount in the glass jar, when it looked like I had a 2:1 ratio of oil to lemon juice I stopped. It was about 3T of oil. A touch of garlic and fresh herbs including mint, oregano and parsley completed this easy and tasty dressing. The dressing will make a lot more than you need for one serving, you'll actually be able to get about 3 couscous salads out of this dressing, so save the leftovers in the fridge for another tasty salad.

The final results of this are savor, rich, creamy, tart, sweet and plain yummy. The herbs in the dressing added great flavor, just enough to keep you interested in taking another bite. The tomatoes give bursts of sweet tart flavor that counter the rich creamy taste of the couscous. A nice salty tang is provided by the feta and the creamy beans kept me full for hours! This recipe was developed as a quick and easy lunch for myself. Imagine my surprise when the Little Witch wanted to try some (shock!) and then declared that she LOVES couscous and wanted more! (double shock!) If you're looking for a quick lunch, easy side dish or a meatless main course, look no further than this Israeli couscous dish. Enjoy!


Israeli couscous salad with beans and tomatoes
makes 1 main dish sized serving
1/2 c Israeli couscous
3/4 c chicken broth OR water
2 t butter
1 T minced onions
1 T minced green pepper (optional)
6-8 cherry tomatoes
1/3 c white beans (cannellini beans), drained and rinsed (1 can will make 3 salads)
2T feta cheese
3t dressing, recipe follows

Lemon herb dressing
makes enough for 3 salads
juice of 1/2 lemon
2 parts olive oil, approx 3T
1t honey
1 clove garlic sliced thin
pinch kosher salt & pepper
fresh minced herbs: parsley, mint and oregano (small bit of parsley, 5 leaves each mint & oregano)

Make dressing first: combine all ingredients in a small lidded jar and shake well to mix. Set aside.

Prepare salad:
In a small sauce pan heat butter over medium high heat until it foams. Once the foaming stops add the uncooked couscous, stir to coat all pearls in butter. Toast for 2 minutes then add the onions. Stir to coat onions in butter and continue to toast for 3-4 minutes longer, until couscous is browned and smells nutty.


Add the broth or water and bring to a boil then reduce heat to simmer. Add the beans, cover the pan and allow to cook for about 5 minutes. Check couscous for tenderness, if soft all the way through then drain couscous of any remaining liquid. Return to pot. Add the dressing, tomatoes and feta, stir well to coat everything evenly. Enjoy!


Nutrition Facts calculated at SparkPeople recipe calculator
Salad only, no dressing 1 Serving
Amount Per Serving

Calories 459.6
Total Fat 9.6 g
Saturated Fat 4.8 g
Polyunsaturated Fat 0.2 g
Monounsaturated Fat 1.2 g
Cholesterol 25.0 mg
Sodium 308.7 mg
Potassim 294.2 mg
Total Carbohydrate 16.6 g
Dietary Fiber 4.8 g
Sugars 0.7 g
Protein 17.7 g

Nutrition Facts calculated at SparkPeople recipe calculator
Lemon herb dressing only -- 3 Servings
Amount Per Serving

Calories 130.5
Total Fat 14.0 g
Saturated Fat 2.0 g
Polyunsaturated Fat 2.0 g
Monounsaturated Fat 10.0 g
Cholesterol 0.0 mg
Sodium 96.3 mg
Potassium 14.9 mg
Total Carbohydrate 2.9 g
Dietary Fiber 0.1 g
Sugars 2.1 g
Protein 0.1 g

Wednesday, October 5, 2011

Jalapeno Corn Cakes

Today I'd like to introduce you to a fabulous foodie and cook, Phyllis Davis. Phyllis isn't a guest blogger; rather she has been a guest in the Witches' house for various cooking dates. Please allow me to introduce Phyllis Davis!

"I was a caterer in Texas in the 70's, a sous chef for six years at the Broadmoor Cooking School during the 80's and assisted: Jacques Pepin, Marcella Hazen, Guiliano Bugialli, Stephan Pyles, Paula Wolfort, Martha Stewart, Ken Hom, and others, became the Food and Restaurant Critic for KKTV in the 80's, taught private cooking classes throughout my cooking life, and now I have the pleasure of cooking with you, Andrea."

Holy cow how did I get so lucky to find a friend and foodie with such a varied and rich history? I'm one lucky Witch, that's for sure! Phyllis and I have a great time cooking, chatting, knitting and generally enjoying each others company. Most recently we made 2 dishes, sweet corn gelato (to be posted soon) and jalapeno corn cakes. Both recipes were delicious and will be/have been repeat offenders in the Witches' kitchen already! The corn cakes were particularly delicious, I loved the crunch of corn, slightly crispy exterior and gentle heat of the jalapeno and the cool sour cream topping was perfect. I've made these twice since then and LOVE them! They are really good for breakfast, too, if you are into a more savory type of AM meal.

Confession time: Phyllis and I made these dishes in August when corn season was at its peak. Yours truly has had a run in with a little thing called LIFE - between a beloved dog passing away, getting a new puppy and a Little Witch starting preK, we have been busy, hence the lack of posts lately AND the unseasonality of this post.

Jalapeno Corn Cakes
Makes 6 servings, 2 cakes each
Source: Sunset Magazine
1 lg egg
1 c milk
3/4 c. medium-grind cornmeal, preferably stone ground
1/2 c. flour
3/4 t. kosher salt
2 t. baking powder
1 t. chopped marjoram (optional, we omitted)
2 green onions, chopped, plus more for garnish
1 jalapeno, seeded and chopped
2 c. corn kernels (fresh or frozen)
1/4 c. veg or canola oil
Sour cream

Whisk egg, and milk and add the cornmeal, flour, salt, baking powder & marjoram stirring to combine.


Fold in chopped onions, jalapeno, and corn.


Heat 2 T. oil in large nonstick skillet over med heat and scoop 1/4 c. portions of batter into pan. Cook, turning once, until puffed and brown - total about 6 minutes.


You can also make smaller bite size cakes, they are wonderful appetizers!

Nutrition Facts provided by SparkPeople recipe calculator
Amount Per Serving
Calories 272.4
Total Fat 14.0 g
Saturated Fat 2.8 g
Polyunsaturated Fat 3.6 g
Monounsaturated Fat 6.8 g
Cholesterol 38.3 mg
Sodium 428.5 mg
Potassium 224.0 mg
Total Carbohydrate 32.2 g
Dietary Fiber 3.0 g
Sugars 3.9 g
Protein 6.7 g

Tuesday, August 23, 2011

Roasted corn and jalapeno cheddar polenta

Polenta is like the red head step child of the side dish world. Most people don't even know what polenta is here in the US. Its only when its referred to as grits, as most southerns know it as, that it gets any recognition. And, unfortunately, the recognition isn't that warm or welcome. Why, I wondered, are people so frightened of polenta. Is it the name? Do people just not know what it is? Could it be the texture? Could it be that maybe they've just never had good polenta? My best guess is a combination of all the above. I hope today that I can demystify polenta and introduce some of you to a new and tasty side dish.

Polenta is corn meal that's been slow cooked to rehydrate it. As mentioned it is known as grits in the south. But please, don't let the name grits turn you off. Yes there is a texture to polenta. However if it's cooked properly it won't be gritty or rough, rather the corn meal softens and becomes al dente and delicious. It has a great corn flavor and stands up well to rich and hearty dishes. There are different grinds to polenta, from instant (not recommended) to coarse grind super slow cooking ones, the choice is yours. Most supermarkets will have 'quick cooking' polenta available and the Kitchen Witch feels that this is a great place to start. After you've made it and decide you love its wholesome corny goodness then please try the coarser grinds, I hear they're loads tastier. I have a bag of Bob's Red Mill coarse grind polenta in the pantry and can't wait to try it! The quick cooking variety will take about 20 minutes to cook up into a creamy corny pudding. What you add to it to flavor it is pretty much endless!

When I created this side dish it was to accompny green chili pork stew. I was looking for something that would go well with the stews liquidy part and what pairs better than corn? I had an ear of corn in the fridge which I roasted under the broiler - you could of course do this over your grill - knowing that the sweet corn would add bursts of flavor as well as a roasted smokiness. Jalapenos seemed natural, they go well with corn as well as the green chili. Onions & garlic add the background flavors to make it more dimensional and the cheese adds the final layer of deliciousness. I left most of the seeds and veins in the jalapeno and honestly it was NOT hot at all. I could have used another 2 peppers before any heat was felt. Use your discression on how hot you want it for your family. I served this polenta in its creamy puddling like form but polenta is the master of make overs! If creamy pudding isn't your thing, no worries, simply pour your polenta into a sheet pan lined with plastic wrap and allow to cool. Once cooled you can slice your now firmed up polenta into any shape you desire and pan fry it in a bit of oil until its golden browned, flip and brown on second side. The exterior has a crispy brown exterior and the inside is a smooth creamy treat. This is a great way to use up left over polenta and its awesome with eggs.

I hope you try polenta in the future and embrace it as a quality side dish that the whole family can enjoy! Play around with the ingredients and add ins, making each batch as individual as you are. Happy cooking!


Roasted corn and jalapeno cheddar polenta
makes 4 servings
1 cup polenta (coarse corn grits)
3 cups chicken broth
1 ear of corn roasted and kernals cut from cob
1/2 onion diced
1 jalapeno diced
2 cloves garlic minced
1/2 c cheddar cheese
2 T butter
1 t kosher salt
black pepper to taste

Begin by roasting the corn in the oven. Set your oven rack on the highest setting and put it on broil. Place the shucked corn cob on the rack under the broiler. Roast until you have a few blackened kernels, rotate and roast evenly all over cob. Don't be alarmed if you hear popping, this is normal if your corn is very fresh. Its the liquid in the kernel expanding as it heats and essentially 'popping'. The popping is usually my indicator that I need to check the corn. Once roasted remove from oven and allow to cool, then cut the kernels off the cob once cool enough to handle.

In a sauce pan heat the butter over medium high heat. Add onions and sautee for 2 minutes. Add the garlic and diced jalapeno, sautee for 5 min longer until the garlic starts to toast slightly and the onions have softened. Add the roasted corn kernels and stir well to coat in the fat.

Add the chicken stock to the veggies in the pan. Using a whisk slowly whisk in the polenta. Whisk until all polenta is incorporated then switch to a wooden spoon. Bring the polenta up to a boil then reduce the heat to low. Cover polenta and cook for 15-20 minutes (or to instructions on package) stirring often to avoid scorch spots and lumps. Once polenta has cooled remove from heat and stir in the cheddar cheese, serve and enjoy.


Nutrition Facts provided by SparkPeople recipe calculator
Amount Per Serving
Calories 296.9
Total Fat 12.0 g
Saturated Fat 6.9 g
Polyunsaturated Fat 1.0 g
Monounsaturated Fat 3.5 g
Cholesterol 30.4 mg
Sodium 1,685.6 mg
Potassium 183.3 mg
Total Carbohydrate 38.5 g
Dietary Fiber 1.6 g
Sugars 1.7 g
Protein 9.0

Tuesday, July 19, 2011

Roasted tri color potatoes with herbs and cheese

Roasted potatoes are a staple in the Witch household. The browned bottoms, crispy and chip like compliment the soft and creamy insides while the skin is crispy and salty. If you're a potato lover you have got to try these!

The potatoes take about 30 minutes to roast, making them an ideal side dish. While you're working on the main dish these little gems mind their own business, getting all delicious in the oven with very little interaction from you. Adding an herb oil to the finished potatoes brings out all the bright flavors in the herbs and compliments the earthy potato nicely.

If you've never tried a Peruvian blue potato this is a great place to experiment. They taste like a regular potato but have a great blue color. Their flavor is slightly more earthy and really good. The blues are my favorite roasting potatoes, not just for their flavor, but its fun to eat blue food! Baby Yukon golds, Red Bliss or any fingerling potato will work fine here too. I hope you enjoy this easy and tasty dish!


Roasted potatoes with herbs and cheese
makes 4 servings
8 small potatoes, red bliss, yukon gold and Peruvian blue are all fantastic
3 T olive oil
3/4 t kosher salt, divided
ground pepper to taste
fresh herbs including chives, parsley, rosemary and thyme, minced
fresh grated Asiago cheese, or cheese of your choice, about 1/3 c grated

Preheat oven to 425F.

Wash and scrub potatoes. Cut potatoes in half. Pat potatoes dry with paper towels.

Place potatoes on a sheet pan and drizzle with 1.5 T of oil, 1/2 t kosher salt and pepper. Toss potatoes to evenly coat in oil and salt. Place potatoes cut side down and put into the hot oven.

Roast for 30 minutes until the bottoms are browned and the potatoes are soft.

While potatoes roast make the herb oil by mincing your herbs very fine and stirring into the remaining oil with the last 1/2 t of salt & pepper. Stir well.

Once potatoes are roasted remove from sheet pan and put into a bowl. Pour the herb oil over top and toss. Add your grated Asiago cheese, toss. Top potatoes with any extra cheese, if desired, and enjoy.


Nutrition Facts provided by SparkPeople recipe calculator
Amount Per Serving
Calories 382.3
Total Fat 13.1 g
Saturated Fat 2.8 g
Polyunsaturated Fat 1.1 g
Monounsaturated Fat 8.0 g
Cholesterol 6.3 mg
Sodium 465.4 mg
Potassium 1,431.4 mg
Total Carbohydrate 59.4 g
Dietary Fiber 7.5 g
Sugars 2.7 g
Protein 8.6 g

Tuesday, February 1, 2011

Lemon & garlic scented rice

If you own a rice cooker you're about 30 minutes away from one of the tastiest and easiest side dishes ever. If you don't own a rice cooker, well you can still have this delicious side dish, it'll just take a little bit longer. This rice was served with the Greek grilled chicken thighs and it was amazing! Lightly scented, perfumed with garlic and lemon zest. Simplicity at its finest and darn good eats, too.

Lemon and garlic scented rice
makes 4 servings
zest of 3/4 lemon
2 cloves garlic whole, smashed with the back of a knife but left whole still
1/2 t kosher salt
1 cup basmati rice
1 3/4 c water
drizzle olive oil

Rinse the rice well until water runs clear. In the bowl of a rice cooker combine all the ingredients. Cook according to manufacture instructions.

If cooking on the stove top follow the rice instructions, adding the lemon zest, garlic and salt to the water.

Remove garlic cloves and fluff with a fork just before serving.


Nutrition Facts provided by SparkPeople recipe calculator
Amount Per Serving
Calories 190.5
Total Fat 1.1 g
Saturated Fat 0.2 g
Polyunsaturated Fat 0.1 g
Monounsaturated Fat 0.8 g
Cholesterol 0.0 mg
Sodium 242.9 mg
Potassium 9.8 mg
Total Carbohydrate 40.3 g
Dietary Fiber 0.1 g
Sugars 0.0 g
Protein 3.5 g

Tuesday, November 30, 2010

Peshwari Pilau aka Spiced rice with nuts and fruit

The New Curry Secret by Kris Dhillon is one of my new favorite cookbooks. And I don't even own it! Nope, the Witch was turned on to this amazing little gem by one of the moms in our playgroup. Like usual we were talking about food and she mentioned that her husband had received a great Indian cookbook for Christmas. After hearing about the wonderful things from this book for months (it was sheer torture, too!) we finally decided to get together and cook from the book.

It was one of the best meals of my life!! So a BIG THANK YOU to Nichole and her husband Mick for having this book and sharing its delicious secrets with the Kitchen Witch. Today I'd like to share with you one of the side dishes, Peshwari Pilau, or better known as Spiced rice with fruit and nuts. Sounds pretty delicious, right?

The spices in play here are cloves, cinnamon sticks and cardamon pods. Combined they create a rich, spicy background flavor, perfect for paring with all sorts of spicy Indian main dishes. The fruit is simply golden raisins. Cooking the raisins with the rice allows them to plump up and their sweet bursts of flavor are absolutely delicious. The crunchy bits of nuts add salty and sweet flavors as well. This rice is about as good as it gets in this Witches' opinion.

Best of all, even a rice challenged Witch can make this, successfully! Oh yes, its true, the Kitchen Witch is very, severely rice challenged. If its not 'minute, instant or boil in the bag' OR made in a rice cooker, chances are good that it won't be good if the Witch makes it. For some unknown reason my rice is notoriously crunchy, not cooked all the way through OR its super sticky (even when a non sticky variety) and pasty and well, frankly unpalatable. Sometimes I'm even able to have both things happen at once, gluey blown apart rice grains that are yet still crunchy in the inside. So when this rice turned out, perfectly, the first time, well I knew I had a winner of a dish and a great cookbook on my hands.

Even if Indian food isn't on your menu give this rice a try. It has a delightful fragrance and is filled with many of the spices we all associate with the holiday seasons. It'd be the perfect side dish for any of your holiday season dinners. Enjoy! Oh and PS, I'll be posting more Indian dishes from The New Curry Secret soon! Stay tuned for those!

Peshwari Pilau aka
Spiced rice with nuts and fruit
makes 4 generous servings
From The New Curry Secret by Kris Dhillon
9 oz (250g) basmati rice, rinsed very well
15 fl oz (450 mL) c water
1 T olive oil
1/4 c golden raisins
2 T blanched almond slices
2 T cashew pieces and halves
2-4 1 inch long cinnamon sticks
6 cardamon pods (green)
6 whole cloves
1 t kosher salt (use 1/2 as much if using table salt)

rinse the rice until the rinse water runs clear.

Preheat oven to 335F.

In an oven safe pan with a tight fitting lid heat the oil over medium high heat. Once oil is hot add the spices and cook about 30 seconds or until fragrant. Add nuts and raisins, cook 30 seconds longer, stirring often. Then add the rinsed rice and stir well. Coat rice in the fragrant oil and cook about 1 minute before adding the water.

Add water and salt, stir well to mix. Bring to a boil, reduce heat to the lowest setting on your stove, cover and allow to cook for 20 minutes, stirring 3 times during the cooking process.


~*~Kitchen Witch Tip: When stirring rice use a wide spoon and a folding technique. Do NOT vigorously stir the rice, that will cause the starches to be released and the rice will be gluey and unnecessarily sticky. A quick stir 2-3 times around the pot is all you need, basically insuring that you won't have any stuck on or scorch spots at the bottom of the pan. Resist the urge to over-stir!~*~

After all water is absorbed put the lidded pan into the oven to dry the rice out, about 20 minutes.

Fluff rice with a fork before serving. Remove the cardamon pods, cinnamon sticks and cloves before serving.


Photo Credits: R.L. Long (aka the Witchy Sissy), the spices photos

Nutrition Facts provided by SparkPeople recipe calculator
Amount Per Serving
Calories 325.9
Total Fat 7.8 g
Saturated Fat 1.0 g
Polyunsaturated Fat 1.0 g
Monounsaturated Fat 4.7 g
Cholesterol 0.0 mg
Sodium 508.8 mg
Potassium 124.3 mg
Total Carbohydrate 57.6 g
Dietary Fiber 1.0 g
Sugars 7.6 g
Protein 7.6 g

Saturday, September 18, 2010

Caesar Salad

Recently a good friend of mine made the long trek to Colorado for a visit. We feasted while she was here!! This was one of the many delicious things we made. It was so much fun to share good food, good friendship and good company! She also took the photos for me, which was great, and she used her super fantastic Nikon DSLR, and now I'm beyond jealous. If anyone's looking for a good gift idea for the Kitchen Witch, a DSLR would be great. Just sayin' :)

Caesar salad is so good, and so simple now that I've learned a few tricks from Pam Anderson and the Pioneer Woman! They make this delightful salad using the hearts of romaine and leaving them in large spears, to be eaten with the hands. The Kitchen Witch loves to eat with her hands so this had to be made. Let me tell you, this Caesar salad is indeed scrumptious.

Garlic is pureed with olive oil which draws the bitterness out of the garlic, leaving wonderfully garlicy oil for the croutons and milder garlic for the dressing. The Pioneer Woman uses her food processor for this process but we soon discovered that mine was too large for such a small amount of oil and garlic: the blender was much better suited. Please use whichever you have at your disposal.

We doubled the dressing, making an even easier and quicker lunch the following day. Adding some grilled chicken or shrimp would be amazing as well. The dressing will last for up to 1 week in the refrigerator. The croutons are really only good for a day or 2 max before they get too stale.


Caesar Salad

Adapted from Pioneer Woman: Pam's Simple, Scrumptious Caesar Salad
makes 4-6 servings

Garlic Croutons
4 cloves garlic
A generous 1/4 cup pure olive oil
2 packed cups 3/4″ bread cubes, cut from a good-quality baguette or homemade loaf
Large pinch of salt

Salad
3 romaine hearts, separated into whole leaves
2 tablespoons lemon juice
2 1/2 tablespoons mayonnaise
1/4 teaspoon Worcestershire
4 tablespoon pure olive oil - optional
1/4 teaspoon salt
Ground black pepper to taste
1/4 cup grated Parmesan cheese or Asiago cheese, plus extra for sprinkling.

Heat a skillet over low heat. With motor running, drop garlic cloves through feeder tube of a food processor fitted with the steel blade to mince. (A blender works as well.) Scrape down sides of bowl and add olive oil through feeder tube as well. Continue to process so that garlic releases its flavor into the oil, about 30 seconds. Strain garlic from oil through a fine-mesh strainer; reserve half of the garlic for dressing.


Increase skillet heat to medium. Place bread cubes in medium bowl. Drizzle garlic oil evenly over bread, along with big pinch of salt; toss to coat.

Add bread cubes to hot skillet and toast, turning the cubes and shaking the pan often, until crisp and golden brown, 5 to 7 minutes. Return croutons to bowl and set aside to cool while preparing salad.


Place lettuce leaves in a large bowl.

Whisk lemon juice, mayonnaise, half the reserved garlic, and Worcestershire in a small bowl.


Drizzle lettuce with olive oil, sprinkle with salt and pepper to taste, and toss lightly and carefully. (Clean hands work well.)
*~*Kitchen Witch Note: After making this salad a few times with out this additional olive oil step I have to say that I do NOT think it's necessary. The dressing provides ample flavor and if you're counting calories, the additional oil isn't needed, or missed honestly. I'm also providing nutritional info for both versions, with and with out the extra oil.*~*

Drizzle lemon mixture over lettuce; toss again.

Sprinkle Parmesan over greens; toss again.

Sprinkle croutons over the salad; toss and serve, sprinkling each portion with a little more Parmesan cheese.


Nutrition Facts provided by SparkPeople recipe calculator
6 Servings
Amount Per Serving - with additional olive oil on lettuce
Calories 377.3
Total Fat 26.7 g
Saturated Fat 5.4 g
Polyunsaturated Fat 4.4 g
Monounsaturated Fat 14.9 g
Cholesterol 8.8 mg
Sodium 828.5 mg
Potassium 214.9 mg
Total Carbohydrate 27.3 g
Dietary Fiber 2.4 g
Sugars 0.3 g
Protein 7.9 g

Nutrition Facts
Amount Per Serving - with out additional olive oil
Calories 297.8
Total Fat 17.7 g
Saturated Fat 4.2 g
Polyunsaturated Fat 3.6 g
Monounsaturated Fat 8.3 g
Cholesterol 8.8 mg
Sodium 828.5 mg
Potassium 214.9 mg
Total Carbohydrate 27.3 g
Dietary Fiber 2.4 g
Sugars 0.3 g
Protein 7.9 g

Friday, September 17, 2010

Smashed Potatoes

I love small potatoes; they are so creamy and sweet when baked, not to mention very cute. They also get very golden when the flesh is exposed to heat and oil. The creamy texture is something you just can't get in a larger baking potato. We were having a big fancy steak dinner and potatoes were the side dish. I knew that I wanted the best of both worlds, creamy potato flesh and the crispy skin that you can only get from an oven baked spud and so these were created.

After baking the small tubers I smashed them, exposing the inner flesh and making the sides flat, perfect for crisping up in the oven. A small amount of oil helped the crisping process. Toppings were kept traditional, why mess with a good thing? Crispy fresh cooked bacon bits, grated extra sharp cheddar, tangy sour cream and onion-y chives made for the perfect side dish.

These potatoes were a hit! Not only were they delicious, they're really cute on the plate. The kids and adults alike were really excited to eat them and there were no left overs. I have big plans for these babies, left over chili would be awesome on them, or, they'd make a great side dish for a brunch. Smashed potatoes were a smashing success!

Smashed Potatoes
makes 8 servings

4 slices bacon
8 red bliss potatoes, about 2 inches diameter
2T sour cream
1 oz shredded cheddar cheese
fresh snipped chives
1T canola oil
kosher salt

Heat oven to 350. Put the washed potatoes into the oven and bake for 45 minutes, or until soft.

Remove potatoes from oven and put onto a cutting board. Hit each potato with a meat mallet or a heavy pan to smash it flat, bursting the sides open but the potato is still intact in one piece.


Pour the oil onto a sheet pan, rub the potatoes on both sides with oil, sprinkle with kosher salt and bake again for 15 to 20 minutes, until the bottoms are browned and crispy.


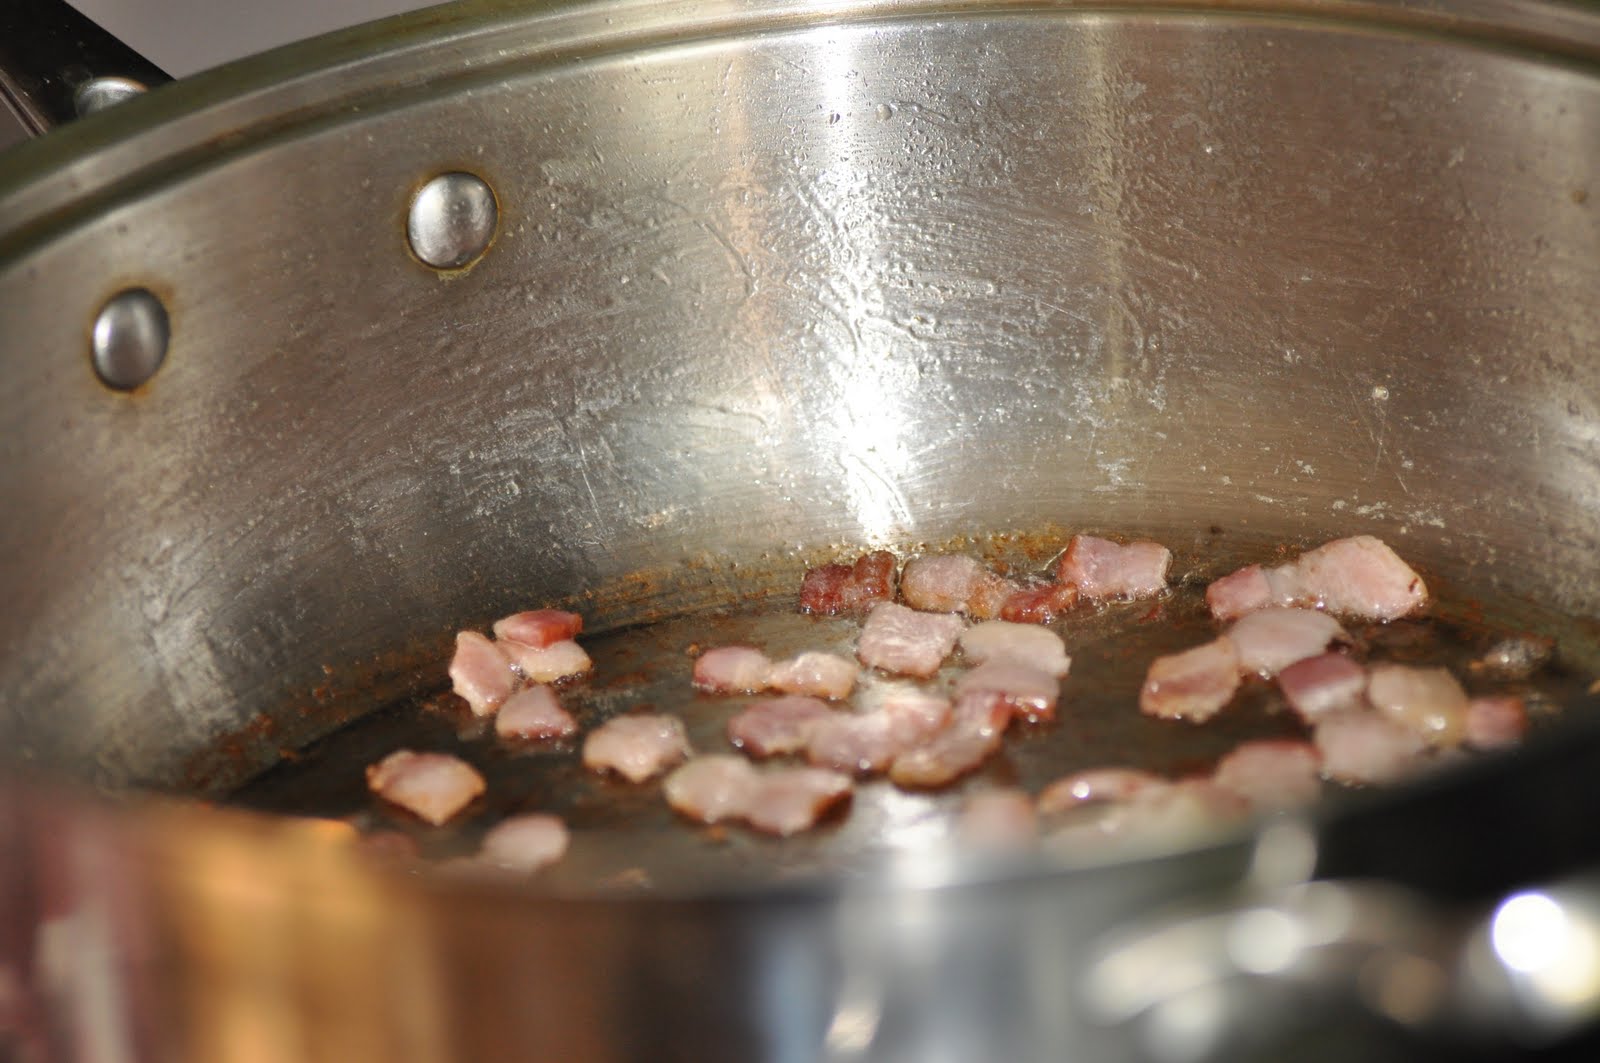
While potatoes are baking cook the bacon. I slice the bacon into bits before cooking, it gives more even pieces and cooks up faster. Drain cooked bacon bits.


Top each smashed potato with grated cheddar cheese, a small dollop of sour cream - a baggie with the end cut off works fantastic here, some bacon bits and chives.


Nutrition Facts provided by SparkPeople recipe calculator
Amount Per Serving (1 topped potato each)
Calories 181.7
Total Fat 5.8 g
Saturated Fat 1.9 g
Polyunsaturated Fat 0.6 g
Monounsaturated Fat 1.5 g
Cholesterol 10.0 mg
Sodium 387.8 mg
Potassium 7.9 mg
Total Carbohydrate 27.2 g
Dietary Fiber 2.5 g
Sugars 2.0 g
Protein 5.4 g

Thursday, September 2, 2010

Green Beans Almondine

Green beans almondine is an old skool recipe that has fallen out of vogue. The Kitchen Witch is here to revive this old classic!!

I've had green bean almondine as a side dish in many frozen dinners in my time. I've also had it in a few restaurants, the results left me wanting more from my humble side dish. Sorry, but just dumping a few almonds on top of frozen beans does not constitute an almondine. Green bean almondine should be elegant, nutty flavored and simple yet elegant.

Turns out, like most things, that its not hard at all!! As a matter of fact this side dish takes about 5 minutes from start to finish - yet tastes like you spent all day. It is a family favorite around here, especially now that we've got lots of beans coming in daily from the garden. I hope you try this old time classic for your family soon!


Green Bean Almondine

serves 4
1/2 to 3/4 lb fresh green beans
1 T butter
2 T blanched slivered almonds
pinch of kosher salt

Pinch off any tough ends on the green beans. Place beans into a microwave safe dish with about 1 inch of water at the bottom. Cover with plastic wrap and microwave 3-5 minutes, until beans are tender crisp. Allow beans to rest 1 minute after taking out of microwave to finish the cooking process.

While the beans are steaming prepare the almondine. In a small pan combine the butter and almonds. Heat over medium high heat, stirring often to avoid burning. Cook about 2 minutes or until almonds are golden brown and smell toasty.

Drain green beans and add them to the butter almond sauce. Add the salt & toss to coat. That's it!


Nutrition Facts
provided by SparkPeople Recipe Calculator
4 Servings
Amount Per Serving
Calories 61.9
Total Fat 4.6 g
Saturated Fat 1.9 g
Polyunsaturated Fat 0.5 g
Monounsaturated Fat 1.9 g
Cholesterol 7.8 mg
Sodium 42.6 mg
Potassium 143.6 mg
Total Carbohydrate 4.7 g
Dietary Fiber 2.3 g
Sugars 0.2 g
Protein 1.8 g

Tuesday, June 8, 2010

Mediterranean style pasta salad

I realize this isn't a lot different from the pasta salad I posted last month but, come on, really what can you do to pasta salad that hasn't already been done? Regardless, I went with a Mediterranean feel with this one; lemon juice, extra virgin olive oil (EVOO), tomatoes, feta cheese, fresh herbs including Greek oregano and mint. The result is a flavorful, colorful, bright salad that perks up any old grilled piece of meat.

As always look at this salad as a canvas to add whatever you and your family likes. Got fresh green beans? Use them in place of the asparagus. Don't like red bell peppers? Leave them out! Hate orzo? Use spirals or shells, whatever makes you happy.

I love that more of my herbs are growing and thriving. It's true, the more you pick them the faster they grow, at least in this Witches' experience it is. My mint is finally big enough to start using, I loved it here, so unexpected yet subtle. If you've not used fresh mint I encourage you to try it, its not at all 'minty' like you would imagine. I always thought adding mint would be like adding a stick of Extra to your dish, gross! Not so. Give it a try! The chive blossom is one of the best perks of late spring & growing chives. Their pretty purple flowers have a sharp onion flavor that doesn't linger, rather gives you its essence and then moves on to allow other flavors in. And who doesn't love to eat flowers?

While easy to prepare the flavor is very complex and its stunning on a plate. The colors let you know that you're in for a delicious treat chock full of vitamins and goodness. Hooray for summertime and veggie laden pasta salads!

Mediterranean style pasta salad
serves 4
1/2 lb orzo or other small pasta
6 spears asparagus
10 grape tomatoes
1/2 red bell pepper finely diced
1 chive blossom (optional, can use fresh minced chives or shallots in lieu)
2 springs oregano
1 sprig thyme
1 sprig mint
1-2 small sprigs parsley
2 oz feta cheese, crumbled

Dressing:
juice of 1/2 lemon
3 T EVOO
1 clove garlic minced
1/2 t kosher salt
dash pepper
1/2 the minced herbs listed above

Make dressing by whisking all ingredient listed, set aside for 15 min while pasta cooks.

Cook pasta according to directions on box. When there's 1 minute left in pasta cooking time add the asparagus to the boiling water and drain it off with pasta. Cook pasta & asparagus with a cold water bath or spray cold water on pasta, moving it around until its all cooled off.


In a medium size bowl combine the tomatoes, bell peppers, feta, herbs and chive blossoms. Add drained and cooled pasta and asparagus. Toss with dressing and serve.


Nutrition Facts provided by SparkPeople Recipe calculator
4 Servings
Amount Per Serving
Calories 296.7
Total Fat 14.5 g
Saturated Fat 3.7 g
Polyunsaturated Fat 1.7 g
Monounsaturated Fat 8.2 g
Cholesterol 12.6 mg
Sodium 162.9 mg
Potassium 197.5 mg
Total Carbohydrate 36.4 g
Dietary Fiber 2.7 g
Sugars 1.2 g
Protein 8.3 g
Related Posts with Thumbnails