Its no secret, we love Mexican food here. Enchiladas, taco, mole, we love it all. Some form of tacos/nachos/tostadas/taco salad is bound to be found on our dinner table at least once a week.
Back in the day before I educated myself about nutrition and healthier eating I was a pound of burger and a packet of taco seasoning mix. Then one day I read the ingredients on that taco seasoning packet and was amazed at the JUNK in there!! Oh sure, theres spices but why is there partially hydrogenated oil? Why is it in there? Some of them have high fructose corn syrup too. Umm...again why? Why do we need corn syrup and almost plastic oil in tacos I ask??
Now a days I make my own taco mix. Its so much fresher tasting, has more flavor, less sodium and NO partially hydrogenated oils or HFCS. That makes a Kitchen Witch happy! I also throw in a fair amount of vegetables like tomatoes, peppers and beans - something the little Witch doesn't realize, so we're getting a serving of veggies in our tacos, gotta love that!
Taco meat is so very versital, last night it was transformed into nachos. Today for lunch it might become taco salad. You can change the meat too, with fantasitc results, try ground chicken for light fresh taste and save yourself a LOT of calories too!!
Oh, we call it Ghetto Fab because its not fancy gourmet like, nope its pretty ghetto. But man, sometimes its so good to slum it :)
Ghetto Fab Taco meat
serves 4-6
1 lb ground meat (beef, turkey, chicken, pork)
1 can RoTel tomatoes or store brand tomatoes with chilies
1 t chili powder
1 t cumin, fresh toasted & ground if possible
S&P
1/2 onion diced fine
3 cloves garlic minced
1 bell pepper diced
1 can beans, pinto, black or kidney, drained & rinsed
1/4 c water
2-4T vinegar based hot sauce like Taco Bell mild sauce or Franks Red Hot (optional but it really doesn't add much heat, more of a subtle spicy tang)
Brown meat, drain fat well. Add onions, garlic and bell peppers. Cook for a few minutes until the onions and garlic start to release their fragrance. Add seasonings and tomatoes, juice & all and the beans. Add the hot sauce & water if needed. Simmer for about 5 minutes or until most of the liquid has evaporated.
Makes awesome nachos, tacos, burritos, tostadas and taco salads.
Nutrition Facts provided by SparkPeople Recipe Calculator
**nutrition is based on ground beef, values will changed with different meat**
Amount Per Serving (5 servings approx)
Calories 316.0
Total Fat 19.2 g
Saturated Fat 7.6 g
Polyunsaturated Fat 0.9 g
Monounsaturated Fat 8.3 g
Cholesterol 68.0 mg
Sodium 484.1 mg
Potassium 483.6 mg
Total Carbohydrate 15.0 g
Dietary Fiber 4.2 g
Sugars 2.5 g
Protein 19.5 g
Sunday, February 28, 2010
Saturday, February 27, 2010
Brownie cheesecake bars
Some of my best creations are based on what I have on hand and what I've been craving. Today is a perfect example: I was bored, its the weekend, so why not bake some tasty treats, right? While my husband and daughter never ever get bored with chocolate chip cookies, I, however do. Brownies sounded good. But I'm out of my beloved black cocoa so I know they won't be as good and dark chocolate as I'd like. Cheesecake sounds delightful, but you really need to let it cool for a good 24 hours, and I didn't have patience for that.
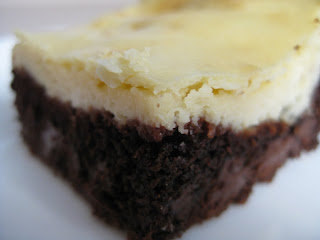
Enter the hybrid of cheesecake and brownie. Not a swirled brownie that only hints of cheesecake, no, I'm looking for a dense brownie bottom with a cheesecake custard layer. Using my old standby brownie recipe was a no brainer, black cocoa or not, it makes awesome brownies. You can find the recipe here. The cheesecake layer was easy to assemble with ingredients that I had in my fridge, with in 20 minutes I had brownie cheesecake bars in my oven.
Creamy, tangy, sweet, chocolaty. Mmm...perfect with a tall glass of ice cold milk.
Brownie Cheesecake Bars
makes a 13x9 pan
brownie layer:
1/2 + 2 T cocoa powder
2 eggs
1 cup + 2 T sugar
1 stick butter
1 1/2 c flour
1 t baking soda
1 t baking powder
1 c chocolate chips
cheesecake layer:
2 packs cream cheese
2 eggs
1 T good vanilla extract
1/2 c sugar
Assemble the brownie layer first while cream cheese sits on counter to come to room temp.
BROWNIES:
in a microwave safe bowl melt the butter. Add sugar to melted butter, stir well and microwave for 60 to 90 seconds. Stir well.
In a small bowl mix cocoa powder and eggs into a very thick paste. Add the butter/sugar mix and stir well until smooth. Add dry ingredients, mix until it forms a thick batter. Add chocolate chips, stir to incorporate.
Press brownie batter into a greased 13x9 pan.
CHEESECAKE:
Using a mixer cream the cheese until light and fluffy. Add sugar, beat about 1 minute. Scrap down sides, add vanilla and 1 egg. Mix very well, about 1 minute. Scrape sides again, add last egg and beat 1 minute until very smooth and thick.
Pour cheesecake over brownie layer. Bake at 350* for 35-40 minutes.
Tuesday, February 23, 2010
Smothered Pork Chops
I was watching Paula Deen throw down with Bobby Flay over chicken fried steak the other day on Food Network. Paula threw Bobby for a loop when she decided to smother her steaks in a brown pan gravy. Personally, I didn't agree with the smothering of a perfectly fried chicken fried steak, I mean whats the point of smothering it and loosing all that crispy goodness?? Other than the fact that its delicious, of course.
Pork was on tonights menu and I recalled the recipe that Paula made. I still don't agree that you should smother and simmer a chicken fried steak in gravy (poor crispiness, gone all soft and soggy) but I did like the idea of a smothered piece of meat in an onion pan gravy. I dredge the chops in flour and lightly brown one side before adding the stock, which develops flavor and, since I'm not going for a crispy crusty exterior, smothering is completely acceptable here.
I'm happy to say that this was GOOD. I mean really good!! Like make this again for dinner tomorrow type of good. Even the little Witch ate an entire pork chop herself and declared "this dinner is yummy Mommy!" The best compliment of all :) And, if great flavor wasn't enough, its done in about 30 minutes.
Smothered Pork Chops
makes 2 servings
2 boneless pork loin chops
1/2 small onion sliced
1/4 c mushrooms sliced
1/2 t poultry seasoning
S&P
1/4 C AP flour
drizzle oil
1 to 1.5 cups chicken or pork stock (I used ham stock as that's what I had on hand)
Nutrition Facts provided by SparkPeople Recipe Calculator
2 Servings
Amount Per Serving
Calories 255.0
Total Fat 11.3 g
Saturated Fat 3.9 g
Polyunsaturated Fat 1.3 g
Monounsaturated Fat 5.0 g
Cholesterol 62.9 mg
Sodium 765.6 mg
Potassium 531.0 mg
Total Carbohydrate 13.0 g
Dietary Fiber 1.0 g
Sugars 0.5 g
Protein 23.7 g
Pork was on tonights menu and I recalled the recipe that Paula made. I still don't agree that you should smother and simmer a chicken fried steak in gravy (poor crispiness, gone all soft and soggy) but I did like the idea of a smothered piece of meat in an onion pan gravy. I dredge the chops in flour and lightly brown one side before adding the stock, which develops flavor and, since I'm not going for a crispy crusty exterior, smothering is completely acceptable here.
I'm happy to say that this was GOOD. I mean really good!! Like make this again for dinner tomorrow type of good. Even the little Witch ate an entire pork chop herself and declared "this dinner is yummy Mommy!" The best compliment of all :) And, if great flavor wasn't enough, its done in about 30 minutes.
Smothered Pork Chops
makes 2 servings
2 boneless pork loin chops
1/2 small onion sliced
1/4 c mushrooms sliced
1/2 t poultry seasoning
S&P
1/4 C AP flour
drizzle oil
1 to 1.5 cups chicken or pork stock (I used ham stock as that's what I had on hand)
bacon bits, if you happen to have them left over in your fridge. If not that's ok too
Sprinkle pork chops with kosher salt, pepper and poultry seasoning, a few sprinkles (1/8 t) on each side. Dredge pork chops in the flour, patting flour into the meat.
Heat a heavy bottom pan (I used cast iron) over medium heat, drizzle bottom with oil. Add onions to hot pan and stir well to distribute oil evenly. Add pork chops, cooking on 1st side about 4 minutes before flipping, once golden browned.
Add stock and cover, cooking about 15 minutes longer. Once sauce has started to reduced add bacon bits if you have them and allow to simmer 5 more minutes, spooning sauce over top of chops as it cooks. The sauce will continue to reduce and thicken to a nice gravy.
Top each chop with onions, mushrooms and gravy. Delicious over egg noodles or mashed potatoes.
Nutrition Facts provided by SparkPeople Recipe Calculator
2 Servings
Amount Per Serving
Calories 255.0
Total Fat 11.3 g
Saturated Fat 3.9 g
Polyunsaturated Fat 1.3 g
Monounsaturated Fat 5.0 g
Cholesterol 62.9 mg
Sodium 765.6 mg
Potassium 531.0 mg
Total Carbohydrate 13.0 g
Dietary Fiber 1.0 g
Sugars 0.5 g
Protein 23.7 g
Goulash
This is the dish that my parents called goulash. Authentic it is not, I'm QUITE sure. However it is quick, easy and pretty darn tasty!
My husband Brian loves this meal. Its one of the few he can cook himself and it tastes almost as good as mine. There's very little prep work, just dicing 1/2 an onion and running a few cloves of garlic through a garlic press for the veg, browning beef and boiling pasta. No biggie!
Give this one a shot on a busy night. Its a family pleaser around here!
Goulash
serves 4-6, ready in 30 min or less!
1 lb ground beef, browned and drained well
2 cans stewed tomatoes
3-4 cloves garlic, minced
S&P (start with 1/4 t kosher salt, taste and adjust from there, about 4 grinds black pepper)
1 t paperkia
1/2 t oregano
Elbow noodles (1/2 box)
Brown the beef and onions. Drain well. Add garlic, spices, S&P and tomatoes, juice and all. Using the end of your spatula cut each tomato slice into quarters (if desired), stir well and bring to a simmer. Simmer while pasta cooks, about 15 min total. Top cooked pasta with goulash and enjoy!
Nutrition Facts provided by SparkPeople Recipe Calculator
5 Servings
Amount Per Serving
Calories 422.6
Total Fat 19.7 g
Saturated Fat 7.6 g
Polyunsaturated Fat 0.8 g
Monounsaturated Fat 8.2 g
Cholesterol 68.0 mg
Sodium 276.9 mg
Potassium 406.6 mg
Total Carbohydrate 38.8 g
Dietary Fiber 2.5 g
Sugars 2.8 g
Protein 22.6 g
Saturday, February 20, 2010
Jicama fruit salad with spiced lime agave dressing
Jicama, its an ugly looking tuber that has a sweet, crispy, earthy flavor. Its fat free and high in vitamin C. Its used frequently in Mexican cooking where its somewhat sweet but bland flavor melds well with other flavors. It can also be used as a substitute for water chestnuts in Asian dishes.
I happened to have one sitting on my counter, just waiting to be used. When I bought it I had no real plan on how to use it, it just caught my eye & I went for it. The flavor if jicama is akin to a potato/apple cross, which got me thinking fruit salad. I had tried jicama for the first time in a local Mexican restaurant, in a fruit slaw, and honestly it was the best thing on the plate. But it had been years, upwards of 15 years, since I had that salad, and I didn't really remember the finer details, like what it was flavored with other than jicama.
I put my Kitchen Witches hat on and set to work. The fruit part would be easy enough, I just used what I had on hand, in this case an apple, 1/2 a banana left over from breakfast, some clementines and said jicama. The dressing was just as easy, juice of 1 lime for a tart acidic note, a touch of agave nectar for sweetness and just a dash of cinnamon for a spicy depth of flavor. The result?
Well, simply put, the best fruit salad I've ever had!! The jicama really absorbed a lot of the dressing flavors and the sweet tart flavors of the other fruits, it was just divine! This quick and easy side dish or snack will become a regular player in the Kitchen Witch repertoire. Try it, you won't be disappointed!
Jimica fruit salad with spiced lime agave dressing
makes 4 servings
1/2 jicama, peeled and julienned
4 clementines, peeled and sectioned
1 pink lady apple, peeled and diced
1/2 banana, sliced
Dressing:
juice of 1 lime (2 T)
1 t agave nectar
dash cinnamon
Combine fruits in a medium sized bowl. Mix dressing and toss fruit to coat evenly.
Nutrition Facts provided be SparkPeople Recipe Calculator
4 Servings
Amount Per Serving
Calories 122.6
Total Fat 0.3 g
Saturated Fat 0.1 g
Polyunsaturated Fat 0.1 g
Monounsaturated Fat 0.0 g
Cholesterol 0.0 mg
Sodium 4.6 mg
Potassium 432.8 mg
Total Carbohydrate 30.8 g
Dietary Fiber 6.4 g
Sugars 15.5 g
Protein 1.8 g
Labels:
fruit,
lime,
quick and easy,
side dishes
Friday, February 19, 2010
Carrot Spice cake and cream cheese icing
I made this cake a few weeks ago but have hesitated on blogging about it for 2 reasons:
#1 The icing didn't turn out right, I didn't have enough powdered sugar to really make it a true icing, it was more of a glaze
#2 The photos aren't too good either, partly because I was very VERY tired of cooking and photography this day (I cooked and photographed 5 new dishes!) and, well, see #1
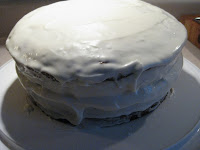
After a week or so, I decided to just post the cake, ugly pictures and all, as the cake itself was very very good. Its incredibly moist, the last slices were just as moist and delicious as the 1st ones were. The ample amount of spices and bright color make this a delightful treat on cold end of winter days.
I created this recipe because my daughter requested carrot cake. Well, she actually asked me to make her chocolate chip cookies, but we were out of chocolate chips. So she then asked "What about carrot cake Mom?" I was a little shocked and surprised, she's never asked for carrot cake before, heck she's not had carrot cake since she was 1 and even then she didn't eat it!! What kind of a mom would deny my little Witch a carrot cake??? After all, its got veggies in it, its practically health food!
I did some research on carrot cake, most call for an unholy amount of oil. I halved the oil, added a can of crushed pineapples and added reconstituted raisins, all of which helped keep the cake super moist and keep it on this side of healthy. A bit of whole wheat flour added a bit more fiber, and its texture was completely unnoticeable in the cake.
The recipe makes 3 eight (8) cakes, so you have a nice, tall layer cake. I don't think I'd try it in a bundt pan, its too dense and I'm pretty sure the outside would burn before the inside was finished cooking.
Carrot Spice Cake
makes 12 servings
3 cups shredded carrots (about 5 large)
1 20 oz can crushed pineapple in its own juice, drained well
1 c. raisins, plumped
1 1/2 c. sugar
2 eggs
1/2 c oil
juice and zest of 1 orange
1 cup flaked coconut
1 T vanilla
2 t cinnamon
1 t ground ginger
pinch cloves
pinch fresh ground nutmeg
1 t salt
2 t baking soda
2 1/2 cups AP flour
1/2 cup whole wheat flour
Cream Cheese icing
8 oz cream cheese (1 block) or Neufchatel cheese (low fat cream cheese)
4 cups confectioners sugar
2 T butter
1 t vanilla
1 t lemon juice
Cake batter assembly: This can be done with a mixer or by hand
In a large work bowl combine the oil, sugar, eggs, vanilla and lemon & orange juices, mix well until throughly combined and smooth. Add orange zest, carrots, pineapple, coconut and raisins. Mix until combined, this will be lumpy.
Mix dry ingredients together, including spices. Add dry ingredients to the wet in 3 installments, stirring in each round until flour is no longer visible but you don't want to over mix this, so don't go overboard. If using a stand mixer I'd go about 4-5 seconds on a 3-4 speed, scrape down sides, add the next round of dry good, mix 5 seconds, scrape, add last round of dry and mix 5-7 seconds longer.
Prep 3 8 inch round cake pans by spraying with non stick spray and lining bottoms with parchment rounds. If you don't have parchment you can use aluminium foil, I did and it worked fine! If you need details on how to make a parchment round for you cake pans send me a comment & I'll let you know how its done :)
Distribute batter evenly among the 3 pans. Bake at 350* for 35 to 40 minute, or until cake tests clean in center. Run a knife along the edge of cake and allow to cool about 30 minutes before inverting out of pan. Once cakes are fully cooled you can frost the cake.
Isn't it UGLY?? Good thing it tasted good :)
Nutrition Facts provided by SparkPeople Recipe Calculator
12 Servings
Amount Per Serving
Calories 505.9
Total Fat 16.9 g
Saturated Fat 5.6 g
Polyunsaturated Fat 3.1 g
Monounsaturated Fat 7.1 g
Cholesterol 49.8 mg
Sodium 528.5 mg
Potassium 304.2 mg
Total Carbohydrate 83.6 g
Dietary Fiber 3.5 g
Sugars 42.8 g
Protein 7.3 g
Tuesday, February 16, 2010
Roasting Peppers indoors
Roasted peppers. They just sound good, if you ask me. Really roasted pretty much anything & I'm a happy camper.
Have you ever spent $4 to $7 on a jar of roasted red bell peppers, eaten & enjoyed them of course, then thought, Geeze, what the heck did I spend so much money on? Its just a pepper, right??
Yup. You're right. Its just a pepper. Someone did about 5 minutes of work for you and charged you $5 for that work. And theres usually 2 peppers in the jar, max. Oh, I forgot, they put it in a jar with some preservatives and junk too, thanks, I was looking for extra chemicals in my peppers! What a rip off!
Most of the time bell peppers run about $1 each here. I can find them cheaper sometimes and when I do I stock up. But what do you do with 12 bell peppers? There's only so many stuffed bell peppers one family can eat, and after a week of sneaking them into everything I make I'm kinda over them. The answer is roast and freeze them.
You can roast ANY pepper, from sweet red bells to the spicy chilies and anything in between. Roasting really brings out the best in a pepper, it enhances the natural sweetness and brings a smoky flavor to your dish. I roast all my peppers before using them whenever possible, it adds an additional depth of flavor to my food and gives everything a nice chef like touch. And, since you remove the skin from a roasted pepper, you won't have curled up chewy pepper skins in your meal. An added bonus indeed.
Roasting peppers
Turn your broiler on (HI setting if you have an option). Put peppers onto a sheet pan.
Put the sheet pan in the oven on the top rack closest to the broiler. Close the door and wait about 2-3 minutes. You want the skin to be blackened and blistered. Once it starts to blacken flip peppers over (using tongs) and continue to blacken on all sides.
When all sides are black, remove peppers to a smallish bowl and cover with plastic wrap. The steam from the peppers will help steam off the skins, making removal easy. Allow to sit in the bowl about 5 minutes or until cool enough to handle.
Scrape off skins using your hands or the back side of a knife. Open pepper, remove the seed pod, shaking out seeds. Cut the veins out if you want less heat. Rinse briefly to remove any remaining charred skins and seeds, but don't go overboard here, you want some of the black to stay, that's your roasted flavor.
My knife is removing the vein, this helps reduce spiciness of hot peppers. In bell peppers remove this part as its very pithy, sponge like and tends to be bitter. Not to mention that its just not pretty.
For long term storage I freeze my peppers. They'll last fresh in the fridge for about 7 days, frozen up to 6 months. Since I don't have a blast freezer where I can IQF (individually quick freeze, like the factories do) I have to improvise. Here's how the Witch does it.
Line a sheet pan with plastic wrap. This makes for easy clean up. Take 1 roasted & seeded pepper and lay it out open on the sheet tray. Repeat for as many peppers you have. Put the sheet tray into your freezer and allow peppers to freeze until solid. Remove frozen peppers from tray and put into freezer storage bags, squeezing out as much air as possible. You can put sheets of parchment between frozen peppers if desired to make removal of single peppers easier. Remove the plastic wrap from the sheet pan & its ready to be used again, no muss no fuss :)
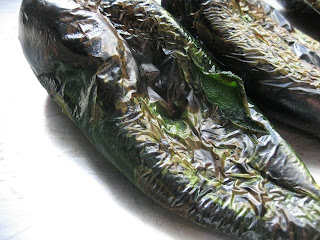
Don't you want to just peel that blackend skin away? I sure do!
Labels:
bell peppers,
chilies,
quick and easy,
side dishes,
vegetables
Basic Pot Roast
My husband is an all American, red blooded male, meaning he loves pot roast. To him, there isn't a better way to cook a piece of beef. I appreciate this very much because pot roast is not only delicious, its super simple. And when you get the roast on sale, its completely affordable too.
I think the hardest part of making a pot roast starts at the store and choosing a cut of meat to roast. Top round, bottom round, chuck cross rib roast, chuck 7 bone roast, boneless pot roast, the list goes on and on. If you don't know what you're looking for you can end up with a roast that's dry and flavorless. Who wants to play that game of Russian roulette with dinner, much less your wallet, roast can be pricey!
Kitchen Witch tip: Look for a CHUCK roast. Really any cut from the chuck and you'll be good to go. Bone in or boneless, that's up to you. Bone in will take longer to cook but you'll get a more flavorful dish, and the bones can then be used to make beef stock. And don't pick the leanest one you see, that marbleizing of fat and tissues is what causes the roast to be so tender and flavorful.
Our local grocery had boneless chuck roasts on sale this past week for $2 per pound. I of course bought 2, one for dinner tonight and one for the freezer. I also like to grind my own chuck to make ground beef, but thats another blog entry. Today its all about the pot roast.
Basic Pot Roast
makes 6-8 servings, depending on size of your roast
1 2-4 lb beef chuck roast
2 t Kosher salt
1/4 t ground pepper
1 t thyme
1 bay leaf
1/2 cup red wine OR 1/2 c water and 1 T each soy sauce, Worcestershire sauce and red wine vinegar
1 small onion sliced
2 cloves garlic, peeled
2 ribs celery cut into 2 inch chunks
4 carrots peeled and cut into 3 in chunks
drizzle of oil
Preheat oven to 300*
Pat dry roast. Cover each side with 1 t salt and 1/8 t pepper. Heat a small amount of oil in a dutch oven or heavy oven safe pot over medium high heat. Brown roast on all sides. Turn heat off, add vegetables, herbs and liquid. Cover pan and put into a 300* oven.
Roast for 4 to 6 hours. (Boneless roasts are ready to go at about 3-4 hours, depending on size, bone in can take up to 6 hours) You really need the roast to have at least 3.5 to 4 hours in the oven to develop a fork tenderness. This long slow moist cooking method (braising) dissolves the collegens in the connective tissues of the meat, making it very savory and flavorful. It also helps give the meat its fall apart tenderness that is a hallmark of pot roast. Skimping on the cooking time will yield a tough and chewy roast.
See how the meat is falling apart tender on the edges? Thats what you're looking for.
Once roast is cooked and very tender remove it from the pan, cover with foil and allow to rest while the gravy is being made.
Strain the juices off the vegetables. Skim off any fat that collects on the top of the juices. Return the juices to the cooking pan (over high heat) and bring to a boil, allow to reduce by 1/3 to 1/2.
Serve roast with the cooking vegetables, mashed potatoes and the gravy. Sit back and enjoy the compliments on a job well done.
Nutrition Facts provided by SparkPeople Recipe Calculator
6 Servings
Amount Per Serving
Calories 443.6
Total Fat 19.2 g
Saturated Fat 7.2 g
Polyunsaturated Fat 0.8 g
Monounsaturated Fat 8.5 g
Cholesterol 196.6 mg
Sodium 272.9 mg
Potassium 1,151.4 mg
Total Carbohydrate 5.4 g
Dietary Fiber 1.6 g
Sugars 1.8 g
Protein 58.8 g
Monday, February 15, 2010
French Chicken in a Pot
I'm a big fan of America's Test Kitchen, a very informative cooking show on PBS. If you've not checked it out, I highly recommend you do so. The Kitchen Witch always thought herself to be pretty informed about all things food, then she got skooled by ATK. My new goal in life is to become a cook in the test kitchen. That would be simply awesome.
Until then, I'll share with you their recipe for a whole chicken cooked in a pot. Its about the easiest thing you'll ever do, and the most tasty, too. The chicken is unbelievably moist, juicy and tender. Its delicately seasoned, which is nice because the left over chicken can be used in a number of applications.
What we like most about this dish is the jus, or gravy as my 3 yr old insists on calling any sauce I serve. According to the fine folks at ATK they say the cooking method of dry roasting in a tightly sealed environment, causes the bird to baste itself and the juices stay in the bird. This is undeniably true. The chicken stays super moist and flavorful. From a dry pan you end up with about a cup and a half of golden chicken juices. Reduce them by half and you have the most intensely chicken flavored jus to ever cross your palate. You'll want to make French Chicken in a Pot just for the jus. I know I do :)
French Chicken in a Pot
from America's Test Kitchen Best of 2009 Cookbook
Serves 4 to 6 people
1 roasting chicken, 4-5 lbs, giblets removed and discarded, wings tucked under back
2 t kosher salt
1/4 t pepper
1 T EVOO
1 small onion chopped
1 rib celery chopped
6 garlic cloves peeled and trimmed
1 bay leaf
1 sprig rosemary or 1/2 dry rosemary
1/2 to 1 t lemon juice
Preheat oven to 250*
You'll need a heavy dutch oven or large pot that a chicken will fit in with a tight fitting lid, oven proof of course, set over medium high heat with the EVOO in it.
Pat chicken dry and sprinkle with the salt on all sides. Once pan is hot add chicken breast side down. Sprinkle back side of chicken with pepper. Cook about 5 minutes or until the skin is golden brown. Flip bird over, sprinkle breast with pepper and turn heat off.
Add the celery, onion, herbs, lemon and garlic to the pan. Cover top with a sheet of heavy duty aluminum foil and put the lid on top of that. The aluminium foil will help cause a tight seal so your chicken is juicy.
Cook at 250* for 90 to 110 minutes. Remove from oven and allow to rest for 20 minutes.
Once rested remove chicken to a cutting board and cover with foil until ready to carve. Strain off the vegetables skim fat off top of cooking juices.
In a small saucepan boil the cooking juices until they've reduced by half. Serve with the carved chicken and enjoy.
**The skin on this chicken is not crispy or very brown. As a matter of fact the chicken is less than impressive when you remove it from the pot. Please don't let the pale color deter you from trying this dish, the flavor more than makes up for its pale appearance. I take the skin off my piece of chicken anyway, so I don't really miss it.
Nutrition Facts provided by SparkPeople recipe calculator
5 Servings
Amount Per Serving
Calories 218.6
Total Fat 5.2 g
Saturated Fat 1.3 g
Polyunsaturated Fat 1.3 g
Monounsaturated Fat 1.6 g
Cholesterol 124.0 mg
Sodium 615.6 mg
Potassium 500.1 mg
Total Carbohydrate 1.5 g
Dietary Fiber 0.4 g
Sugars 0.0 g
Protein 39.0 g
Sunday, February 14, 2010
Fresh Salsa
Recently I went shopping at a local Mexican grocery store. Holy cow, they have the best prices on produce!! Here's what I scored there for $20!!! Twenty dollars people! That's amazing!
1 head cauliflower, 3 heads broccoli, 12 jalapeno peppers, 3 pablano peppers, 3 Anaheim pepper, 4 yellow onions, 6 cloves garlic, 1 lb carrots, 1 jicima ,2 large sweet potatoes, 10 lbs potatoes, 8 tomatillios, 1 head lettuce, 2 red bell peppers, 8 roma tomatoes, 6 large limes, 36 corn tortillas, 1 lb queso fresco and 1 container Mexican crema. Phew! That's a LOT!
So what did I decide to do with my bounty? Make fresh salsa, of course! I am not a cilantro fan which is why you don't see it on my list of produce scored (however it was .25 cents per bunch, an awesome price indeed) or in my recipe for salsa. If you like it please feel free to add it.
This salsa is fresh, tangy, spicy and delicious. Its really good with tortilla chips, made into a guacamole or topping your favorite tacos, nachos or even a baked potato.
Fresh Salsa
makes about 2 cups worth, enough for 4 to enjoy with chips
2 jalapeno peppers, seeded and diced fine
4-6 roma tomatoes, diced
about 2 T of fince minced onions, rinsed
1 clove garlic, minced
juice of 1/2 lime
kosher salt and pepper
Mix everything together in a bowl. Allow to sit for at leasts 30 minutes before serving for flavors to meld. Keeps about 1 week in the fridge, or about 1 day in the Kitchen Witch household.
Nutrition Facts provided by SparkPeople recipe calculator
4 Servings
Amount Per Serving
Calories 22.6
Total Fat 0.3 g
Saturated Fat 0.0 g
Polyunsaturated Fat 0.1 g
Monounsaturated Fat 0.0 g
Cholesterol 0.0 mg
Sodium 46.2 mg
Potassium 203.5 mg
Total Carbohydrate 5.1 g
Dietary Fiber 1.2 g
Sugars 0.3 g
Protein 0.9 g
Labels:
chilies,
Mexican,
quick and easy,
side dishes,
vegetables
Spiced Beans
Canned beans are a staple in the Kitchen Witch pantry. My daughter LOVES beans, so anytime I can throw them into a dish, I do. Its the one thing I know she'll eat! But canned beans have a tenancy to be lackluster, to say the least. Have no fear, the Kitchen Witch is here to spice up those beans for you, turning them from a pantry staple to a quick and easy side dish.
Black beans are my personal prefereance for this dish, they go so well with cumin and lime. However the day I photographed this dish all I had on hand was pinto beans. They were pretty darn tasty, too. Almost as good as the black beans. So feel free to use whatever kind of beans you have in your pantry.
These beans are a great side dish with your favorite Mexican meal. I also like to use these beans with some grilled meats in a taco salad. They also make for mean nachos. Pretty much no matter what you decide to serve these beans with you'll be happy you did.
Spiced beans
serves 4 as a side dish
1 can beans, drained and rinsed well (black or pinto are good choices)
1 t fresh toasted and ground cumin (preground cumin seed works fine too)
1 T minced onion
1 clove garlic
1/4 red bell pepper, diced
1/2 jalapeño, seeded and diced (more or less depending on your preference)
1/2 c water or chicken stock
S&P
squeeze of lime juice
drizzle of oil
Heat a small saucepan over medium high heat. Add oil and onions, allow to cook about 3 minutes. Add cumin, garlic, bell peppers and jalapanos, stir well to coat in oil and cook 2 minutes.
Add beans and water or stock, stir well. Reduce heat to low and allow beans to simmer for about 20 minutes.
Nutrition Facts provided by SparkPeople recipe calculator
4 Servings
Amount Per Serving
Calories 64.3
Total Fat 0.4 g
Saturated Fat 0.1 g
Polyunsaturated Fat 0.1 g
Monounsaturated Fat 0.1 g
Cholesterol 0.0 mg
Sodium 40.5 mg
Potassium 189.6 mg
Total Carbohydrate 11.8 g
Dietary Fiber 4.0 g
Sugars 0.1 g
Protein 4.1 g
Labels:
beans,
bell peppers,
Mexican,
quick and easy,
side dishes,
vegetarian
Tuesday, February 9, 2010
Tortilla soup
After making mole last week, I had a lot of Mexican style ingredients around the kitchen that needed to get used. Things like corn tortillas and jalapanos. It was lunch time on yet another snowy day here in Colorado Springs, a bit of warming was in order. What warms you inside and outside better than tortilla soup?
I've made tortilla soup many times and it always follows the same basic recipe. And its usually good, not great, but good. This tortilla soup, however, was amazingly good. What a taste sensation! It was the first time that I added lime, something I'll never leave out again. Other than the chicken stock, this soup contains no meat. Between the beans and toppings I guarantee you'll never miss the meat.
I cook corn tortillas into my soup, rather than just garnishing the top with them. After all, this is tortilla soup! It takes about 30 minutes of simmering for the tortillas to break down and incorporate into the soup. Its not a pretty process but the taste is fantastic. When you look at the finished product you'll see how creamy the soup looks, and theres no dairy in it at all. That's the magic of the corn tortilla. Rich chicken stock, creamy black beans, spicy jalapanos, all made rich and creamy by the addition of tortillas. A splash of lime juice makes everything stand up and pay attention.
The best part of tortilla soup is the garnishes - add anything you like. I like the creaminess of avocados, the color and acidity of tomatoes and the cooling action of sour cream and cheese. This is a great dish for the entire family, kids and adults both have fun adding their own toppings, making their own custom bowl of soup.
Tortilla soup
serves 4
4 cups chicken stock
2 fresh jalapanos or fresh chili of your choice OR 1 small can jalapanos or green chilies
1 can black beans drained and rinsed
1 t fresh toasted & ground cumin seeds (pre ground is fine if that's what you have)
1 cloves garlic minced
2 T onion fine mince
8 fresh corn tortillas
1/2 lime, fresh or squeeze of lime juice on each bowl of soup
drizzle of oil
S&P
GARNISHES: diced avocado, tomato, green onion, olives, cilantro, sour cream, tortilla strips
Prep all ingredients first. Dice jalapanos, discard veins and seeds if you like a milder soup. Mince onion and garlic. Toast the cumin and grind it.
Kitchen Witch Tip: If you're unsure about the heat level desired from your soup, remove the vein and seeds from your pepper. Dice the pepper and add to the soup. Dice the vein and seeds and reserve, add some if you need more heat. The vast majority of the heat is in the vein and seeds of the pepper. I do this when making spicy dishes that I expect the kids to eat, the base dish is quite mild, the adults can add more spiciness as desired.
Heat a medium sized soup pan over medium high heat. Add a drizzle of oil to the pan and sautee onions for about 2-3 minutes. Add the garlic, beans, jalapanos, cumin and stock, reduce heat to medium. Taste and season with S&P as needed. Tear 4 corn tortillas into hunks and stir into soup, allow to rapidly simmer for 30 minutes. You need some good simmering action here, the agitation of the bubbling will help break down the tortillas and allow them to dissolve, helping to thicken the soup and add a rich corn flavor. Stir every 5 minutes.
While soup is simmering heat oven to 450*. Brush both sides of corn tortillas with a touch of oil. Slice tortillas into 1/8 inch wide strips. Put tortilla strips on a baking sheet and toss with 1/2 t kosher salt. Bake strips 8 minutes, turn them over and bake about 5 minutes longer, or until strips turn golden and smell like toasted corn.
Ladle soup into bowls topping with tortilla strips and any/all garnishes you like.
Nutrition information provided by SparkPeople recipe calculator
Nutrition Facts
4 Servings
Amount Per Serving *~*does not include garnishes*~*
Nutrition Facts
Tortilla soup
4 Servings
Amount Per Serving
Calories 195.8
Total Fat 2.3 g
Saturated Fat 0.3 g
Polyunsaturated Fat 1.0 g
Monounsaturated Fat 0.7 g
Cholesterol 6.3 mg
Sodium 1,400.5 mg
Potassium 342.2 mg
Total Carbohydrate 36.5 g
Dietary Fiber 7.4 g
Sugars 1.0 g
Protein 8.5 g
I've entered this soup into a blog challenge for tortilla soup recipes, click HERE to check out all the awesome soups, too!
Labels:
chilies,
Mexican,
soups and stews,
vegetables
Monday, February 8, 2010
Chicken with Chevre, sun dried tomatoes and lemon
Goat cheese makes everything it touches better. Take my infamous chicken with herbs in wine sauce. We love that dish and have it at least once a week. Its quick & easy to prepare. It however can get boring after a while. Thats where the goat cheese comes in.
The chevre has a creamy texture, very similar to cream cheese, but with an added tang that only goat cheese can provide. Don't be afraid of goat cheese, its quite possibly the best cheese ever. There isn't a goat cheese that I've tried and not liked. I can NOT say that about standard cows milk cheese. Added bonus, goat cheese is lower in fat naturally than cows milk, so the cheese is automatically low fat.
Chicken with sundried tomatoes, chevre and lemon
serves 2
2 chicken breasts
kosher salt & pepper
1/4 c white wine
1 t dry Italian herb seasoning
1 clove garlic minced
zest of 1/2 lemon
juice of 1/2 lemon
3 whole or 10 julienned strips sun dried tomatoes
1 oz. chevre (goat) cheese
Click here to get the recipe for the chicken, marinade and preparation.
To the sauce I add the juice of 1/2 a lemon and lemon zest. Add sun dried tomatoes to the sauce, about 5 to 6 julienne strips per chicken breast. Top each breast with a medallion of chevre, the sun dried tomato strips and the lemony wine sauce & dinner is served.
nutritional information provided by SparkPeople recipe calculator
Nutrition Facts
2 Servings
Amount Per Serving
Calories 216.4
Total Fat 6.8 g
Saturated Fat 2.8 g
Polyunsaturated Fat 0.8 g
Monounsaturated Fat 2.7 g
Cholesterol 72.3 mg
Sodium 306.7 mg
Potassium 416.1 mg
Total Carbohydrate 4.3 g
Dietary Fiber 0.4 g
Sugars 1.8 g
Protein 29.4 g
Labels:
chicken,
goat cheese,
herbs,
lemon,
sun dried tomatoes,
wine
Saturday, February 6, 2010
Classic Red Mole, an ode to Rick Bayless
Have you ever tried mole? (pronounced mole-aye) Mole means sauce, or concoction in Spanish. Guacamole is an example of mole, its a concoction of avocado and whatever the chef feels like adding. There is no right or wrong mole, just different versions.
They type of mole I was thinking of was very deep, complex, sweet, spicy, nutty and chocolatey all at once. A classic red mole. That's when I decided I was in need of tutelage from the master of all things Mexican cooking: Chef Rick Bayless.
Rick Bayless is a pioneer in Mexican cooking. I remember being 13 years old and watching "Great Chefs of the West" on PBS and seeing Rick Bayless make awesome creations. He was the first person I had ever seen to use authentic Mexican cookware, recipes and ingredients. I watched with rapt attention as Rick made hot chocolate using Mexican chocolate and a molinillo, a traditional hot chocolate frother, amazed at what he was telling me, how the molinillo breaks down the chocolate, incorporates air, all this wonderful science along with folklore, well I was under his spell.
Rick has had a very successful career including Frontera and Topolobampo restuarants, multiple cook books, a few cooking shows on PBS and last summer he was named Top Chef Master. On the very first episode of Top Chef Masters I saw that Rick was in the competition. I told my husband that the rest of the contestents should go home now, Rick was walking away with the title. I was right. This man is an amazing chef.
Thats why he was the first and only place I went to when looking for a mole sauce. A quick trip to the Mexican supermarket for ingredients & I was in business. 4 very very VERY messy hours later and I had about 12 cups of the most complex, wonderful sauce I had ever created. Thank you Rick for sharing your knowledge and love of Mexican cookery with me.
this is after the sauce has cooked for hours. Notice how much its darkened.
Click here for the recipe. Here's the 3 changes that I made:
1. I used 2 oz mulatto chiles, I didn't realize I needed more. Oops!
2. I used 6 oz of ancho chiles, not the 3 oz of ancho & 3 oz of pasilla chiles that Rick calls for. The store had the anchos listed as "Ancho Pasilla" so I figured it incorporated them both :-) My lack of attention to detail on reading the recipe is why there's less chiles in my mole than Rick calls for. An error I won't make again, my sauce lacked the heat that I was hoping for. Oh well, there's always next time.
3. I used 2.5 oz Mexican chocolate. I like chocolate, sue me.
Mole is not a very photogenic sauce. I apologize for the lack of photos on this post, believe me some of the steps weren't pretty. Tasty yes, attractive, not so much.
Oh and 1 final word. This sauce will cause a royal mess in your kitchen. You will find brick red splatters that you could have sworn you wiped up at least 100 times before, 5 days later. Using a splatter screen helps, minimally. I ended up using a combo of splatter screen with the lid to the pot on top. Be prepared to clean when making mole, don't say I didn't warn you!
Chicken Mole
serves 2
2 chicken breasts butterflied open
3/4 cup mole sauce
kosher salt
Butterfly chicken breast to maximize surface area. More surface are means more mole. That's a good thing. Salt the chicken.
Heat a large skillet over medium high heat. Add chicken and allow to brown on first side. Flip chicken, add mole sauce, cover and reduce heat to medium low. Allow chicken to simmer for 15 minutes or until done (160* internal temp). Stir occasionally and spoon mole over top of chicken.
Serve with rice, beans and tortillas.
Nutritional Info
I'm not even going to try, there are way too many ingredients in the mole and it makes 3/4 of a gallon. You don't use much mole in recipes so I wouldn't worry about it too much. This is one of those 'just enjoy the meal' moments - Andrea the Kitchen Witch
Friday, February 5, 2010
Brownies
Brownies. The word alone makes my mouth water. For years I was a boxed brownie mix kind of girl, and was quite happy. I think that may have been because I didn't realize how much better homemade brownies can be. Oh sure a boxed mix is quick and easy, but is it REALLY that hard to make them from scratch?
Turns out the answer is no, its not hard at all!! In actuality its very very simple, dangerously so. If you have a few basic pantry ingredients, 2 bowls, a spoon and an 8x8 pan you too can have awesome brownies, with out HFCS or PHO's, in 45 minutes. Uh oh, this could be bad, and yet so very good.
When looking for recipes I found that there are 2 basic options: fudge like and cake like. That's all well & good but what about those of us who like a hybrid version, fudgey and cake like all at the same time. I want a dense brownie but not gooey, one that has a nice crumb but not soft & spongy like a cake. Why can't I find the perfect marriage of fudge and cake brownies?
Thats when I discovered the extensive baking recipe collection at King Arthur Flour. One brownie recipe stood out from the rest: it claimed to be BOTH cake like and fudge like. Ah ha!! There ARE others out there who demand the best of both worlds! With out further adieu I made the recipe. Oh My Goodness. Brownie bliss!!!! I'm happy to share this wonderful chocolaty delicacy with you all. Enjoy!
It was the Little Witch's idea to make the brownies today. I think she just wanted to lick the batter spoon. Eyes closed in anticipation of chocolate overload!
Brownies
makes an 8x8 pan
adapted from the King Arthur Flour recipe
1 cup plus 2 T sugar
1 stick (1/2 cup) unsalted butter
1/2 cup plus 2 T cocoa powder (I use a combo of black cocoa, dark chocolate cocoa and regular cocoa powders)
2 eggs
1 t vanilla
3/4 cup flour
1/2 t baking soda
1/2 t salt
OPTIONAL: 1 cup chocolate chips
In a microwave safe bowl melt butter. Add sugar to butter, stir well. Microwave butter & sugar for 1 minute and stir well. This will start the sugar melting and give you a thin, crispy, paper like layer on top of the brownies.
cocoa, eggs & vanilla
In a medium mixing bowl add the cocoa powders, vanilla and eggs. Stir very well until it forms a thick paste. Add 1/2 of the butter/sugar mix and stir very well with a wooden spoon. Be sure to scrape the sides of the bowl often to incorporate all the chocolate mixture. Add the 2nd half of the butter/sugar mix and stir well.
Add dry ingredients, stirring until just mixed. Add chocolate chips if desired.
Pour into a sprayed 8x8 pan, bake at 350* for 25-30 min or until the brownies are just set. I use a toothpick and lift up a small amount of brownie from the center. If its liquidy then bake 5 min longer & check again. If you have a distinct crumb and no liquid the brownies are done. You don't want to over bake these, they need to be JUST set so they stay soft & fudge like.
Cut into appropriate size bars (9 is about right). Your 8x8 pan could serve as many as 16 people, or as few as 2 people, depending on degree of chocolate jones and caliber of day, and well how big you cut them. Excellent with a cup of coffee or a glass of milk.
PS I said they were good, I didn't say they were low calorie :)
Nutritional information provided by SparkPeople Recipe Calculator
Nutrition Facts
9 Servings
Amount Per Serving
Calories 269.7
Total Fat 11.5 g
Saturated Fat 6.7 g
Polyunsaturated Fat 0.6 g
Monounsaturated Fat 3.4 g
Cholesterol 74.8 mg
Sodium 214.9 mg
Potassium 37.3 mg
Total Carbohydrate 38.9 g
Dietary Fiber 0.5 g
Sugars 24.5 g
Protein 3.4 g
Wednesday, February 3, 2010
Hummus
Sometimes I feel like the last person to know about a good thing: this time its hummus. Oh sure, I've heard about it for years and thought, Gee that sounds delightful! I love chick peas and sesame seeds, so whats not to love about hummus? I even went so far as to make some once, with out a recipe, as is the Kitchen Witches style. The results were less than favorable so I didn't return to hummus land for a long, long time.
I scored a bag of Stacey's pita chips for FREE recently (thank you Stacey's facebook fan page). As luck would have it I was scrounging through my cupboards and discovered a can of chick peas. Just like that the spell was cast. I'd make hummus. But this time I'd figure out what I was supposed to do before just winging it, and maybe I too could get in on the hummus bandwagon, just as it pulls away from the station.
The results this time around, with a little research under my belt, were amazing. So good that I bought more hummus making materials and I plan on it becoming an integral part of my lunch time routine. My lunch sandwich will consist of whole wheat pita bread, 2 heaping tablespoons of hummus, lettuce, cucumber, tomato and feta cheese. Low calorie, lots of vegetables and meat free. Ding ding ding, we have a winner!
Hummus
makes 8 servings
1 can chick peas, drained, reserve 1/4 c of the liquid
1 lemon, zested and juiced
2 cloves garlic
1 t ground cumin seed
1 t kosher salt (more or less depending on taste)
few grinds pepper
3 T tahini
1 T EVOO
Put everything in the work bowl of a food processor. Run it for about 5 minutes, scraping down sides every minute, or until you have a very smooth and thick paste.
Really, that's it! If you don't have a food processor you could try to use a blender but honestly, I don't know if it'd work, this is a pretty thick paste so the blender might not process it properly. If you try the hummus in a blender please let me know how it turns out!
Nutrition Facts provided by Spark People recipe calculator
8 Servings
Amount Per Serving
Calories 119.7
Total Fat 5.5 g
Saturated Fat 0.7 g
Polyunsaturated Fat 1.9 g
Monounsaturated Fat 2.6 g
Cholesterol 0.0 mg
Sodium 467.8 mg
Potassium 136.2 mg
Total Carbohydrate 14.9 g
Dietary Fiber 3.1 g
Sugars 0.2 g
Protein 3.9 g
Labels:
beans,
chick peas,
dip,
garlic,
lemon,
side dishes,
vegetarian
Subscribe to:
Posts (Atom)