Showing posts with label Cooking with Phyllis. Show all posts

Tuesday, March 6, 2012

Carnitas

Carnitas is a Mexican dish meaning "little meats" but we traditionally know it as braised then fried pork.  This carnitas dish accomplishes exactly that, with 3 ingredients.  The simplicity of the dish is deceptive once you try the pork.  Salty and crispy, almost bacon like in aroma and taste, yet tender and succulent and completely addictive.  All that from 3 ingredients?  You bet it's Witchcraft!  I got this recipe from my friend and cooking buddy Phyllis.  She acquired it from Diana Kennedy when she was working as her soux chef in the '80's.  Knowing that the recipe is a tried and true one from Phyllis - and that she worked directly with the chef creator -  really sealed the deal for this Kitchen Witch.  Carnitas were on the menu!

Here's how these carnitas go down.  Get your pork - butt (shoulder) or country style ribs are great choices.  You want to make sure you have plenty of fat and connective tissues - therein lies the secret to these great carnitas.  Either have your butcher (or yourself if you've got the knife skillz to do that) debone the butt, or find a boneless variety, and slice the meat into 2 inch wide by 5-6 inch long strips.  The Kitchen Witch found a great deal on country style ribs and used those in this recipe with great success, and bonus, the ribs are already cut into the size I needed.  Less prep work = happiness!  Once your meat is deboned and cut into strips place them into your largest skillet.  If you don't have a skillet big enough a dutch oven will work as well, it just takes a bit longer to cook off the liquids.  Sprinkle the meat with kosher salt then cover with water so the meat is covered just barely in liquid.  Bring it to a boil, then reduce to a hard simmer (medium heat, you want bubbles breaking the surface) and allow it to simmer until all the water has cooked off.  Once the water has cooked off you'll hear a distinct difference in the sound of the cooking, it changes from simmer to a sizzle.

As the meat is simmering in the water it is braising, cooking and becoming tender and delicious.  The connective tissues are also breaking down and becoming flavorful while the fats are rendering out of the pork.  The fat sits on top of the water while it's simmering and once that water is gone, the meat begins to sizzle.  Here's the real secret of good carnitas, frying the pork in it's own fat (or confit).  Allow the meat to fry and brown in the rendered fat, it takes about 5-10 minutes per side.  Be sure to flip the chunks to brown evenly.  This will make your cooking pan look like an utter disaster but I promise you all that the extra clean up is totally worth it.  And the crispy parts on the bottom of the pan, well those are just bonus treats for the cook.  Yay!  Once the meat is evenly browned remove it from the pan and either serve as chunks or shred and eat with tortillas.

From start to finish these took about 2 hours and were some of the most amazing pork I've ever made.  Tender and succulent, crispy and indulgent all at once.  I really hope you try and enjoy this dish soon!

Carnitas
makes 8 servings
SOURCE: The Cuisines of Mexico by Diana Kennedy
3-4 lbs of boneless pork shoulder (butt) or country style ribs
2 t kosher salt
water

Cut pork into strips about 1 inch wide and 4-5 inches long.  If using country style ribs they are precut so no extra work is needed.

In a large skillet or deep pan add the pork. Sprinkle with salt.  Add water to the pan to cover the pork.  Heat the pan over high heat until boiling then reduce the heat to an aggressive simmer (medium heat).  Cook until the water cooks out and only pork and fat are left in the pan.  Continue to cook pork in the fat until browned, turning pieces to brown evenly on all sides.

Serve with your choice of warmed corn or flour tortillas and toppings of your choice.


Nutrition Facts calculated at SparkPeople recipe calculator Amount Per Serving Calories 503.2 Total Fat 36.6 g Saturated Fat 13.6 g Polyunsaturated Fat 3.2 g Monounsaturated Fat 15.8 g Cholesterol 147.9 mg Sodium 580.3 mg Potassium 557.6 mg Total Carbohydrate 0.0 g Dietary Fiber 0.0 g Sugars 0.0 g Protein 40.6 g
Thursday, January 26, 2012

Ricotta cheese


Cheese making has been a goal of the Kitchen Witch for as long as she cares to remember.  Maybe it was reading Little House books, or just the foodie that's always been there, but even as a young teen the Witch has wanted to make her own cheese.  That's normal, right?  Don't you all dream about making your own cheese?  No?  Well...pretend like you do, 'k?  Do you need to make your own ricotta?  No, you don't.  Should you make your own ricotta?  Yes!  Yes you should indeed !   It's easy, quick and really doesn't require any specialty equipment or ingredients.   4 ingredients is all it takes to make the smoothest, richest, silkiest ricotta cheese you've ever been lucky enough to try.

If you aren't a ricotta fan, don't despair.  This ricotta isn't at all like the grainy rubbery ricotta in the tubs at the grocery store.  There is some grain to it, but it's not at all rubbery and if you aren't a fan of the grain, simply drain off more of the whey until you get a cheese that you're happy with.   Other than the noticeable difference in texture there's a taste difference.  Store bought ricotta is bland and rather flavorless to me.  Between the lack of flavor and the nasty texture it's defiantly not high on my like list.  Homemade ricotta, on the other hand, is sweet from the cream and milk, salty and slightly tangy.  It's delicious in lasagna as well as dessert.

Ricotta Cheese
Source:  Ina Garten
Makes about 1 cup of cheese (approx. 8 servings) ~*~easily doubled or tripled~*~

2 cups whole milk (2% works fine too)
1 cup heavy whipping cream
heavy 1/2 t kosher salt
1 1/2 T white wine vinegar

In a stainless steel pan add the milk, cream and salt.  Bring to a full boil over medium high heat, stirring to avoid scortch spots.  Once liquid is boiling turn the heat off and add the vinegar.  Give it one good stir to incorporate the vinegar and allow to sit for at least 1 minute to form the curd.

While the curd is forming dampen some cheesecloth.   Lay a double layer of cheesecloth in a fine mesh sieve placed over a bowl to catch the whey.  Pour the cheese curds and whey into the cheesecloth and allow to drain undisturbed for about 20-30 minutes.  The longer the cheese sits the finer and less distinct the grain becomes.  Transfer the ricotta to a air tight bowl and use anywhere you'd normally use ricotta like lasagna or stuffed pasta recipes.   Stores in the refrigerator for up to 7 days.


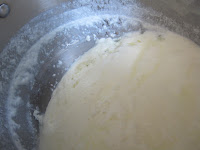
Cheese curds set and ready to be seperated

Whey draining from curds
Curds after draining for 10 minutes
 ~*~Kitchen Witch Tip:  No cheesecloth?  No problem!  Simply drain your curds through a clean wash cloth or kitchen towel.  Paper towels absorb too much and don't allow the whey to drain, save those for something else and use cloth to strain cheese.~*~


Nutrition Facts calculated at SparkPeople recipe calculator Amount Per Serving Calories 133.5 Total Fat 12.2 g Saturated Fat 7.6 g Polyunsaturated Fat 0.5 g Monounsaturated Fat 3.5 g Cholesterol 45.6 mg Sodium 156.3 mg Potassium 125.1 mg Total Carbohydrate 3.8 g Dietary Fiber 0.0 g Sugars 3.0 g Protein 2.6 g

Friday, November 11, 2011

Sweet Corn Gelato


Sweet-corn Gelato
makes about 5 cups gelato (10 1/2 c servings)
Source: recipe comes from New York and was served at Gramercy Tavern and then at Babbo

3 ears of sweet corn
3 1/2 c. whole milk
1 1/2 c. sugar
1 c. heavy cream
8 large egg yolks
1 t. kosher salt

Cut kernels from cob and break cobs into 2-3 pieces. Add the corn, cobs and milk to a sauce pan and bring up to a boil. Allow it to boil for 1 minute then remove from heat and allow to cool for 15 minutes.

Remove cobs from milk and discard them. Puree mixture in batches in a blender. Set a course strainer over large bowl and strain mixture pressing on solids and then discard them. Add more milk if needed to measure 3 1/2 c of milk and corn mix.

Bring mixture, 1 1/4 c. sugar, and cream. Bring to a simmer, stirring to dissolve sugar.

Set a strainer over med bowl and set aside.

Whisk remaining 1/4 c. sugar, egg yolks, and salt and gradually whisk in hot milk, return to saucepan and stir constantly for about 2 min to reach 175 degrees on instant read thermometer.

Immediately pour custard through strainer and place bowl over ice water to chill, about 5 min. Cover and refrigerate at least 6 hours or overnight and then process per manufacture directions with your ice cream freezer. Transfer to container and freeze at least 1 hour before serving. Lasts up to 1 month in the freezer.


Nutrition Facts calculated at SparkPeople Recipe calculator
Amount Per Serving
Calories 288.2
Total Fat 11.2 g
Saturated Fat 5.7 g
Polyunsaturated Fat 1.1 g
Monounsaturated Fat 3.7 g
Cholesterol 188.8 mg
Sodium 243.5 mg
Potassium 262.0 mg
Total Carbohydrate 42.8 g
Dietary Fiber 1.2 g
Sugars 35.9 g
Protein 6.5 g

Wednesday, October 5, 2011

Jalapeno Corn Cakes

Today I'd like to introduce you to a fabulous foodie and cook, Phyllis Davis. Phyllis isn't a guest blogger; rather she has been a guest in the Witches' house for various cooking dates. Please allow me to introduce Phyllis Davis!

"I was a caterer in Texas in the 70's, a sous chef for six years at the Broadmoor Cooking School during the 80's and assisted: Jacques Pepin, Marcella Hazen, Guiliano Bugialli, Stephan Pyles, Paula Wolfort, Martha Stewart, Ken Hom, and others, became the Food and Restaurant Critic for KKTV in the 80's, taught private cooking classes throughout my cooking life, and now I have the pleasure of cooking with you, Andrea."

Holy cow how did I get so lucky to find a friend and foodie with such a varied and rich history? I'm one lucky Witch, that's for sure! Phyllis and I have a great time cooking, chatting, knitting and generally enjoying each others company. Most recently we made 2 dishes, sweet corn gelato (to be posted soon) and jalapeno corn cakes. Both recipes were delicious and will be/have been repeat offenders in the Witches' kitchen already! The corn cakes were particularly delicious, I loved the crunch of corn, slightly crispy exterior and gentle heat of the jalapeno and the cool sour cream topping was perfect. I've made these twice since then and LOVE them! They are really good for breakfast, too, if you are into a more savory type of AM meal.

Confession time: Phyllis and I made these dishes in August when corn season was at its peak. Yours truly has had a run in with a little thing called LIFE - between a beloved dog passing away, getting a new puppy and a Little Witch starting preK, we have been busy, hence the lack of posts lately AND the unseasonality of this post.

Jalapeno Corn Cakes
Makes 6 servings, 2 cakes each
Source: Sunset Magazine
1 lg egg
1 c milk
3/4 c. medium-grind cornmeal, preferably stone ground
1/2 c. flour
3/4 t. kosher salt
2 t. baking powder
1 t. chopped marjoram (optional, we omitted)
2 green onions, chopped, plus more for garnish
1 jalapeno, seeded and chopped
2 c. corn kernels (fresh or frozen)
1/4 c. veg or canola oil
Sour cream

Whisk egg, and milk and add the cornmeal, flour, salt, baking powder & marjoram stirring to combine.


Fold in chopped onions, jalapeno, and corn.


Heat 2 T. oil in large nonstick skillet over med heat and scoop 1/4 c. portions of batter into pan. Cook, turning once, until puffed and brown - total about 6 minutes.


You can also make smaller bite size cakes, they are wonderful appetizers!

Nutrition Facts provided by SparkPeople recipe calculator
Amount Per Serving
Calories 272.4
Total Fat 14.0 g
Saturated Fat 2.8 g
Polyunsaturated Fat 3.6 g
Monounsaturated Fat 6.8 g
Cholesterol 38.3 mg
Sodium 428.5 mg
Potassium 224.0 mg
Total Carbohydrate 32.2 g
Dietary Fiber 3.0 g
Sugars 3.9 g
Protein 6.7 g
Related Posts with Thumbnails