Wednesday, March 21, 2012

Chopped at Home: Beets, Endive, pork and sweet chili sauce

A round of Chopped at Home happend this past weekend at the Kitchen Witches' home.  Good friend and cooking buddy Eric brought the ingredients for our challenge.  This time we had the following to work with:

Pork Loin roasts (2 of them, rolled and tied from the butcher)
4 bunches of fresh beets
Endive
Sweet Chili Sauce

Our rules were simple:  Make something for dinner using the secret ingredients and any pantry items I had on hand and the meal needed to be as low carb as possible.

The beets were easy.  We decided to roast them with some olive oil, salt & pepper.  When they were half way done we drizzled them with the sweet chili sauce.  The sweetness of the beets was maximized by the roasting and the sweet chili sauce was a nice glaze.  The heat in the chili sauce wasn't very prominent, it really cooked out, but ever now & then you'd get a hint of spice and it was a nice contrast to the beets.  We decided to throw the endive into the roasting pan with the beets when they were 3/4 of the way done.  The bitterness of the endive was tempered by the sweet beet and chili sauce glaze.   I am a tried & true beet hater.  I even grew some a few years ago to see if homegrown beets would be better than store bought ones (turns out nope, beets taste like beets regardless of where they're grown LOL!).  But you know what???  These beets, they were amazing!!  Really really good.  Sweet, earthy and delicious.  They will definitely be made again!

Now, onto the pork!  A wet paste of dijon mustard, thyme, extra hot horseradish, garlic and S&P was made from my pantry ingredients.  I also had fresh parsley and rosemary on hand so I minced up a lot of that, too.  We decided to half the roasts, slather them with the mustard sauce and herbs then re-roll the pork into a nice bundle.  More mustard on the outside covered with the fresh herbs and the pork went into the oven.  It LOOKED good, the mustard paste tasted good, sure hope it is good!  Verdict:  Success!!  The strong flavors of the mustard rub accented and seasoned the pork perfectly.  The fresh herbs added a great spring time flavor, as well as color, and really lightened things up.  When the pork was paried with the beets, well it was divine!  Sweet beets, savory pork laden with herbs and mustard.  Yeah it was good stuff!!!  The pork is defiantly another hit and one I'll be making again!

This round of Chopped at Home was incredibly successful in this Witches' opinion.  Eric, I'm pretty sure that we'd hear Ted Allen telling us that we are indeed the Chopped (at home!) CHAMPIONS!  Now where's our check for $10,000??  Ha ha ha!

Beets and endive with sweet chili glaze
Makes 4 servings
4 bunches beets, washed and peeled
6-8 heads endive, trimmed and halved
about 4-6T olive oil
kosher salt and pepper
1 jar sweet chili sauce (or make your own, awesome recipe here!)

Herb and Mustard Roasted Pork
makes 4 servings
1 pork loin roast, about 1.5 lbs
2T dijon mustard
1/2 t dried thyme
1/8 t white pepper
1/2 t kosher salt
1 t extra hot prepared horseradish
4 springs rosemary
1/4 head parsley minced
Butches twine for tying roast

Prepare beets and endive:
Preheat oven to 450F.  Peel the beets and trim the tops & root end.  Put them into a roasting pan and drizzle with 2-3T oil, kosher salt & pepper.  Reduce oven to 375F after putting the beets in.  Roast beets for about 45 min, stirring twice during that time, then add about 1/2 bottle (or 1/2 c) sweet chili sauce.  Stir well to coat beets evenly.  Continue roasting for another 30 minutes.  Add trimmed endive to roasting pan, drizzle with the remaining oil and sweet chili sauce.  Stir well to coat endive in the reduced sauce glaze and roast for 30 min longer.  Bottoms of beets will be deeply browned and caramelized.

Prepare pork:
Mix the wet rub by combining mustard, thyme, salt & white pepper and horseradish into a small bowl.  Stir well to combine.  Finely mince the parsley and rosemary.

Unwrap pork and remove the butcher twine/wrap.  Slice pork roast in half long wise.  Slather the inside cuts of the pork with the mustard mixture, about 1T for the inside.  Sprinkle herbs on the mustard and press both halves of the pork together.

Using butchers twine tie the roast back together, using 3-4 knots.  Coat the outside of the roast in remaining mustard mixture and then encrust it with the remaining herbs.  Place crusted roast on a sheet pan and bake for 60 minutes, or until a thermometer reads 145F minimum for medium-med well cooked pork, up to 160F.  Do not let it cook longer than 160F.  Remove roast and allow to rest for 15-20 minutes before slicing.  Remove and discarding strings as you slice the roast.  Enjoy!


Friday, March 9, 2012

Chicken Pot Pie

 Is there anything that ranks higher on the comfort food meter than a pot pie?  I didn't think so.  Pot pie is really one of my favorite dishes of all time.  Sure it's basically a chicken soup or beef stew in a crust, but man, something happens to that soup or stew when you add pastry.  It changes from ho hum, albeit delicious, to holy hell that's GOOD stuff!  Just ask anyone, I can pretty much guarantee you that pot pie is a comfort king amongst your friends and families.  Now imagine what a rock star you'll appear to be to those pot pie lovers when you present this fresh baked, home cooked, pure deliciousness of a pie.  And best of all, it's really not that hard to do!

Being a Kitchen Witch, I make my own pie dough.  The food processor makes quick work of it and it's always tasty and delicious.  If you aren't a pastry maker feel free to use refrigerated pie crust, it comes in a red box and you unfold the sheets of pastry and put it into your own pie pan.  If you don't have a pie pan (and that's OK!) get a frozen pie shell for the bottom and use the boxed pastry for the top crust.  Pie plate problem solved!   Look for refrigerated pie crust by the eggs & cheese, that's where it is in my store.

The Witch uses chicken thighs in her pot pie, it makes a richer more flavorful gravy and I like the flavor of dark meat better.  If you like white meat you can use breast meat, however the flavor won't be as rich.  Breast meat is also a lot harder to shred, so you may have to cut it into cubes.  No matter, it'll still be delicious, regardless of the type of chicken you choose to use.  I added a few green beans to this pot pie, they were on sale this week and their bright green pop of color was nice in an otherwise golden pie.  Frozen or fresh peas could be used instead.  As always, add or subtract the veggies based on what your family likes, but a mix of carrots, celery, onion, potato and either bean or peas can't be beat!

Chicken Pot Pie
makes 8 servings, 1 slice each
For Chicken stew filling
1 lb boneless skinless chicken thighs or breasts (thighs will be a LOT more flavorful)
2 carrots, sliced into rounds
2 ribs celery, sliced
1/2 medium onion fine mince
2 cloves garlic, diced fine
1 russet potato, peeled and diced into 1/4 in chunks
about 10 green beans sliced into 1/2 inch pieces
3/4 t dried thyme
1 bay leaf
1 T butter
kosher salt & pepper to taste (about 1.5t salt and 1/4 t pepper)
EITHER 1 t Better than Bullion chicken flavor OR 1 chicken bullion cube OR 1 can chicken broth
6 cups water * if using chicken broth then reduce to 4 cups water
2T corn starch
1 egg for eggwash

For Crust:
4T very cold butter cut into cubes
4T vegetable shortening
2.5 cups flour
1.5 t kosher salt
1/2 c (give or take 2T) ice water

Make crust first by combining flour, salt and fats into a food processor bowl.  Pulse 4 times to cut fat into flour.  Add 1/3 c water, pulse 2-3 times and test to see if it can form a ball by squeezing dough together.  If not add more water, 1T at a time, until dough will stay together when squeezed.

Divide dough into 2 sections, one slightly larger than the other.  Form dough into a disc about 3/4 inch thick and wrap both in plastic wrap.  Chill in refrigerator for 1 hour before rolling out.

Make chicken stew next.  Heat a medium size pan over medium high heat and melt butter.  Once it stops foaming add the onions, celery, carrots and garlic.  Sautee for about 5 minutes until the onions are translucent and other veggies are starting to soften slightly.  Add the chicken, herbs, salt & pepper and water.  Bring to a boil then reduce to a low simmer, cover and cook for 25-30 minutes.

Remove the chicken and the bay leaf from the cooking liquid and allow to cool (discard bay leaf).  Add the potatoes to the cooking liquid and cook for 10 minutes.  Potatoes will not be fully cooked.  Thicken the sauce with the cornstarch dissolved into 2T water, making a slurry, add the slurry to the stew stirring well.  Increase heat to a rapid simmer and gravy will begin to thicken considerably.  You want this pretty thick, a lot thicker than normal gravy, so it doesn't just run out of your pot pie.   Once chicken is cool shred it and remove any fat and gristle.  Add chicken and cut green beans to the stew and stir to coat everything.  Turn heat off and set aside.

Roll dough out using the slightly larger disc for the bottom crust.  Place bottom crust into a pie pan and dock (poke with a fork) the bottom and sides slightly to release air while baking.  Fill the crust with the stew.  Roll out remaining disc of dough to make top crust.  Crimp the edges together well.  Brush top with eggwash and cut a few slits in the top dough to release steam.  Place pot pie on a baking sheet (to catch any drips) and bake in a preheated 350F oven for 45-60 minutes, or until pie is golden browned and gravy is bubbling through the vent slits.  Allow pie to cool for 15 minutes before slicing and enjoying!


Nutrition Facts calculated at SparkPeople recipe calculator Amount Per Serving Calories 349.9 Total Fat 16.0 g Saturated Fat 6.8 g Polyunsaturated Fat 3.9 g Monounsaturated Fat 4.1 g Cholesterol 67.5 mg Sodium 787.7 mg Potassium 449.9 mg Total Carbohydrate 37.2 g Dietary Fiber 2.9 g Sugars 1.3 g Protein 13.6 g

Wednesday, March 7, 2012

Diva Chocolate Pudding

We were invited to a dinner party at our good friend Staci's house.  The menu was "Kid Food" in honor of the Little Witch, who was joining us.  We had chicken fingers and mac and cheese that night, man it was good too!  I was in charge of dessert.  As soon as I heard our theme of the night was "Kid Food" I knew I had to make pudding.  Ok I didn't know, I was rather clueless.  It wasn't until Staci said what about chocolate pudding that I went DING and sprung into action!  You know that skin that forms on pudding if it's not covered with plastic wrap?  Well that was always my favorite part of the pudding.  It was so dark and chocolaty and really had that great chocolate pudding flavor.  Well, after you peel back the skin you're left with pale lackluster pudding.  The chocolate isn't as intense as the 'skin'.  Actually the whole thing is rather milky, thin and lackluster.  Boo!  This is not the greatness that the skin promised!  I want pudding that tastes like the skin does, rich, thick, chocolate to the max.  So I created it!

This is not a chocolate pudding that someone who's ambivalent about chocolate should embark upon.    No, this pudding is one that only the true chocoholic in your life should try.  Dark, rich, indulgent, velvety and decadent are just a few of the words that Staci offered to me to describe this pudding.  Seeing as how I serve it in fancy antique tea cups, she also deemed them "Diva like", a term I love and named this pudding after!  Only a chocolate diva could appreciate the rich chocolate punch that this pudding pulls.

The chocolate factor is amped up from my traditional chocolate pudding by the addition of 2 cocoa powders, chocolate chips and coffee.  I use Ghiradelli cocoa powder for it's overall intense chocolate flavor and Hershey's Special Dark OR Black Onyx cocoa powder for the deep color and matching flavor.  The chocolate chips that reign supreme in the Witch household are Ghiradelli double chocolate chips, and unlike some other chips, they melt fantastically.  Coffee is a supporting player here.  The coffee flavor doesn't really come through, but rather it makes the chocolate taste more chocolaty, so it's a natural addition here as well.  The result is a chocolate pudding that is thick, velvety, rich and most importantly, CHOCOLATY!  Finally, a pudding who's interior is as dark and flavorful as the skin on top.  Success!


Diva Chocolate Pudding
makes 12 servings - 1/2 c each
3/4 c sugar
1/2 c cocoa powder total (1/4 c ea Hershey's special dark and Ghiradelli cocoa)
1 t kosher salt
1/4 c corn starch
1 c chocolate chips (Ghiradelli double chocolate)
1/2 c hot strong brewed coffee
4 c milk (2%)
3 eggs

In a large pan mix the sugar, cocoa powders, salt and corn starch together.  Whisk well to incorporate, allowing the shards of sugar to help break up the cocoa powders and corn starch.  Slowly add in the milk, whisking well.  The mixture will be very foamy at first, this will clear out as it heats.

Put the chocolate chips into a heat safe bowl.  Pour very hot coffee over top of chips.  The chips will melt from the heat of the coffee, allow to rest for about 5 minutes.  Using a whisk, stir the coffee/chocolate mixture until all chocolate is melted making a form of ganache.

Beat the eggs in a seperate bowl.  Once beaten slowly add eggs to the melted chocolate coffee ganache whisking well.  The mixture will thicken.

Heat milk & cocoa mixture over medium high heat stirring constantly until boiling.  Allow to boil for 1 minute.  After 1 minute slowly whisk in the egg/chocolate mixture.  Cook for 2 minutes longer over medium heat, whisking often to avoid scorch spots.

Ladle hot pudding into cups and allow to cool before serving.  Top with fresh whipped cream and chocolate curls if desired.  If you don't want a 'skin' to form on the pudding simply place a piece of plastic wrap over the surface of the hot pudding.  Remove plastic before serving.


Nutrition Facts calculated at SparkPeople recipe calculator Amount Per Serving Calories 203.5 Total Fat 9.3 g Saturated Fat 5.2 g Polyunsaturated Fat 0.3 g Monounsaturated Fat 1.0 g Cholesterol 52.8 mg Sodium 85.9 mg Potassium 156.0 mg Total Carbohydrate 28.7 g Dietary Fiber 2.0 g Sugars 22.3 g Protein 5.9 g

Tuesday, March 6, 2012

Carnitas

Carnitas is a Mexican dish meaning "little meats" but we traditionally know it as braised then fried pork.  This carnitas dish accomplishes exactly that, with 3 ingredients.  The simplicity of the dish is deceptive once you try the pork.  Salty and crispy, almost bacon like in aroma and taste, yet tender and succulent and completely addictive.  All that from 3 ingredients?  You bet it's Witchcraft!  I got this recipe from my friend and cooking buddy Phyllis.  She acquired it from Diana Kennedy when she was working as her soux chef in the '80's.  Knowing that the recipe is a tried and true one from Phyllis - and that she worked directly with the chef creator -  really sealed the deal for this Kitchen Witch.  Carnitas were on the menu!

Here's how these carnitas go down.  Get your pork - butt (shoulder) or country style ribs are great choices.  You want to make sure you have plenty of fat and connective tissues - therein lies the secret to these great carnitas.  Either have your butcher (or yourself if you've got the knife skillz to do that) debone the butt, or find a boneless variety, and slice the meat into 2 inch wide by 5-6 inch long strips.  The Kitchen Witch found a great deal on country style ribs and used those in this recipe with great success, and bonus, the ribs are already cut into the size I needed.  Less prep work = happiness!  Once your meat is deboned and cut into strips place them into your largest skillet.  If you don't have a skillet big enough a dutch oven will work as well, it just takes a bit longer to cook off the liquids.  Sprinkle the meat with kosher salt then cover with water so the meat is covered just barely in liquid.  Bring it to a boil, then reduce to a hard simmer (medium heat, you want bubbles breaking the surface) and allow it to simmer until all the water has cooked off.  Once the water has cooked off you'll hear a distinct difference in the sound of the cooking, it changes from simmer to a sizzle.

As the meat is simmering in the water it is braising, cooking and becoming tender and delicious.  The connective tissues are also breaking down and becoming flavorful while the fats are rendering out of the pork.  The fat sits on top of the water while it's simmering and once that water is gone, the meat begins to sizzle.  Here's the real secret of good carnitas, frying the pork in it's own fat (or confit).  Allow the meat to fry and brown in the rendered fat, it takes about 5-10 minutes per side.  Be sure to flip the chunks to brown evenly.  This will make your cooking pan look like an utter disaster but I promise you all that the extra clean up is totally worth it.  And the crispy parts on the bottom of the pan, well those are just bonus treats for the cook.  Yay!  Once the meat is evenly browned remove it from the pan and either serve as chunks or shred and eat with tortillas.

From start to finish these took about 2 hours and were some of the most amazing pork I've ever made.  Tender and succulent, crispy and indulgent all at once.  I really hope you try and enjoy this dish soon!

Carnitas
makes 8 servings
SOURCE: The Cuisines of Mexico by Diana Kennedy
3-4 lbs of boneless pork shoulder (butt) or country style ribs
2 t kosher salt
water

Cut pork into strips about 1 inch wide and 4-5 inches long.  If using country style ribs they are precut so no extra work is needed.

In a large skillet or deep pan add the pork. Sprinkle with salt.  Add water to the pan to cover the pork.  Heat the pan over high heat until boiling then reduce the heat to an aggressive simmer (medium heat).  Cook until the water cooks out and only pork and fat are left in the pan.  Continue to cook pork in the fat until browned, turning pieces to brown evenly on all sides.

Serve with your choice of warmed corn or flour tortillas and toppings of your choice.


Nutrition Facts calculated at SparkPeople recipe calculator Amount Per Serving Calories 503.2 Total Fat 36.6 g Saturated Fat 13.6 g Polyunsaturated Fat 3.2 g Monounsaturated Fat 15.8 g Cholesterol 147.9 mg Sodium 580.3 mg Potassium 557.6 mg Total Carbohydrate 0.0 g Dietary Fiber 0.0 g Sugars 0.0 g Protein 40.6 g

Wednesday, February 1, 2012

Chicken and dumplings

Chicken and dumplings is one of our favorite meals here in the Witches' household.  It gets made at least once a month and no one is ever sick of it.  Comforting, homey, savory and delicious, chicken and dumplings is comfort food in it's finest form.  One of the things I love most about it is that it's not heavy and fat laden like a lot of wintery soups and stews can be.  I also love it because it's chock full of veggies and I know that the Little Witch will eat veggies if it's in chicken and dumplings.

When frozen veggies are on sale I stock up my freezer with them.  Soups like this are a great place to use these veggies, when their fresh counterparts are out of season.  Change it up with different veggies and it's a new dish each time you make it.  I've found it to be a great vehicle for trying out new tastes with the little ones, too.  Anything enrobed in a delicious chicken broth is bound to be good.

The dumplings are soft and pillow like.  If you don't have a food processor to make the dumplings you can use a pastry blender or 2 forks to cut the butter into the flour.  If all else fails you can use a prepared baking mix (bisquik) instead of the flour, salt, baking powder and butter.  The dumplings are dropped into the simmering stew which does two things; it steams and fluffs the dumplings and  it thickens the stew.  I hope you treat yourself and your family to a pot of this delicious and hearty stew soon!

Chicken and dumplings
makes around 6 generous servings
6 boneless skinless chicken thighs (can use breasts, see notes)
6 cups chicken stock
5-6 carrots, peeled and sliced into rounds
3 ribs celery, sliced
1/2 onion diced very fine
1 t dried thyme
2 T fresh minced parsley
kosher salt to taste (around 1.5-2t) and ground pepper
choose up to 2 (1/2 c. each) optional veggies:  frozen corn, peas, green beans, broccoli, diced potatoes, whatever your family likes
Dumplings
1 1/4 c all purpose flour
1.5 t baking powder
1.5 t kosher salt
1 egg white
1/4 c water
1/4 c milk
1/4 c (1/2 stick) cold butter, diced

In a dutch oven or other large pot add everything except the optional veggies.  Bring to a boil then reduce to a low simmer.  Allow to simmer for 45 min.  Remove the chicken thighs to a plate to cool slightly before shredding.  If you are using chicken breasts only cook them for 25-30 minutes before removing.  


After removing the chicken taste the broth for season.  Adjust salt & pepper if needed.   Add optional veggies to the stew at this time.

Shred the chicken and discard any gristle and fat pieces.  Set aside.

Make the dumplings - in the work bowl of a food processor add your flour, baking powder and salt.  Pulse to incorporate.

Add the cold diced butter.  Pulse 5 times using 1 second bursts of power.  The mixture should resemble coarse meal or damp sand.  Pour flour mix into a bowl.

In a separate small bowl mix the egg white, milk and water.  Pour the wet ingredients over the dry and combine with a fork until all flour is dampened.  A few lumps are OK, just don't overwork the batter.  It will be like thick pancake batter.

Add the shredded chicken back to the stew and stir well.  Stew needs to be at a bare simmer, not too many bubbles breaking the surface, to cook the dumplings.  If the stew is simmering too rapidly it will break apart the dumplings.

Using a tablespoon size scooper or 2 spoons, scoop dough into balls on top of simmering stew.  Try not to let dumplings touch when being dropped into stew.  Once all the dough is added cover the stew and allow to steam cook for 10 minutes.  DO NOT OPEN THE LID until the 10 minutes is over or the dumplings will not cook properly.

Once the dumplings are cooked they'll float to the surface.  Sprinkle with minced parsley before serving.

Nutrition Facts calculated at SparkPeople recipe calculator chicken Amount Per Serving Calories 324.6 Total Fat 11.1 g Saturated Fat 5.7 g Polyunsaturated Fat 1.2 g Monounsaturated Fat 3.2 g Cholesterol 78.8 mg Sodium 1,351.0 mg Potassium 782.7 mg Total Carbohydrate 34.5 g Dietary Fiber 3.6 g Sugars 3.8 g Protein 23.8 g

Thursday, January 26, 2012

Ricotta cheese


Cheese making has been a goal of the Kitchen Witch for as long as she cares to remember.  Maybe it was reading Little House books, or just the foodie that's always been there, but even as a young teen the Witch has wanted to make her own cheese.  That's normal, right?  Don't you all dream about making your own cheese?  No?  Well...pretend like you do, 'k?  Do you need to make your own ricotta?  No, you don't.  Should you make your own ricotta?  Yes!  Yes you should indeed !   It's easy, quick and really doesn't require any specialty equipment or ingredients.   4 ingredients is all it takes to make the smoothest, richest, silkiest ricotta cheese you've ever been lucky enough to try.

If you aren't a ricotta fan, don't despair.  This ricotta isn't at all like the grainy rubbery ricotta in the tubs at the grocery store.  There is some grain to it, but it's not at all rubbery and if you aren't a fan of the grain, simply drain off more of the whey until you get a cheese that you're happy with.   Other than the noticeable difference in texture there's a taste difference.  Store bought ricotta is bland and rather flavorless to me.  Between the lack of flavor and the nasty texture it's defiantly not high on my like list.  Homemade ricotta, on the other hand, is sweet from the cream and milk, salty and slightly tangy.  It's delicious in lasagna as well as dessert.

Ricotta Cheese
Source:  Ina Garten
Makes about 1 cup of cheese (approx. 8 servings) ~*~easily doubled or tripled~*~

2 cups whole milk (2% works fine too)
1 cup heavy whipping cream
heavy 1/2 t kosher salt
1 1/2 T white wine vinegar

In a stainless steel pan add the milk, cream and salt.  Bring to a full boil over medium high heat, stirring to avoid scortch spots.  Once liquid is boiling turn the heat off and add the vinegar.  Give it one good stir to incorporate the vinegar and allow to sit for at least 1 minute to form the curd.

While the curd is forming dampen some cheesecloth.   Lay a double layer of cheesecloth in a fine mesh sieve placed over a bowl to catch the whey.  Pour the cheese curds and whey into the cheesecloth and allow to drain undisturbed for about 20-30 minutes.  The longer the cheese sits the finer and less distinct the grain becomes.  Transfer the ricotta to a air tight bowl and use anywhere you'd normally use ricotta like lasagna or stuffed pasta recipes.   Stores in the refrigerator for up to 7 days.


Cheese curds set and ready to be seperated

Whey draining from curds
Curds after draining for 10 minutes
 ~*~Kitchen Witch Tip:  No cheesecloth?  No problem!  Simply drain your curds through a clean wash cloth or kitchen towel.  Paper towels absorb too much and don't allow the whey to drain, save those for something else and use cloth to strain cheese.~*~


Nutrition Facts calculated at SparkPeople recipe calculator Amount Per Serving Calories 133.5 Total Fat 12.2 g Saturated Fat 7.6 g Polyunsaturated Fat 0.5 g Monounsaturated Fat 3.5 g Cholesterol 45.6 mg Sodium 156.3 mg Potassium 125.1 mg Total Carbohydrate 3.8 g Dietary Fiber 0.0 g Sugars 3.0 g Protein 2.6 g

Wednesday, January 11, 2012

Brookies

A while ago I won the Clinton St. Baking Company Cookbook from a blog.  For the life of me I can NOT remember which blog it was from, and for that I am deeply sorry.  The cookbook however is great!  If you like down home, family friendly food this is the book for you!  The cover has the most delightful pancakes, topped with chocolate chunks.  It's just a taste of the yummy treats you'll find inside!  These Brookies were discovered in this cookbook, and were one of the first things the Kitchen Witch bookmarked when browsing through it.  The Witch has made many chocolate cookies in the past - Death by Chocolate cookies, chocolate crinkles, you get the idea, we love a chocolate cookie here - so when I saw this cookie that was a brownie/cookie hybrid, I knew that I had to make it!

The recipe calls for 'high quality chocolate', the Kitchen Witch used Ghiradelli 62% cacao double chocolate chips.  I had them on hand, and they're our favorites.  Callebaut, Guittard or Valhrona would also be good choices.  Nestles Toll House would NOT be a good choice here.  You really need that depth of deep chocolate flavor in these tasty treats, so do spend a few extra dollars and get the better chips.  You'll be happy you did.

The brookies mix up quick and easily, heck the Witch didn't even use the KitchenAid for this one!   In less than 30 minutes the house smelled amazing and the brookies were done.  The outsides are dry and cracked, just like a brownie is.  The insides are soft, gooey and oh so rich.  If you like chocolate cookies make these. If you like brownies, make these!  I can't say enough good things about these brookies.  They have officially become the chocolate cookie of choice here at the Witches' home.  And that's saying a lot!

Brookies
Source: Clinton Street Baking Company Cookbook
makes about 30 cookies
2 cups high quality 62% cacao chocolate chips
3/4 c brown sugar
2 eggs
1 T oil
1 t butter
1/2 c flour
1/4 t salt
1/4 t baking powder

Preheat oven to 350F

Melt 1 cup chocolate chips with the oil and butter until melted.  Stir well to melt all chips.  Allow to cool slightly.

In a small bowl mix the flour, salt and baking powder together.

In a medium work bowl mix the eggs and brown sugar together.  Add the melted chocolate, stirring well to thoroughly mix.  Scrape down sides before adding the flour mix.  Whisk it in until just in mixed, then add the remaining chocolate chips and stir well.

Transfer batter to a shallow pan, like a pie pan and put in the freezer for about 10 minutes to firm up batter before scooping.

Scoop cookies onto either a parchment or silpat lined sheet pan.  Using a 1T size scoop, form cookies.

Bake  10-11 minutes, until tops are dry looking and cracked like a brownie.  Remove from oven and allow to rest on tray for 5 minutes before removing to a cooling rack.  The centers will be very soft and brownie like in texture.  These cookies are best consumed in the first 12 hours, they begin to dry out after that and lose that brownie like texture.


Nutrition Facts calculated at SparkPeople recipe calculator Amount Per Serving Calories 75.6 Total Fat 3.4 g Saturated Fat 1.8 g Polyunsaturated Fat 0.2 g Monounsaturated Fat 0.4 g Cholesterol 12.7 mg Sodium 30.4 mg Potassium 26.0 mg Total Carbohydrate 13.7 g Dietary Fiber 0.6 g Sugars 11.1 g Protein 1.2 g

Tuesday, January 10, 2012

Zucchini Cakes

It seems that the Kitchen Witch has a love/hate relationship with zucchini.  If you've read this blog for any length of time you'll know that zucchini is something that is a staple in the Witches' garden.  Every year I say I won't worry or over plant, and yet every year I have a mini freak out -  will they grow?  Will they produce?  Will I have beautiful zucchini this year? And because it's me, every single year I over plant, too, just in case one or 2 of the plants don't do well.  In 3 years, I've never had an unsuccessful zucchini crop.  They're always TOO successful!  Despite my fretting over the wee plants in the early days they grow and become big time producers.  Before I know it I've gone from "oh my I hope they grow" to "holy shit someone needs to come get some of this zucchini!!" If you remotely like zucchini I highly recommend growing them yourself.  It's SO easy, they're very low maintenance plants, and have never failed to produce.  Oh, and the love/hate thing is because I absolutely love zucchini but as the season wanes on I grow to hate it...after all zucchini for 3 meals a day is only awesome for a few days.

Now that you've been informed about the trials and tribulations of zucchini growing, let's get to the point of today's post, shall we?  Zucchini cakes!  Oh sure they've been done before but boy, are they good!  A few weeks ago my girlfriends and I were out to lunch.  I spotted zucchini cake sliders on the menu and thought now that sounds good!  I ordered them and indeed, I was right, they WERE good!  So promptly I went to the store to buy zucchini (it's not zucchini season in Colorado currently, much to my dismay) so I could recreate these babies.  They seemed pretty basic in their ingredients, zucchini, red bell pepper and feta cheese, with some binders to hold it together.

The Witch decided to use an egg as one of the binders along with some panko breadcrumbs.  Not much, I wanted the veggie to be the star of this cake, but enough to hold it together.  The panko is very light in texture, not dense like traditional bread crumbs can be.  It helped the cakes have a nice firmness to them with out being dense or heavy.  The crunch of the red onions provided a nice contrast to the soft zucchini.  As the cakes brown the zucchini takes on a fantastic flavor, browned zucchini is the only way to eat it in this Witches' opinion!  As the cakes cook the feta softens and melts, adding it's salty flavor to each bite.  These zucchini cakes are a taste sensation, low in calories and vegetarian!   Sounds like a great lunch or side dish idea to me!


Zucchini Cakes
makes 4 cakes, 2 cakes per serving
1 medium zucchini (about 7-8 inches long) shredded
about 2T diced roasted red bell pepper
scant 1T fine diced red onion
1 clove garlic, pressed
1 egg, beaten
1/4 c panko bread crumbs
1/4 c feta cheese
approximately 1/2 t kosher salt
a pinch pepper, or to taste
about 1-2T olive oil for cooking

Shred zuccini using large holes on a box grater.  Squeeze zucchini to remove excess liquid.  Put squeezed zucchini into a small work bowl.  Add the diced roasted red peppers, garlic, onion, panko, feta and S&P.   Pour the beaten egg over top and using a fork, gently mix.  You'll want a cohesive mixture with no obvious pockets of dry bread crumbs or uncoated veggies.

Heat oil in a nonstick skillet over medium high heat.  Once hot scoop zucchini mix into 4 patties, about 1/4 c each.  Make about 1/2 inch thick by 3-4 inches diameter.  Cover skillet and fry cakes on first side until golden browned, about 5 minutes.  Cakes will still be very fragile so be careful when you flip them.  Gently flip and continue cooking covered on second side, until browned and cakes hold together.   Serve and enjoy!


Nutrition Facts provided by SparkPeople recipe calculator Amount Per Serving Calories 223.8   Total Fat 16.8 g Saturated Fat 4.9 g Polyunsaturated Fat 1.5 g Monounsaturated Fat 9.3 g Cholesterol 109.2 mg Sodium 562.1 mg Potassium 339.6 mg Total Carbohydrate 11.4 g Dietary Fiber 1.6 g Sugars 2.4 g Protein 7.3 g

Friday, December 23, 2011

Citrus Buttercream Sandwich Cookies

Citrus buttercream sandwich cookies were part of my Christmas goody gift package this year.  When I went soliciting ideas for Christmas cookies one of my friends suggested a citrus cookie.  Honestly it took me by surprise, as I'm a chocolate and caramel cookie kind of Witch.  A citrus cookie would be different and very holiday appropriate, after all the best citrus fruits are ripe in December.  I wasn't sure what kind of citrus cookie to make, however.  I tossed around a few ideas, a thumbprint type of cookie, filled with a citrus curd maybe?  What about a citrus shortbread with a citrus glaze?  Both sounded quite nice but really my mind kept wandering to a sandwich cookie, something that incorporated both of those ideas, filled and crispy all at once.  Now that the type had been hammered down to  a sandwich cookie, it was a matter of figuring out what kind of cookie I wanted to make for the sandwich.  Shortbread tends to really just crumble away for me so I decided it wasn't what I wanted here.  A standard drop cookie isn't structurally strong enough to support filling and a top cookie, not to mention their round shape isn't what I was looking for here.  Back to the drawing board.

That's when I went blog hopping and discovered Culinary Connection's by Peabody's recipe for Citrus sandwich cookies.  Immediately I knew I had my recipe.  The Witch changed a few very minor things; I used the zest of clementines instead of orange and I added lime zest into the mix as well.  The colors of the zest are so pretty in the pale yellow citrus dough, which was a pleasure to work with, not dry or crumbly and rolled out easily.  Baking the cookies released the essential oils of the citrus zests, adding their flavorful perfume to the cookie.  The filling is a reduction of orange and lemon juices whipped into a buttercream, their tangy acidity help balance the sweetness of the filling.  A touch of heavy cream keeps the melt in your mouth soft.

The cookies looked impressive once finished.  The colorful zest peeping through the cookie with the pale buttercream centers were very pretty.  The Kitchen Witch is very sad to say that she never got to taste one in it's finished state.  The recipe made 32 sandwich cookies, the exact number of recipients on my goodie gift list this year.  I was able to snag a broken piece of cookie, it was delicious, slightly chewy and rich, and the buttercream I sampled and enjoyed.  Yet the finished product I didn't get.  Sob!  That's ok, I'll just have to make these beauties again soon.  Enjoy!

Citrus Sandwich Cookies 
Makes 32 sandwich cookies
Source:  Culinary Connections 
2 cups all purpose flour
¼ tsp baking powder
¼ tsp salt
14 TBSP unsalted butter, softened
1 cup granulated sugar
1 large egg yolk
 2 tsp finely grated lemon zest
 1 tsp finely grated orange zest
1 tsp finely grated lime zest

Whisk together the flour, baking powder and salt in a medium bowl; set aside.

In the bowl of an electric mixer fitted with a paddle attachment, beat butter and sugar at medium speed for 3 minutes. Add egg and zest and beat until combined.

Reduce to slow speed and add flour mixture just until well blended. Scrape dough onto a work surface and gather it up into a disk. Wrap the disc in plastic warp and refrigerate for at least 2 hours, until firm(up to 3 days).

350F. Line baking sheets with parchment paper or silpat.

Place the chilled dough on a lightly floured work surface and sprinkle lightly with flour. Using a rolling pin, roll the dough out to a thickness of 1/8 inch.

Using a small cookie cutter, cut out as many cookies possible from the dough. Transfer dough to baking sheets and bake for 9-11 minutes or until lightly browned on the bottom(not the top).

Transfer the cookies to wire racks and cool completely.

Citrus buttercream filling 
¼ cup orange juice
1 TBSP lemon juice
6 TBSP unsalted butter, softened
1 ½ cups powdered sugar
1 TBSP heavy cream
pinch of salt

 In a small nonreactive saucepan, bring the orange and lemon juices to a boil over high heat and boil for 3 to 5 minutes, or until reduced by half (3T).  Let cool completely.

 In a bowl of an electric mixer, using the paddle attachment, beat the butter, powdered sugar, cream, salt and cooled citrus juices at medium speed until smooth and fluffy.

Pipe fiilling onto the bottom of one of the cookies. Top with another cookie. Press the cookies lightly together. Repeat with the remaining cookies and filing.

Store cookies in the fridge.  Allow to warm to room temperature before serving.


Nutrition Facts provided by SparkPeople recipe calculator
  32 Servings
Amount Per Serving
  Calories142.2
 Total Fat7.6 g

 Saturated Fat4.7 g

 Polyunsaturated Fat0.3 g

  Monounsaturated Fat2.2 g
Cholesterol26.5 mg
Sodium23.6 mg
 Potassium16.4 mg
Total Carbohydrate18.1 g

Dietary Fiber0.2 g

Sugars12.0 g
Protein1.0 g

Traditional Beef Stew

Beef Stew was one of those things we rarely had growing up. My Witchy Sisters and I LOVED the canned Dinty Moore Beef Stew (sacrilege I know) until my parents freaked me out one day by saying they didn't know what kind of meat it was in the stew, it could be tongue or something like that. And in my oh so mature 13 year old mind I said "EW!!" and abandon the canned beef stew entirely. Not a bad thing necessarily! So, after I was completely grossed out about canned beef stew, I still had a beef stew jones that needed to be satisfied. I asked, begged even, my mother to make stew for us. Being a wonderful mom she did; however being a fairly lousy cook, it was 'Stew Starter' beef stew. Anyone remember this stuff? A paper canister filled with dehydrated veggies and flavors, a seasoning packet filled with salt and chemicals, just add water and beef and in 4 brief hours, voila, stew. Ish. Stew-ish is exactly what this was. The broth was thin and insipid, not rich and hearty. The beef was tough and chewy - obviously the wrong cut was used. The veggies were still slightly firm from the dehydration/rehydration process and lacked any nutritional value or flavor. Sure the canister says Stew Starter but man, what a disappointment. Finally the Witch said enough is enough and learned how to make beef stew. Real beef stew!

The stew I offer to you all today is quite possibly one of the best beef stews the Kitchen Witch has ever created. The beef is fall apart tender and oh so flavorful. The veggies have texture and flavor, all of which enhance the stew. Herbs are used sparingly, just enough to add the sweet perfume but not enough to overwhelm the rich brown gravy. Like most soups, this stew if very forgiving and accepting of pretty much any veggie you want to offer it. I kept it traditional with carrots, celery, onion, potatoes and peas. The gravy gets some extra rich flavor from the use of mushroom base, a product that the fine folks at Better than Bullion produce. It's basically concentrated mushroom soup in a jar, all natural and organic to boot! It adds a great depth of flavor with out any visual mushrooms, a great way to get that flavor in when you have mushroom haters around. The use of it isn't required but it will make your dish that much better. If you can't find it you can always sautee up some mushrooms and add them to the stew.

When beef stew is done properly it's as warm and comforting as a hand knitted sweater or a hug from your Mom. Since I'm the worlds laziest knitter, consider this my knitted sweater to you. I hope it keeps you warm and comfortable. Enjoy!

Traditional Beef Stew
Makes 6-8 servings
1 three (3) pound chuck roast, cut into 1.5 inch cubes, excess fat trimmed
6 carrots cut into rounds
3 stalks celery, diced fine
1/2 onion sliced thin
4 cloves garlic minced fine
3 sprigs thyme leaves
2 bay leaves
6-7 cups water
1 T Mushroom base (Better than Bouillon) - optional
3/4 c red wine (shiraz is fine)
1/3 c frozen peas
9-10 small red bliss potatoes, cut into quarters
salt and pepper to taste
3T corn starch
2T oil

Cut the meat into cubes and pat dry.  Heat a dutch oven over medium high heat and add the oil.  Once hot brown the cubed beef in 3 batches.  Brown beef aggressively, about 2-3 minutes on each side.  Once browned remove from pan and sprinkle with salt and pepper.  Repeat until all meat is browned.

In the same pan add the onions, carrots, garlic and celery.  Cook about 5 minutes or until the onions start to brown and soften.  Add the water and mushroom base, scraping up any browned bits from the bottom of the pan.  Add meat, herbs and wine, bring to a boil then reduce to a simmer.  Cover stew and simmer on medium low for 1 hour.

Stir stew.  Taste for season.  Please note that the stew is NOT done and this is NOT a final season, it's merely a chance to add more salt if need be, or if it's too salty, a touch more water to dilute things a bit.  Adjust seasoning as needed, recover stew and continue cooking for another hour.

Stir stew.  Add the potatoes, recover and simmer for 30 minutes.  After 30 min stir the stew and taste for season.  Make a slurry of the cornstarch and about 2-3T of water and add to the stew, stirring well while adding to avoid lumps.  Allow stew to simmer for another 15 minutes before serving and enjoying.


Nutrition Factscalculated by SparkPeople Recipe calculator
Amount Per Serving
Calories 508.7
Total Fat 12.7 g
Saturated Fat 4.7 g
Polyunsaturated Fat 0.7 g
Monounsaturated Fat 5.5 g
Cholesterol 126.4 mg
Sodium 643.2 mg
Potassium 1,754.4 mg
Total Carbohydrate 50.8 g
Dietary Fiber 7.1 g
Sugars 5.0 g
Protein 42.8 g

Thursday, December 22, 2011

Molasses Spice Cookies

Molasses cookies are the Witches' husband's favorite cookie ever. His Grandma used to make the BEST molasses cookies!! Last holiday season I was searching for a newer version of the molasses cookie, something to dress up the standard spicy treat. I stumbled across this recipe from a blog, but after over 365 days of NOT posting this post (because I forgot to take photos of the cookies, D'oh!) I have completely forgotten which blog it came from. And for that I apologize. The Kitchen Witch did do a google search to see if I could find it to give proper credit where it's due...alas I was unsuccessful in locating the original source. Sorry about that!

Back to the cookies! These molasses spice cookies start off the same as Grandma's, but they take a turn at Spicy Town with the addition of cardamom and black pepper. Yes, I said black pepper. In a baked good. It's tasty, too! A generous 2 teaspoons of ground ginger helps reinforce that these are indeed spice cookies and they pack a wallop! But behind that spicy bite is a mellow sweetness and a delightful chewiness to the cookie. The molasses really make these a crispy outside, chewy inside cookie, which makes me a very happy Witch indeed!

These cookies are not a favorite of the Little Witch, she thinks they're too spicy. I tend to agree with her, they are spicy, but I like that. They are spicy, not necessarily 'hot' but spicy and not overly sweet, and therefore tend to not be a preferred cookie of the kids. And that's ok in this Witches' opinion. After all the cloying sweet Holiday treats, it's nice to have a bit of spice and subtle sweetness. And best of all, Santa loves these cookies! I hope you enjoy them.

Happy Yule to you and yours!

Molasses Spice Cookies makes 3 dozen, 2 cookies per serving
Source: Unknown; inspired by a blogger with good taste!
1/2 cup butter, softened
1 cup sugar
1/4 cup molasses (not blackstrap)
2 tbsp honey
1 large egg
2 1/3 cups all purpose flour
2 tsp baking soda
2 tsp ground ginger
1 tsp ground cinnamon
1/4 tsp ground cloves
1/2 tsp ground cardamom (7 pods ground)
1/4 tsp ground black pepper
1/2 teaspoon salt
sugar, for rolling

Preheat oven to 350F.

In a work bowl of a stand mixer, cream together butter and sugar until fluffy. Beat in molasses, honey and egg until smooth.

In a medium bowl, whisk together flour, baking soda, spices and salt.

Working by hand, or with a mixer on low speed, stir flour mixture into molasses mixture.

Roll dough into 1-inch balls and roll each ball in extra sugar before placing on baking sheet.

Bake cookies for 10-12 minutes, until the edges are set but not browned.

Cool for 5-10 minutes on baking sheet, then transfer to a wire rack to cool completely. Store in an airtight container.


Nutrition Facts calculated at SparkPeople recipe calculator
Amount Per Serving
Calories 177.8
Total Fat 5.6 g
Saturated Fat 3.3 g
Polyunsaturated Fat 0.3 g
Monounsaturated Fat 1.6 g
Cholesterol 24.1 mg
Sodium 211.1 mg
Potassium 91.0 mg
Total Carbohydrate 30.5 g
Dietary Fiber 0.4 g
Sugars 17.3 g
Protein 2

Friday, November 18, 2011

A Cook's book for Cooks, GIVEAWAY WINNER!!

There were 25 entries for the giveaway of "A Cook's book for Cooks" written by Stephen Crout. The lucky winner was #16, Yenta Mary!!! Congratulations Yenta Mary on winning this cookbook, you're gonna love it!!! Thank you to everyone who entered the giveaway. Your support means a lot to both myself and Stephen. Enjoy the book Mary!

Everyone else, don't fret, you can still order this book on Amazon.com. Search BOOKS for Stephen Crout and you'll find it. Makes a great holiday gift for the foodie in your life!

Monday, November 14, 2011

Mushroom marsala sauce


My Husband's birthday was last week so of course I had to make him something delicious for dinner. Between the two of us, we couldn't decide on what he wanted. One thing was for sure: he wanted beef. And mushrooms. And wine. The first thing he suggested was beef burgundy, delicious indeed, but we'd recently had beef stew, which is very similar and I didn't want those flavors again. Yes, it's his birthday, but I'm in charge of the food! Beef Stroganoff was suggested, we haven't had it in a while, but I've made that plenty of times before. Steak, sure, but what can we do to make it more special for his birthday??

That's when my good friend Phyllis and I got chatting. She told me about a recipe she'd concocted using shallot & mushrooms, a bit of marsala wine, sour cream and Parmigiana done up gratin style. The timing of our conversation couldn't have been better!! Here was something different that would pair perfectly with the beef the Witchy Husband had requested. And it has wine, a flavor he'd been thinking about. And mushrooms! And sour cream!! I couldn't wait to get working on this delightful birthday treat!

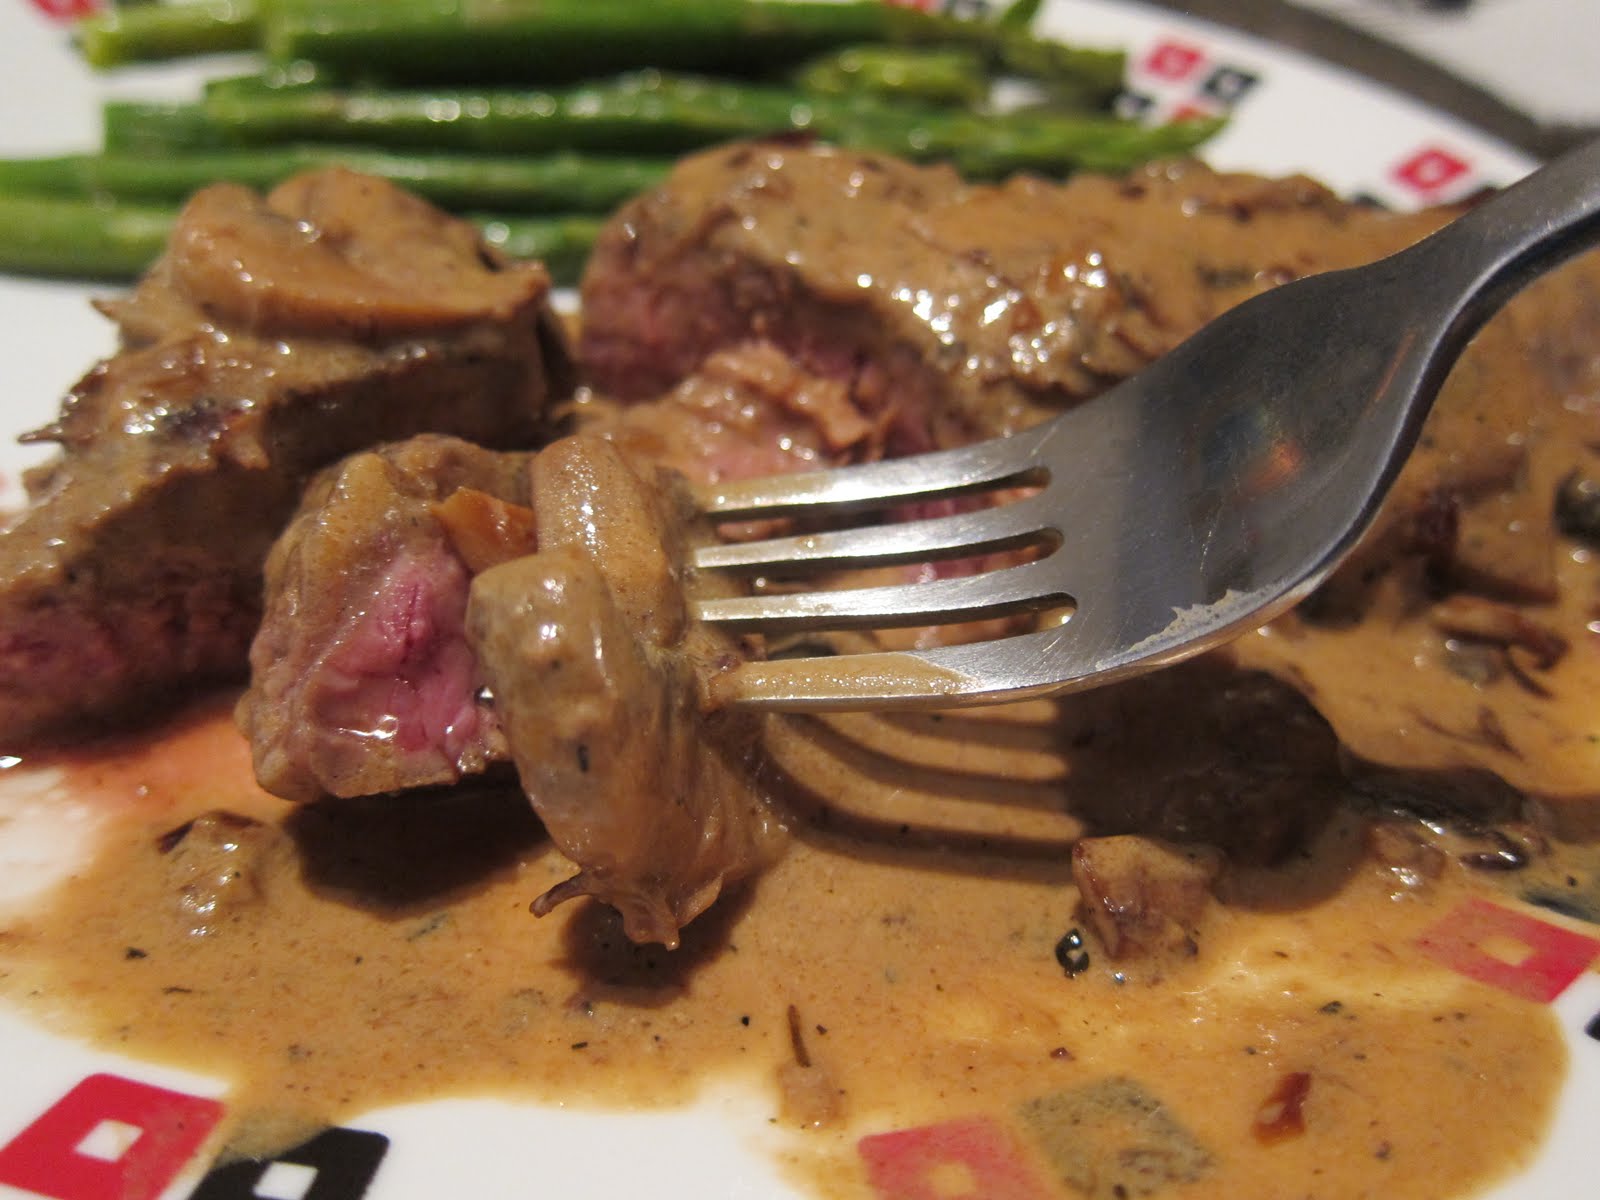
Phyllis' original dish was done in a casserole and baked to melt and brown the cheese. I decided to morph her idea into a sauce that could blanket the steaks. I cooked the beef using the grilled steak technique I've written about before, except I seared them on my stove top in a cast iron skillet. The skillet was then deglazed after the steaks cooked so that lovely browned beefy flavor could become one with my sauce. The sauce was done in a seperate sautee pan, starting with the butter, shallots and mushrooms. Once the 'shrooms were deeply browned the pan was deglazed with marsala wine. After reduction the Witch added the deglaze liquid from the steaks pan, a touch of water and sour cream. The resulting sauce was rich, velvety, lusciously and deeply flavored. It was the PERFECT companion to the medium rare cooked sirloins. Birthday dinner perfection!! Happy Birthday Hon, I love you!


Mushroom Marsala sauce
makes 2 servings
Inspired by Phyllis Davis
8 large white mushrooms, sliced
1 medium shallot, fine diced
3T butter, unsalted
1/2 c marsala wine, dry
1/2 c sour cream
1/2 t thyme crushed
1 c water, divided
parmesean cheese, fresh grated, about 4T
2 steaks, pan seared using reverse sear technique
kosher salt and pepper


In a sautee pan melt butter over medium high heat. Once it stops foaming add the finely diced shallot and sautee until translucent, about 4 minutes. Add the mushrooms and toss to coat in butter evenly. The mushrooms will absorb the butter, this is ok, just let them cook. Cook for 10 minutes, stirring every few minutes, until mushrooms are deeply browned.

Deglaze pan with marsala wine. Allow to reduce by half. Remove from heat and add sour cream, slowly stirring it into the sauce. Add 1/2 c water to the sauce and stir well.

Deglaze pan that steaks seared in with remaining water. Scrape up any browned bits from the pan and add this to the sauce. Add the parmesean cheese to the sauce, stir well, taste for seasoning and add salt and pepper as needed. Serve over rested steaks.

*~*Kitchen Witch TIP: If you're cooking the steaks outside on the grill simply substitute the steak deglazing liquid with about 1/2 cup of beef broth.~*~
Nutrition Facts

User Entered Recipe

2 Servings

Amount Per Serving
Calories325.6
Total Fat29.4 g
Saturated Fat18.3 g
Polyunsaturated Fat1.1 g
Monounsaturated Fat8.5 g
Cholesterol71.9 mg
Sodium37.6 mg
Potassium224.4 mg
Total Carbohydrate6.2 g
Dietary Fiber0.1 g
Sugars0.2 g
Protein2.8 g

Friday, November 11, 2011

Sweet Corn Gelato


Sweet-corn Gelato
makes about 5 cups gelato (10 1/2 c servings)
Source: recipe comes from New York and was served at Gramercy Tavern and then at Babbo

3 ears of sweet corn
3 1/2 c. whole milk
1 1/2 c. sugar
1 c. heavy cream
8 large egg yolks
1 t. kosher salt

Cut kernels from cob and break cobs into 2-3 pieces. Add the corn, cobs and milk to a sauce pan and bring up to a boil. Allow it to boil for 1 minute then remove from heat and allow to cool for 15 minutes.

Remove cobs from milk and discard them. Puree mixture in batches in a blender. Set a course strainer over large bowl and strain mixture pressing on solids and then discard them. Add more milk if needed to measure 3 1/2 c of milk and corn mix.

Bring mixture, 1 1/4 c. sugar, and cream. Bring to a simmer, stirring to dissolve sugar.

Set a strainer over med bowl and set aside.

Whisk remaining 1/4 c. sugar, egg yolks, and salt and gradually whisk in hot milk, return to saucepan and stir constantly for about 2 min to reach 175 degrees on instant read thermometer.

Immediately pour custard through strainer and place bowl over ice water to chill, about 5 min. Cover and refrigerate at least 6 hours or overnight and then process per manufacture directions with your ice cream freezer. Transfer to container and freeze at least 1 hour before serving. Lasts up to 1 month in the freezer.


Nutrition Facts calculated at SparkPeople Recipe calculator
Amount Per Serving
Calories 288.2
Total Fat 11.2 g
Saturated Fat 5.7 g
Polyunsaturated Fat 1.1 g
Monounsaturated Fat 3.7 g
Cholesterol 188.8 mg
Sodium 243.5 mg
Potassium 262.0 mg
Total Carbohydrate 42.8 g
Dietary Fiber 1.2 g
Sugars 35.9 g
Protein 6.5 g
Related Posts with Thumbnails